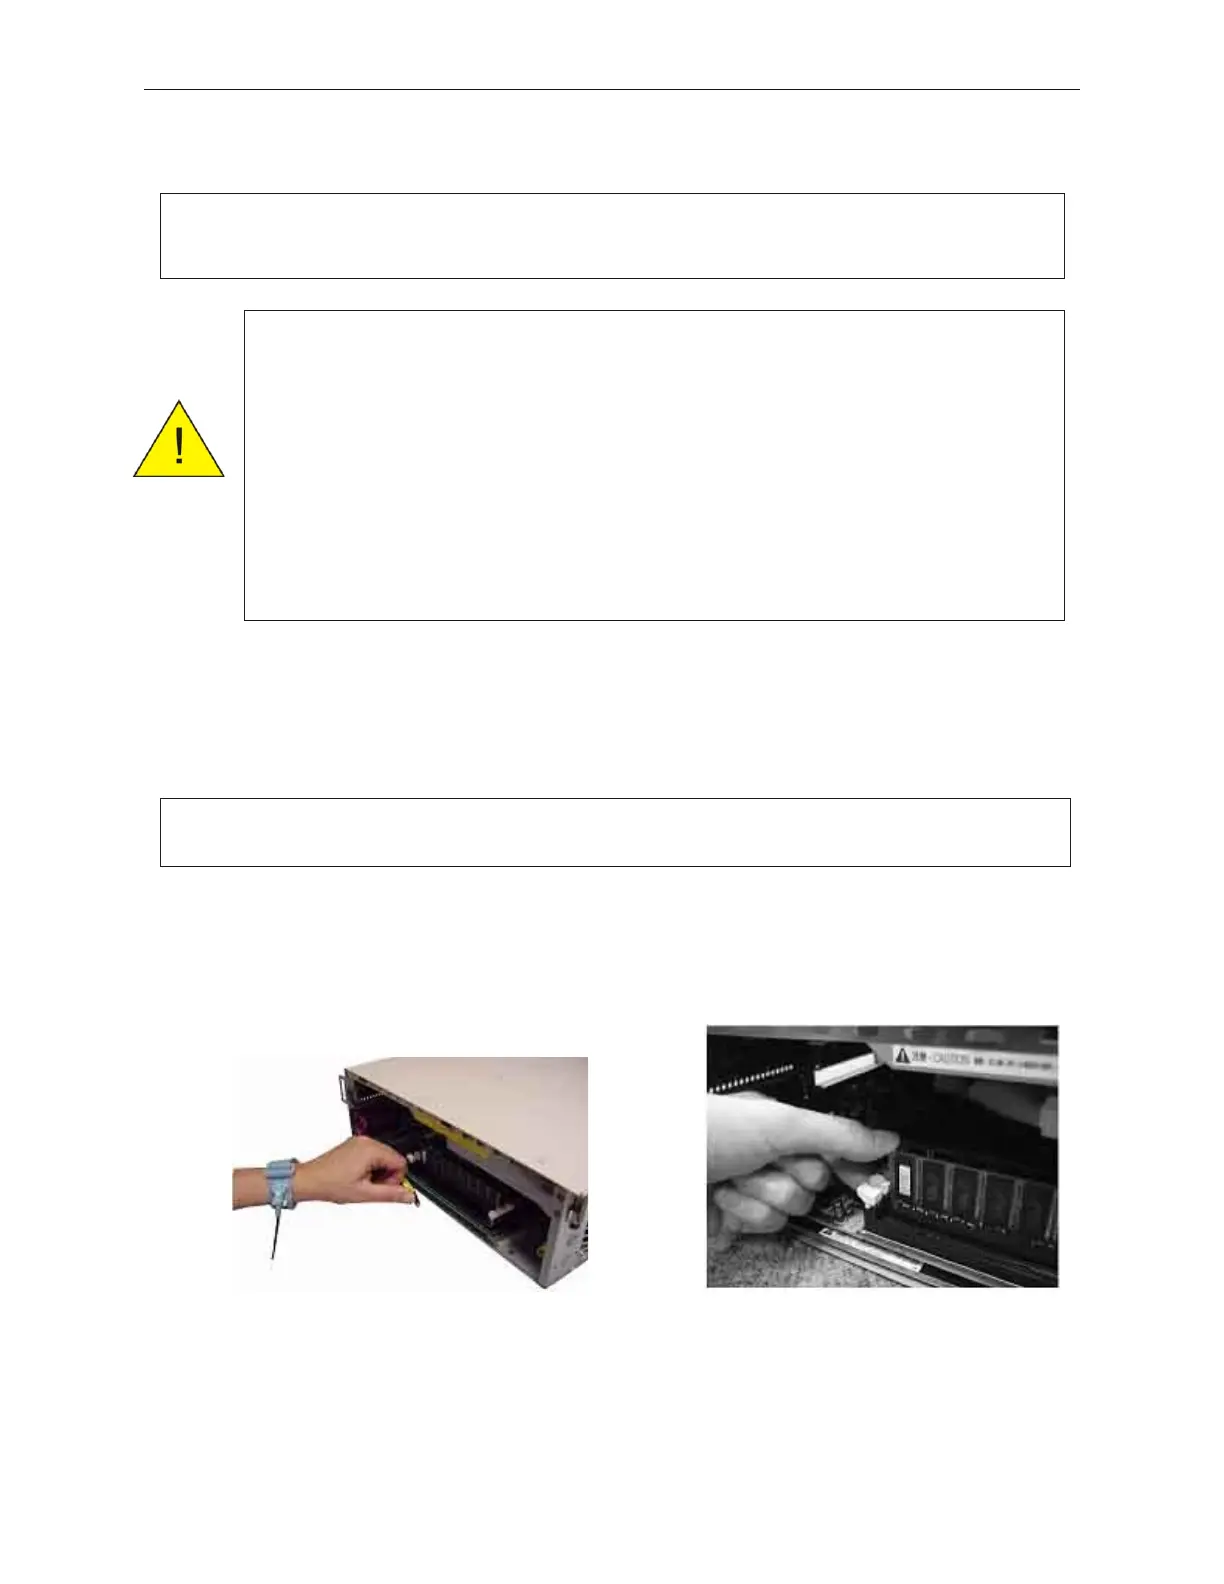
7. Insert the DIMM into an empty socket as shown below.
8. After inserting the DIMM, be sure to check that both sides of the DIMM socket
levers are locked into place.
9. If this is an upgrade (adding memory), install the upgrade label that comes with the
upgrade kit on the side of the unit near the serial number. See section 5.2.1.
90000291 Rev 3.0 7-21
TeamPoS 2000 MAINTENANCE MANUAL
Note: Start adding DIMMs in rear socket and work forward to make future upgrades
more convenient.
Caution: Installing memory improperly can damage the memory and/or the PC
Board.
When installing memory, ensure that it is inserted properly. DIMMs
have two small cutouts on the edge connector that must match the
socket.
When inserting DIMMs into the socket, carefully push them down
into the socket until the levers lock into place. The locking should be
automatic and not require pressure on the levers.
Note: If DIMM socket will not lock, the DIMM is not far enough in the socket and must
be pressed harder.