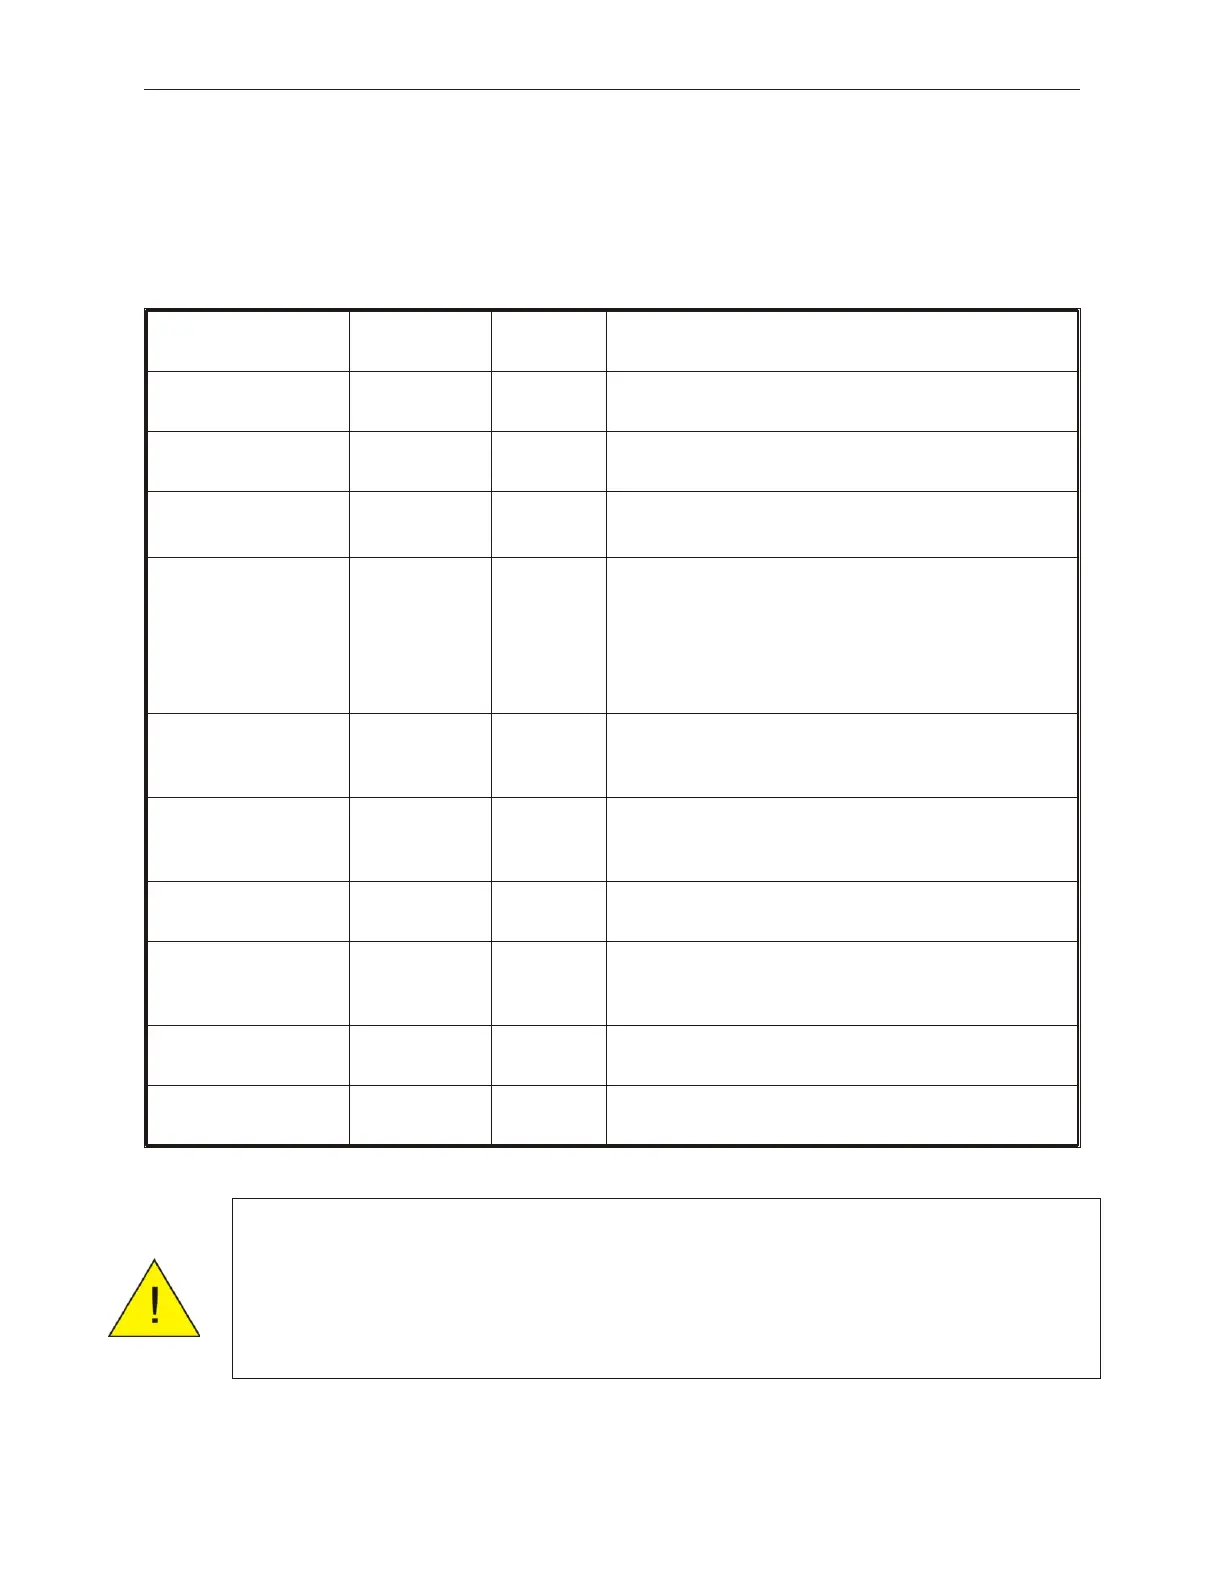
1.2.1 TeamPoS 2000 Front Panel Switch and LCD Matrix
Name Switch/LED
Mounting
Position
LED Color Remark
Power SW Outside of
Front Door
— Depending on BIOS setup, the power switch can be
instant off or delayed off.
Reset SW Inside of Front
Door
— PC board resets.
Dump SW
(DO NOT USE)
Inside of Front
Door
—
Resets CMOS memory on Retail I/O,TeamCOMBO®
or TeamUSB® Board.
Port On/Off SW Inside of Front
Door
— Interrupts power to the I/O board's RS232 ports and the
LCD power port. (For the original TeamCOMBO board,
the switch also interrupts power to USB ports on the
TeamCOMBO board. For the revised TeamCOMBO
board, the switch interrupts power only for the RS232
and LCD power ports.)
HDD Select SW Inside of Front
Door
— Selects master HDD between primary and secondary
HDD. The hard drives must be jumpered to Cable
Select (CS) in order to allow switching of disks.
Power LED Outside of
Front Door
Green This LED is illuminated when power is supplied
including during battery backup mode. It blinks when
power switch is pressed in delayed off mode.
Port On LED Outside of
Front Door
Green This LED is illuminated when the port on/off switch is
set to on.
Battery Backup LED Outside of
Front Door
Blinking
Yellow
This LED is turned on and blinking when the power is
supplied from lead-battery (i.e., when battery backup is
enabled due to AC power loss.).
HDD Access LED Inside of Front
Door
Green Indicates hard disk access activity.
LAN Activity LED Inside of Front
Door
Green Illuminates with LAN activity.
1-4 Rev 3.0 90000291
TeamPoS 2000 MAINTENANCE MANUAL
Caution: It is assumed that the user of this manual fully understands and strictly
adheres to proper Electrostatic Discharge (ESD) precautions. Failure to
adhere to precautions can cause damage to this equipment.
Always remove the power cord from the unit prior to performing any
controller maintenance.