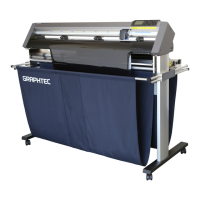
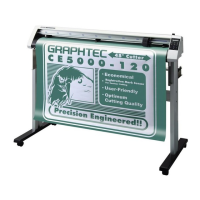
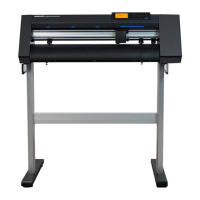
What to do if my GRAPHTEC CE6000-120AP is cutting on the grit roller imprint?
- CcindylewisAug 29, 2025
If the plotter is cutting on the grit roller imprint, it means the cutting width has been widened. Revert the expand limit to the default setting.
What to do if my GRAPHTEC CE6000-120AP is cutting on the grit roller imprint?
If the plotter is cutting on the grit roller imprint, it means the cutting width has been widened. Revert the expand limit to the default setting.
Why does my GRAPHTEC Plotter tool condition change?
If the tool condition changes unexpectedly, it could be due to: * The priority setting being set to PROGRAM. Change the setting to MANUAL. * The [ENTER] key not being pressed after changing the TOOL CONDITION. Check the TOOL CONDITION again and ensure you press [ENTER] to save changes.
How to fix one of the push roller going off the media on my GRAPHTEC CE6000-120AP?
If one of the push rollers goes off the media, the leading or trailing edge of the media is likely not cut straight. Cut the edge of the media straight.
What to do if my GRAPHTEC Plotter cannot cut above certain length?
If the plotter cannot cut above a certain length, the length of the cut is exceeding the page length set on the plotter. Press the [FAST] key to check the cutting area and match the setting for the page length.
What to do if my GRAPHTEC Plotter has too many tool up and down?
If there are too many tool up and down movements, the setting for the tangential mode is likely turned ON. Turn OFF the tangential mode unless you are cutting thick media.
What to do if nothing is displayed on the LCD panel of my GRAPHTEC CE6000-120AP Plotter?
If nothing is displayed on the LCD panel, it could be due to a lack of power or a defect in the plotter. First, ensure the power cord is securely connected to both the plotter's AC line inlet and the electrical outlet. Verify that the electrical outlet is receiving power.
How to resolve my GRAPHTEC CE6000-120AP Plotter cutting results differ from the specified size?
If the cutting results differ from the specified size, consider these potential causes: * The STEP SIZE may be set differently on the computer and the plotter. Ensure the STEP SIZE is the same value on both. * Scaling may be specified on the computer. Check whether scaling has been enabled and adjust as needed.
What to do if my GRAPHTEC CE6000-120AP drops the media while detecting?
If the plotter drops the media while detecting, it could be due to: * Bright light shining onto the media sensor. Block direct sunlight or move fluorescent lamps away from the plotter.
What to do if corners are rounded or too sharp when cutting with my GRAPHTEC CE6000-120AP Plotter?
If corners are rounded or too sharp, the blade and OFFSET settings do not match. Change the OFFSET: increase it if corners are rounded, and decrease it if they are too sharp.
What to do if my GRAPHTEC Plotter blade skips and does not completely cut lines?
If the blade skips and doesn't completely cut lines, or if straight cut lines wobble, it could be because: * The blade is extended too far. Adjust the blade length. * The cutting speed is too high. Lower the speed setting.
Explains the ranking and meaning of safety precautions and symbols used in the manual.
Explains the meaning of various safety symbols indicating attention, prohibition, and mandatory actions.
Provides notes on reproduction, changes, errors, and liability for the manual.
Lists trademarks and registered trademarks of respective companies.
States that the User's Manual is copyrighted by Graphtec Corporation.
Mentions the instruction manual is included on CD-ROM with detailed explanations.
Provides advice on handling sharp cutter blades to prevent injury and proper disposal.
Advises on not extending cutter pen blades too far and retracting them when not in use.
Warns against touching the pen tip after the power is turned on or during operation.
Informs the user that the machine's caution label is on the top cover and should be observed.
Explains the meaning of terms like "plot" and "media" as used in the manual.
States that not using the supplied basket may cause problems in cutting quality.
Provides precautions for using paper (media), including temperature/humidity sensitivity and alignment.
Provides specific notes about the availability and positioning of the left grit roller.
Details how crosscut length is determined by push roller position for the left grit roller.
Lists and describes all accessories included with the plotter for verification.
Identifies and defines the various parts of the plotter using diagrams (Front and Rear Views).
Provides step-by-step instructions with diagrams for assembling the plotter stand and basket.
Explains how to connect the plotter to a computer using USB or RS-232C interface cables.
Describes the nomenclature, structure, and blade length adjustment of the cutter plunger.
Provides instructions on how to attach cutter plungers and pens to the plotter's tool holder.
Details the procedures for loading both roll and sheet media, including alignment and sensor checks.
Explains how to position push rollers correctly for media width and long-axis media feeding.
Describes the initial setup screen for setting display language and length units upon first power-up.
Guides the user through the process of connecting the plotter to a power source and turning it on.
Explains the functions of the control panel's keys, lamps, and LCD screen displays.
Details how to select the media type (roll or sheet) and set the feeding method for the plotter.
Explains how to perform auto media transfer and cross-cuts for single page sections.
Describes how to select and set tool conditions (force, speed, acceleration) for different media types.
Explains how to set various perforation patterns for cutting lines, including custom patterns.
Guides the user on performing test cuts to verify settings and achieve optimal results.
Introduces the Simple menu mode for basic settings and its available options.
Explains how to raise or lower the tool (pen) using the control panel keys.
Details manual movement of the tool carriage and media in steps or continuously using the POSITION key.
Describes how to set the origin point for cutting and its behavior with coordinate axis rotation.
Explains how to rotate the coordinate axes to change the cutting direction.
Covers pausing, resuming, and stopping the cutting operation via the control panel.
Covers settings for cutting area, width, page length, mirroring, enlargement, and shrinking.
Explains the COPY function to cut specified numbers of data stored in buffer memory.
Describes panel cutting to prevent skew by dividing partition length and continuing cuts.
Details how to set whether to perform cross cuts based on command and timeout settings.
Explains how to set cross cuts for the F command in GP-GL, even if the media is not cut by feed command.
Describes how to adjust the blade force for cross cuts, with a range from 1 to 38.
Explains axis adjustment based on grit/registration marks and moving the tool tip to appropriate points.
Guides on adjusting plot deviations on X/Y axes and origin point, and re-plotting previously cut paper.
Explains TANGENTIAL MODE for precise corner cuts, with two modes for overcutting.
Describes using STEP PASS to control short lines for stable blade rotation and higher cut quality.
Details angle control for cutter blade tips when corners have large angle changes.
Explains how to correct deviations in cut/plotted line segment lengths using percentage adjustments.
Covers setting the initial blade control position to prevent area damage and ensure proper media contact.
Describes setting lower force for slight cut operations to align the blade and control rotation.
Explains the function for measuring cut depths to determine cutter blade replacement timing.
Guides on adjusting the space between pen and cutter plungers for alignment by drawing and cutting a crosshair.
Explains how sorting cutting area parameters increases efficiency by grouping cuts and changing tools.
Details automatic media feeding and reversing for specified amounts upon receiving cutting data.
Explains automatic media feeding and return when media is loaded and the set lever is raised.
Covers setting media transfer speed for auto media transfer and initial feed leveling.
Explains setting the tool speed when it is raised to potentially shorten total cutting time.
Describes settings for tool up movement, choosing between sequential or direct movement to coordinates.
Describes how to set the plotter's USB and RS-232C interfaces, including necessary driver installation.
Explains setting separators for GP-GL and HP-GL commands to judge data junctures for plotting and cross cutting.
Details timeout settings where intervals longer than the set time are judged as data junctures for plotting and cross cutting.
Allows selection of display language from ten options for the plotter's interface.
Allows changing coordinate values and parameters to meter or inch display.
Enables or disables media sensors that detect media size in the feed direction.
Enables or disables push roller sensors that detect media width.
Sets suction force for affixing media, adjustable for thin media.
Selects whether to enable or disable the beep sound when a control panel key is pressed.
Sets the command type (GP-GL or HP-GL) to match the software being used.
Determines priority between computer-set and panel-set tool conditions (MANUAL vs. PROGRAM).
Allows changing the distance traveled with one step for GP-GL commands.
Enables or disables specific GP-GL commands to prevent adverse effects on data.
Sets how the pen moves in response to the 'W' command for drawing arcs.
Sets the plotter's response to the "OI" command for model ID, selecting between 7550 and 7586.
Sets resolution for HP-GL circle commands, choosing between AUTO or DEFAULT (5 degrees).
Provides daily cleaning and maintenance procedures for the plotter and its components.
Guides on how to safely remove and replace the cutter blade using the structure diagram.
Explains the importance and method for regularly cleaning the cutter pen to maintain performance.
Recommends exchanging the cutter plunger when its tip wears down, affecting cut quality.
Provides solutions for common symptoms like no display, error messages, and operational issues.
Explains how to print the current plotter settings list, requiring media and pen plunger setup.
Guides on creating a self-test pattern to check plotter operation, requiring media and pen plunger setup.
Details how to output a dump list of received cutting data to verify transmission accuracy.
Explains how to plot a cut demo pattern to check the unit's operation.
Describes performing a self-diagnostic test by operating sensors and switches to check operational status.
Lists key technical specifications of the CE6000-120AP plotter, including CPU, dimensions, and capabilities.
Lists available consumables and accessories for the plotter, such as cutter plungers and pens.
Provides the physical dimensions of the plotter, including stand, in millimeters.
Illustrates the navigation structure of the plotter's menus (Simple and Normal modes).
Lists the initial default settings for Simple and Normal menus, which can be configured upon first use.
| Model | CE6000-120AP |
|---|---|
| Category | Plotter |
| Manufacturer | Graphtec |
| Max Cutting Width | 1200 mm |
| Maximum Cutting Area | 1200 mm x 50 m |
| Repeatability Precision | ±0.1 mm |
| Number of Tool Mounts | 1 |
| Interface | USB, Serial |
| Power Supply | AC 100-240V, 50/60Hz |
| Blade Force | 30 - 500 gf |
| Cutting Force | 30 - 500 gf |
| Pen Force | 30 - 500 gf |
| Media Thickness | Max. 0.25 mm |
| Compatible Media | Vinyl, paper, film |
| Mechanical Resolution | 0.025 mm |
| Programmable Resolution | 0.025 mm |
| Command Sets | HP-GL, GP-GL |
| Operating Environment | 10 to 35 °C, 30 to 85 % RH |

