EasyManua.ls Logo

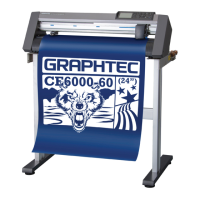
GRAPHTEC CE6000 SERIES User Manual

GRAPHTEC CE6000 SERIES
260 pages
To Next Page IconTo Next Page
Page #1 background imageLoading...
Page #1 background image
USER’S MANUAL
MANUAL NO.CE6000U-UM-151
CUTTING PLOTTER
CE
6000
SERIES

Table of Contents

Other manuals for GRAPHTEC CE6000 SERIES

Questions and Answers:

GRAPHTEC CE6000 SERIES Specifications

General IconGeneral
ConnectivityUSB, Serial
Cutting Force30-500 gf
InterfaceUSB
Media TypesVinyl, film
DisplayLCD
ConfigurationDesktop
Programmable Resolution0.025 mm
Repeatability Precision±0.1 mm
Command SetsGP-GL / HP-GL
Power SupplyAC 100-240 V, 50/60 Hz
Media ThicknessUp to 0.25 mm (0.01 in) including liner for die-cut, Up to 0.5 mm (0.02 in) for plotting
Operating System CompatibilityWindows
Number of Push Rollers2
Pen CompatibilityYes

Summary

Chapter 1 Product Summary

1.3 Assembling

Provides step-by-step instructions for assembling the plotter stand.

1.4 Connecting to the Computer

Details how to connect the plotter to a computer via USB or RS-232C.

Chapter 2 Preparing to Cut

2.1 Cutter Plunger Preparation

Explains the structure and manual adjustment of the cutter plunger and blade length.

2.2 Attaching a Tool

Guides on how to mount and remove tools like cutter plungers or pens into the plotter.

2.3 Loading Media

Provides instructions for loading roll and sheet media into the plotter.

2.4 Aligning Push Rollers

Details how to correctly position push rollers for media alignment and hold-down force.

2.6 Connecting to the Power

Describes the procedure for connecting the plotter to a power source.

2.10 Selecting Tool Condition

Explains how to set tool conditions like blade, force, speed, and acceleration for different media.

2.11 Running Cutting Tests

Guides on performing test cuts to optimize settings for quality results.

Chapter 3 Basic Operations

3.3 Setting the Origin Point

Describes how to set the origin point for cutting operations on the media.

3.5 Stop Cutting

Covers pausing, resuming, and stopping the cutting operation.

Chapter 4 Convenient Functions

Chapter 5 ARMS System

5.2 ARMS Setting and Adjustment

Details necessary adjustments and settings for correctly scanning registration marks with ARMS.

5.3 Setting Position Using ARMS

Explains methods to adjust position using ARMS based on 2, 3, or 4 registration marks.

Chapter 6 Manual Position Adjust

6.2 Manual Position Adjust Procedure

Details the step-by-step procedure for manual position adjustment using the plotter controls.

Chapter 7 Cutting Quality Settings

7.1 Cutting Thick Media Corners

Explains tangential emulation for sharp corner cuts on thick media.

Chapter 8 Cutting Time Settings

Chapter 9 Interface Settings

9.1 Setting Interface

Describes how to set USB and RS-232C interfaces and connection parameters.

Chapter 10 Operation Environment Settings

Chapter 11 Computer Control Settings

Chapter 12 Maintenance

12.2 Replacing Cutter Blade

Step-by-step instructions for safely replacing the cutter blade.

Chapter 13 Troubleshooting

13.1 Troubleshooting Guide

Lists common symptoms, possible causes, and solutions for plotter issues.

13.3 Create Test Pattern

Guides on creating a self-test pattern to check plotter operation.

13.5 Self Diagnostic Test

Explains how to perform a self-diagnostic test of sensors and switches.

Related product manuals