10 - 22
Using Remote Management
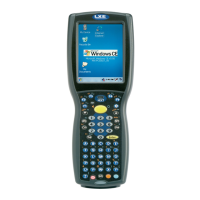
1. Configure the radio to connect to the network running the Mobile Device Server. After the MX7 Tecton is connected, proceed
to step 2.
2. If it is desired to configure the radio using the Summit package, add the configured package to the Wavelink Avalanche MC
Console and enable it.
3. Verify RMU.CE.CAB exists in the \System\RMU folder.
4. Double tap the MX7 Tecton enabler CAB file in the \System folder.
5. The enabler automatically launches after installation and contacts the Mobile Device Server. The Avalanche MC Console
connected to that Mobile Device Server identifies the remote device and performs a sync. This downloads any available
packages available for the MX7 Tecton.
Using eXpress Scan
If the MX7 Tecton has an eXpress Scan icon on the desktop, eXpress Scan may be used for the initial configuration of the
device.
If the eXpress Scan icon is not present on the desktop, install the Enabler. If the icon is still not present, Enabler must be
updated.
If the eXpress Scan icon is present, follow these steps to configure the MX7 Tecton to connect with the wireless network and the
Mobile Device Server.
Creating Bar Codes
Bar codes are created with the eXpress Config utility on the desktop/laptop computer, not the mobile device. Depending on
the bar code length and the number of parameters selected, eXpress Config generates one or more bar codes for device
configuration. The bar codes contain configuration parameters for the wireless client and may also specify the address of
the Mobile Device Server.
Bar codes should be printed at a minimum of 600 dpi.
Scanning Bar Codes
Folow these instructions for each device to be configured.
1. Start eXpress Scan on the MX7 Tecton by double tappng the eXpress Scan icon.
2. Enter the bar code passcode, if any.
3. Tap Start.
4. Bar Code 1 must be scanned first. The scanned data is displayed in the “Data” text box. The password, if any, entered
above is compared to the password entered when the bar codes were created.
eXpress Scan Desktop Icon
 Loading...
