Page 84 - CEAST 9340 - Instructions for Use and Maintenance 7510.000MN1r ed. 1 rev. 1
c) Charpy head
1) Insert and screw the spacer to the striker body (Fig. 8) by hand. Skip this step if
it is already installed.
2) Screw and tighten the Charpy head to the striker body by hand.
3) Loosen and unscrew the ring nut until the spacer is very near to the Charpy head
(not in contact).
4) Place the head alignment template with the notch toward the Charpy head.
5) Turn the Charpy head until the cisel end is aligned with the notch of the template.
6) Hold the Charpy head in position and tighten the ring nut.
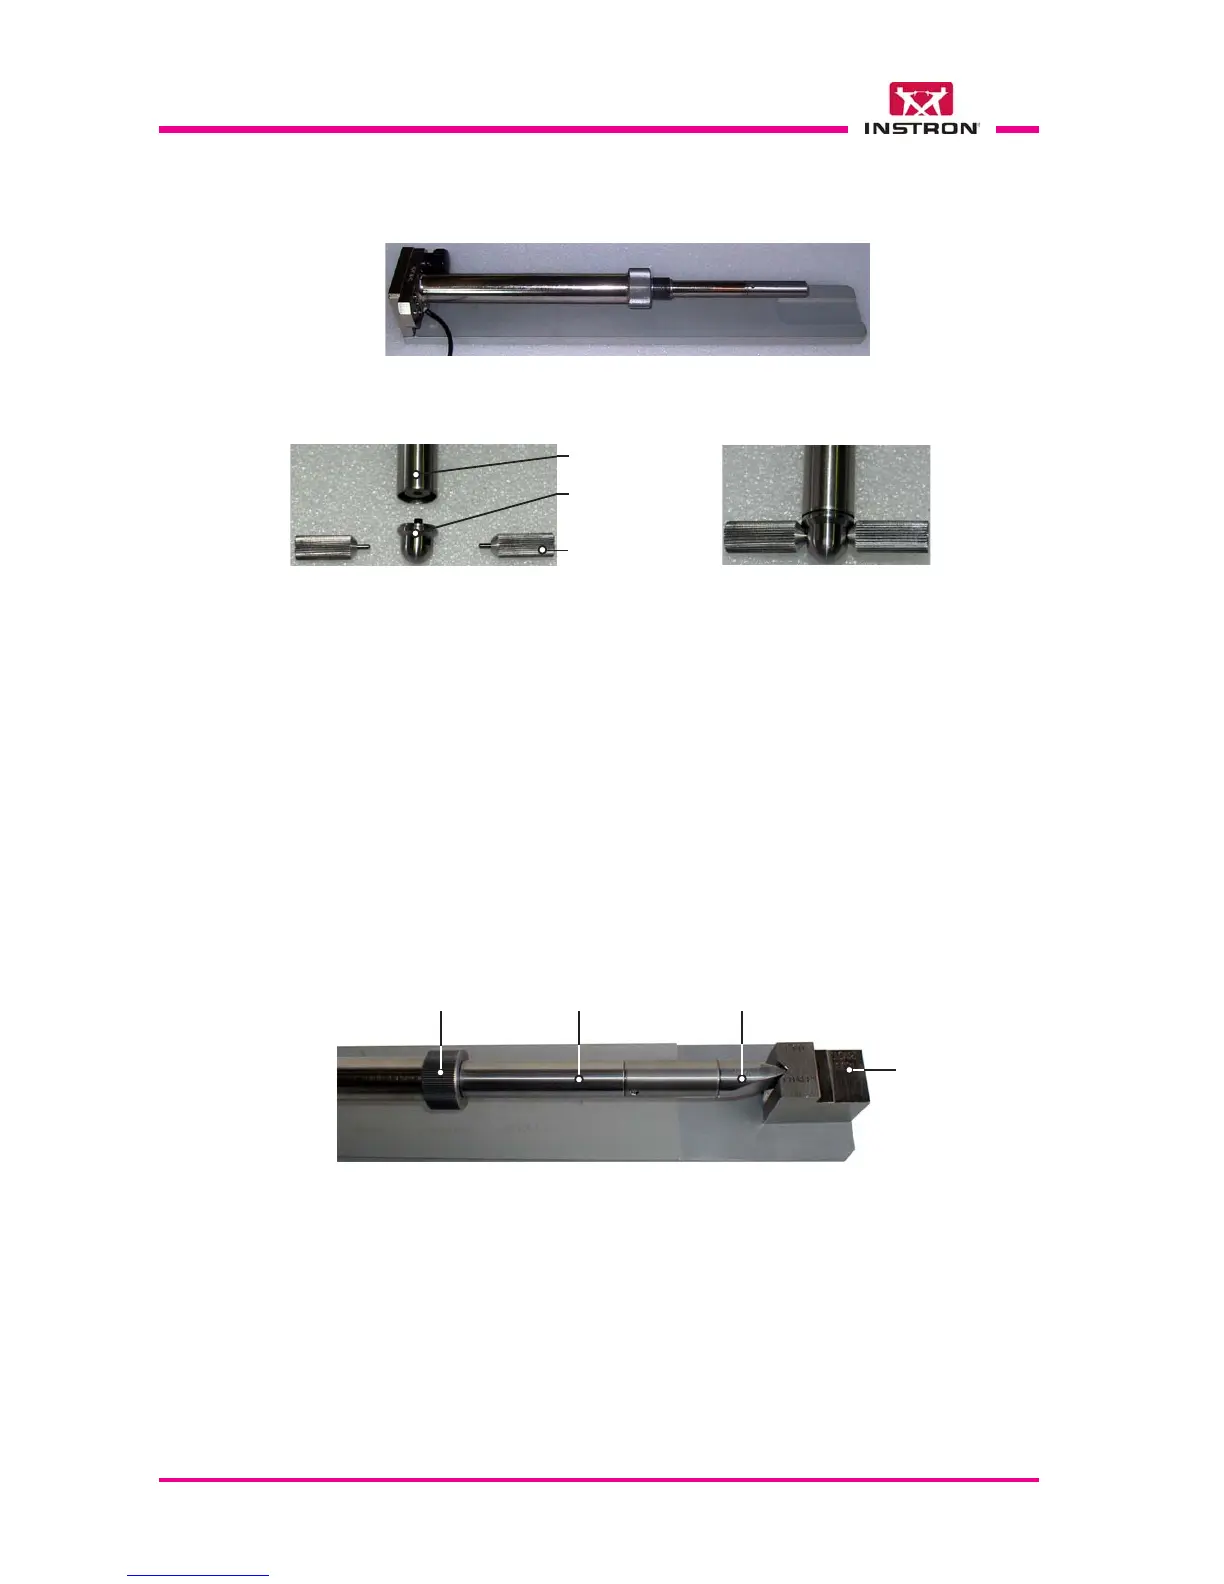
X
Fig. 8 - Striker with the Charpy head aligned
Heads alignment
template
Spacer
Ring nut Charpy head
Fig. 7 - Striker body fastened to the fixture without head and spacer
Spacer
Hemispherical
head
Pin (x 2)
Fig. 7a - Hemispherical head
3) Alternatively, fasten the head to the striker body end using the pins (Fig. 7a).