PLDC01938
REVISION 00
01/06/2011
TECHNICAL DEPT.
Stavale
- date 05/09/2011
134/195
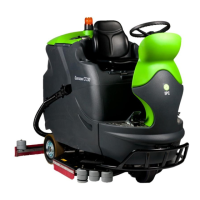
7
Identify the location of the float switch D and remove the gasket G closing the hole in the tank to access the
back part of the float switch.
8
Remove the guard, complete with the bracket H by unscrewing the two screws H1.
9
With a no. 26 spanner, unscrew the float switch D from the tank.
10
Extract the float switch D from the tank and replace with a new one.
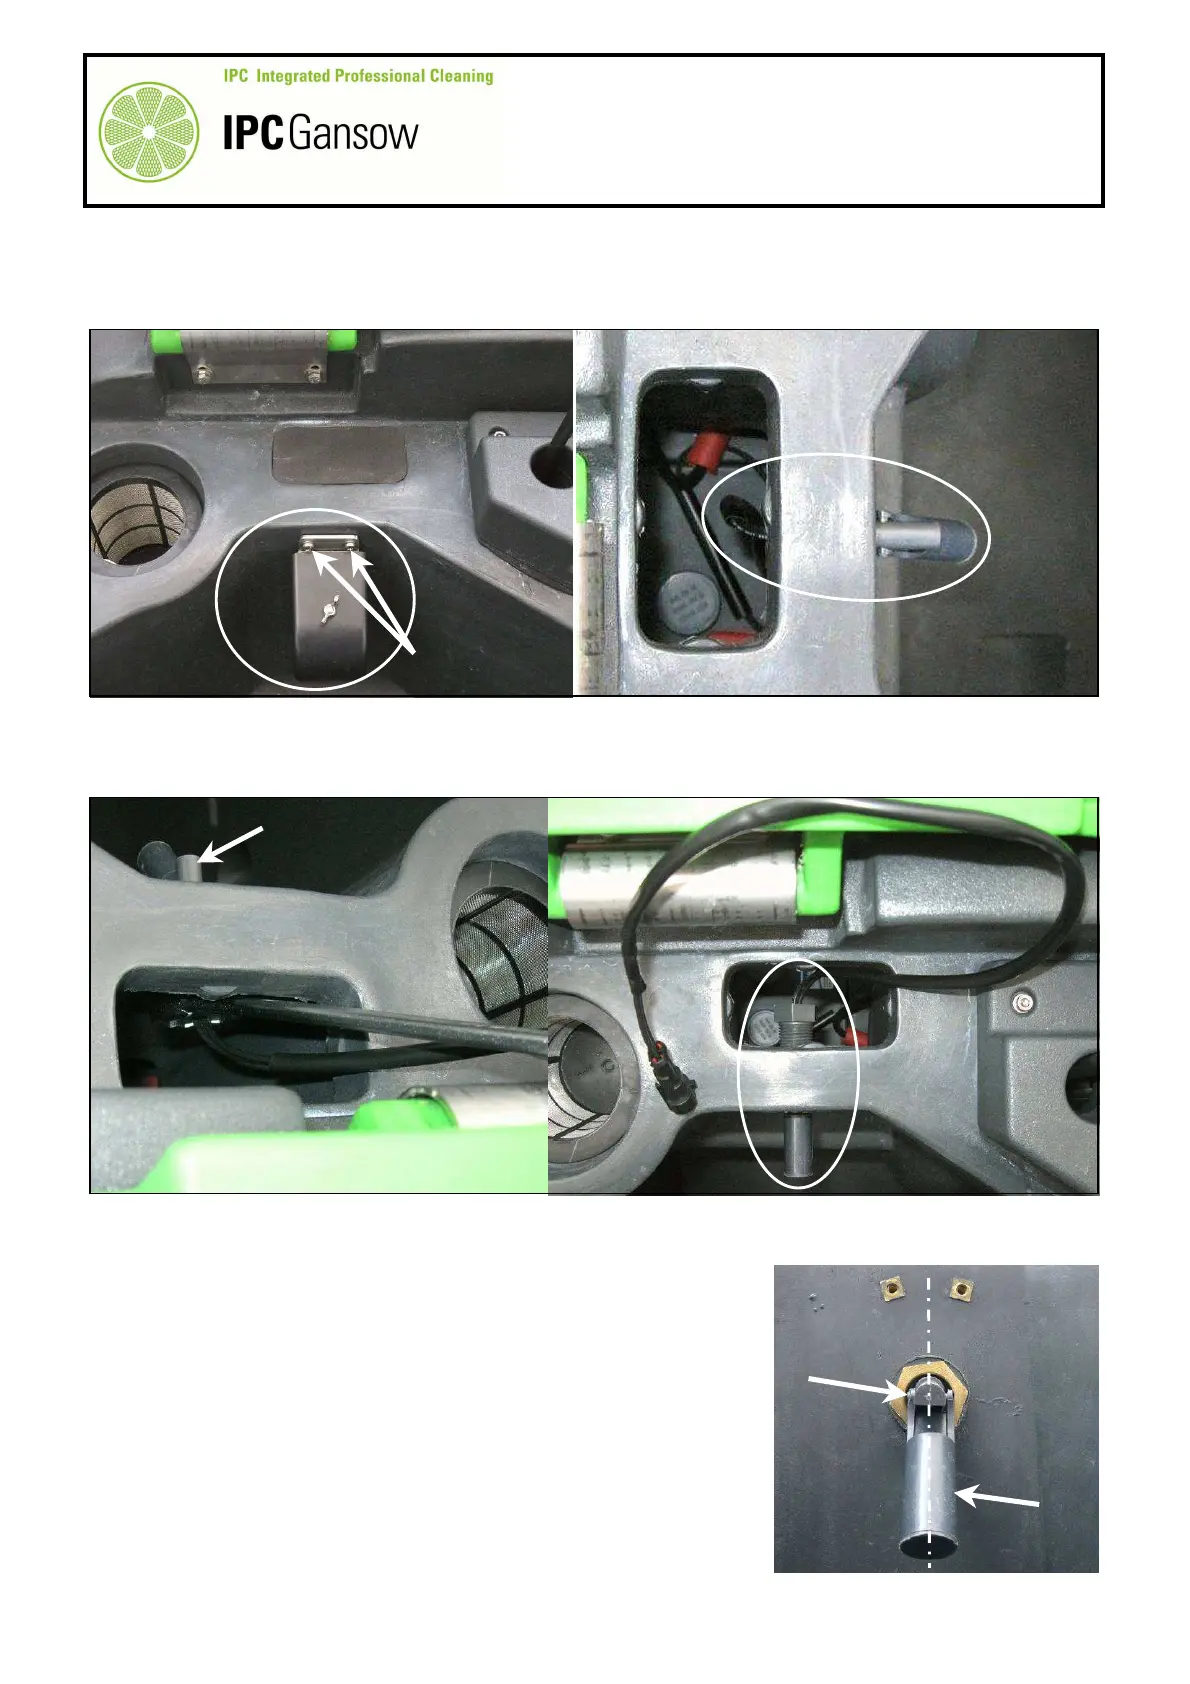
Reassembly
1
Mount the new float switch by performing the disassembly operations
in reverse
2
The thread on the float switch body is conical and therefore simply
needs screwed up until you feel resistance.
3
Screw up the float switch I until the lever I1 is perfectly vertical.
4
Tighten the float switch I with moderation and no more than
necessary to avoid ruining the conical thread.
PHOTO 288
H
D
D
D
PHOTO 289
I
I1
PHOTO 290