P/N 960-000164R_Rev. 3 {EDP #213631} © 2018, JAPAN CASH MACHINE CO., LTD.
Section 6 iPRO-RC™ Series Banknote Recycler Performance Tests
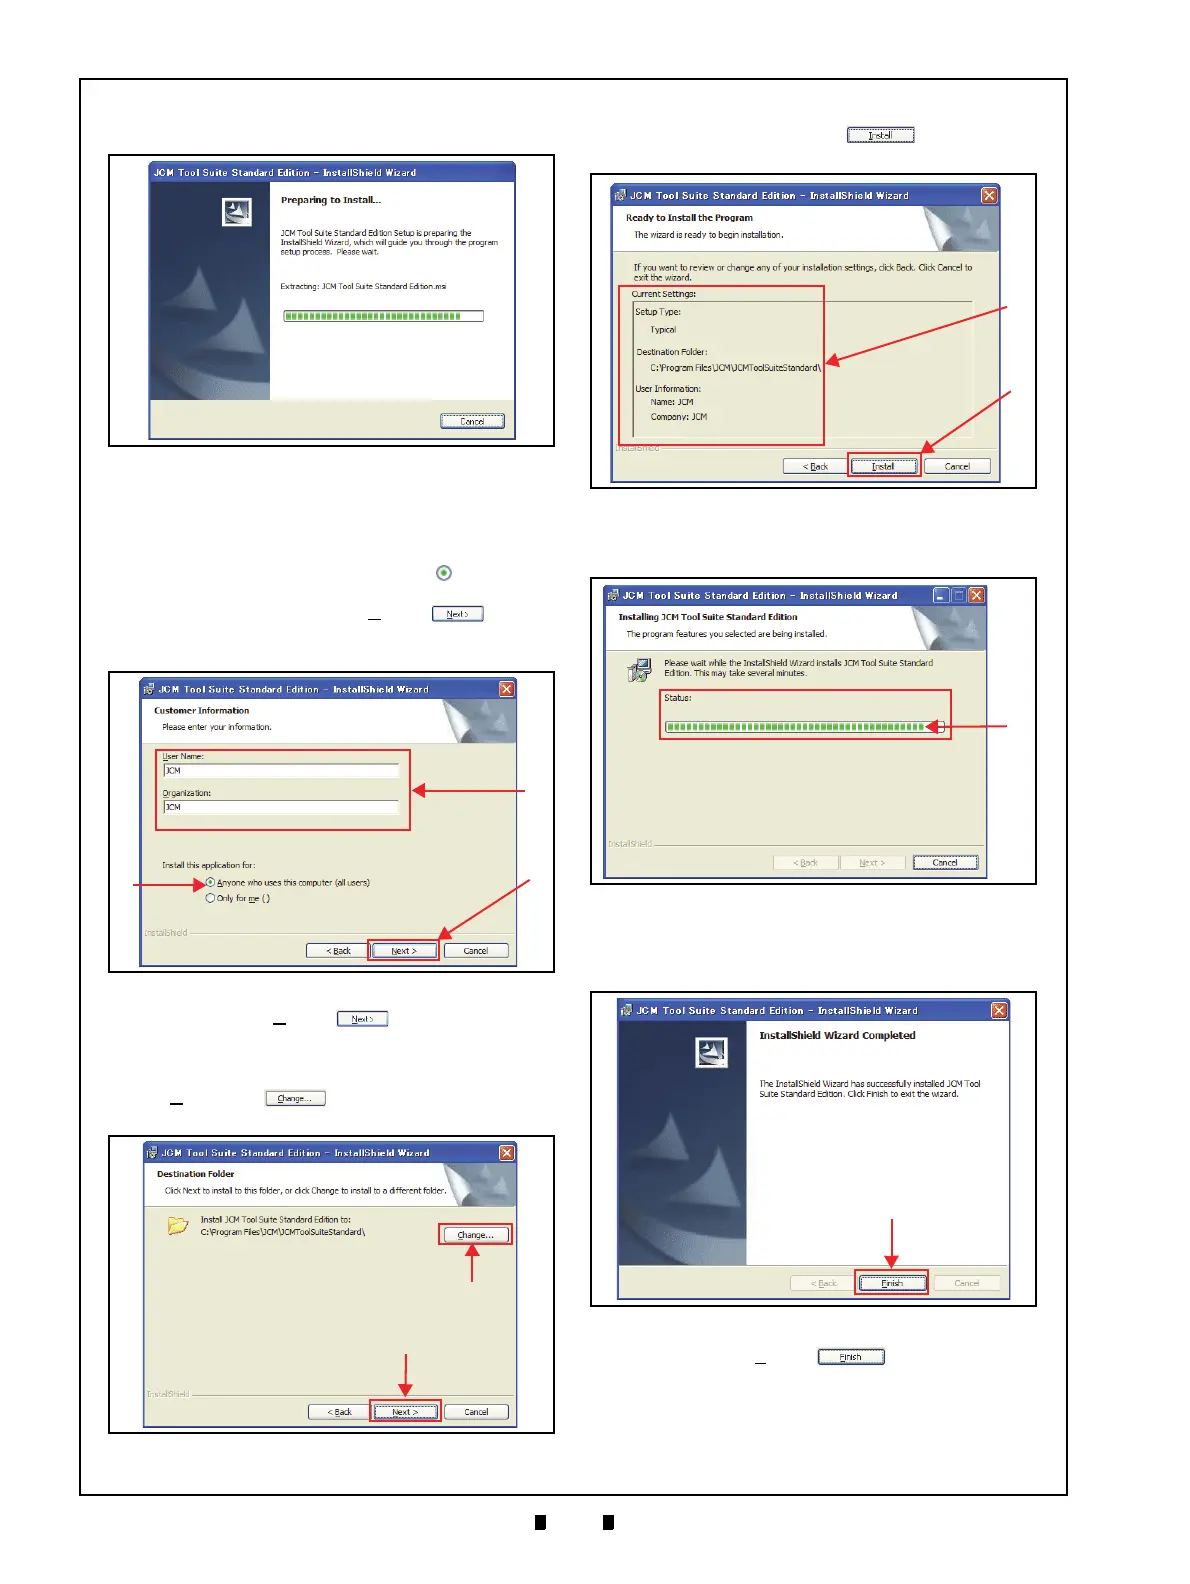
5. Confirm that the Installation File was extracted
automatically (Figure 6-4).
6. When the “
Customer Information” Screen shown
in Figure 6-5 appears, type the User Name and
Organization (Figure 6-5 a) into each T
ext Field
provided, if necessary.
7. Click on the Radio Screen Button located next
to “
Anyone who uses this computer” (Figure 6-5
b), and then click on the “Next>” Screen
Button (Figure 6-5 c) once all
the information is
entered.
8. Click on the “
Next>” Screen Button (Fig-
ure 6-6 a) wh
en the “Destination Folder” Screen
shown in Figure 6-6 appears. If the “Destination
Folder
” is not the desired location, click on the
“
Change...” Screen Button (Figure 6-6
b) and select the
desired location.
9. Check the “
Current Settings” Area (Figure 6-7 a),
and click on the “
Install” Screen Button
(Figure 6-7 b)
to begin the installation process.
10. Confirm the installation status by observing the
Green S
tatus Bar (Figure 6-8 a).
11. When installation is complete, the “
InstallShield
Wizard Completed
” Screen shown in Figure 6-9
will appear.
12. Click on the “
Finish” Screen
Button.
This completes the “JCM Tool Suite Standard
Edition
” installation procedure.
Figure 6-4 Installation File Extracting Screen
Figure 6-4 Installation File Extracting Screen
Figure 6-5 Customer Information Screen
Figure 6-5 Customer Information Screen
Figure 6-6 Destination Folder Screen
Figure 6-6 Destination Folder Screen
Figure 6-7 Current Settings Confirmation
Figure 6-7 Current Settings Confirmation
Figure 6-8 Installation Status Confirmation
Figure 6-8 Installation Status Confirmation
Figure 6-9 Installation Completion Screen
Figure 6-9 Installation Completion Screen