P/N 960-000164R_Rev. 3 {EDP #213631} © 2018, JAPAN CASH MACHINE CO., LTD.
Performance Tests iPRO-RC™ Series Banknote Recycler Section 6
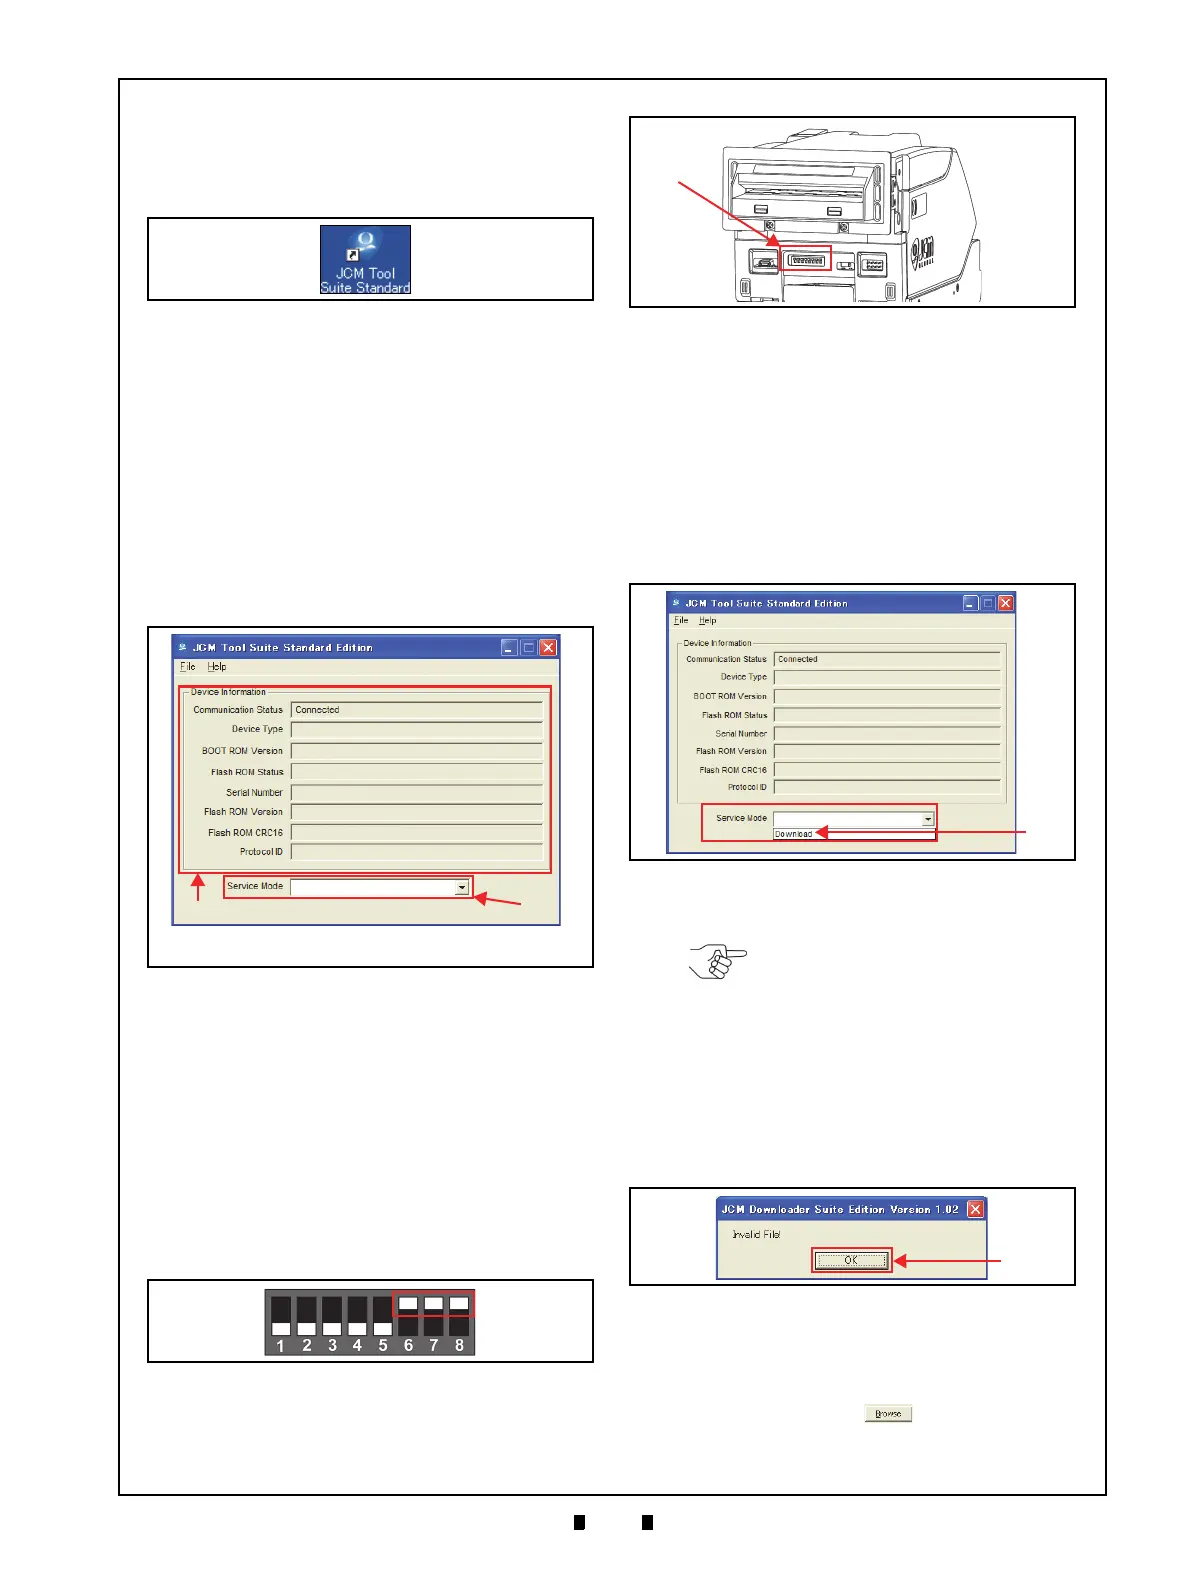
JCM Tool Suite Standard Edition
When the “JCM Tool Suite Standard Edition” is
installed, the Short-cut Icon shown in Figure 6-10
will appear on the PC Desktop.
To activate the “
JCM Tool Suite Standard Edi-
tion
” Software Program, Double-Click on the
Short-cut Icon. The “
JCM Tool Suite Standard
Edition
” Screen shown in Figure 6-11 will appear
on the PC Monitor.
The
Device Information Text Fields shown in
Figure 6-11a list the Model Information when
the Device is connected to a PC.
The
Service Mode Pull-down Menu shown in
Figure 6-11b contains several functional selections.
The selection items will appear depending on the
specific DIP Switches set to create them
.
Firmware Download Procedure
To download the iPRO-RC™ Firmware, proceed as
follows:
1. Copy the iPRO-RC™ Firmware File and paste it
on the PC Desktop. (Review Figure 6-1 “Tool and
Harness Connection” on page 6-1 to properly
select and set-up the Cable connections).
2. Turn the iPRO-RC™ Power Supply
OFF.
3. Set the iPRO™ Transport Unit’s 8-Position DIP
S
witches #6, #7 and #8 to
ON (Figure 6-12 & Fig-
ure 6-13 a).
4. Connect the iPRO-RC™ and the PC together
using the recommended USB Cable.
5. Turn the iPRO-RC™ Power Supply
ON. The
iPRO™ Transport Unit LED will begin alter-
nately flashing at a Green and Re
d Color Rate,
and the iPRO-RC™ Status will revert to Stand-by
Mode.
6. Launch the “
JCMToolSuiteStandardEdition.exe”
Program.
7. When the “
JCM Tool Suite Standard Edition”
Screen shown in Figure 6-14 appears, click on the
Service Mode Pull-down Menu and select “
Down-
load
” (Figure 6-14 a).
8. The “
JCM Downloader Suite Edition Ver X.XX”
Program will activate automatically.
9. When the communication line
between the
iPRO-RC™ and the PC is
connected, “Online”
will appear in Green Text (Figure 6-16 a) belo
w
the Download Screen Button.
click on the “
Browse” Screen
Button (Figure 6-16 b).
Figure 6-10 JCM Tool Suite Short-cut Icon
Figure 6-10 JCM Tool Suite Short-cut Icon
Figure 6-11 JCM Tool Suite Standard Edition
Figure 6-11 JCM Tool Suite Standard Edition
a
b
NOTE: Service Mode Pull-down Menu listings will depend on
DIP Switch Setting selections.
Figure 6-12 iPRO-RC DIP Switch Setting
Figure 6-12 iPRO-RC DIP Switch Setting
Figure 6-13 DIP Switch Location
Figure 6-13 DIP Switch Location
Figure 6-14 Select Download
Figure 6-14 Select Download
NOTE: When the download program
is activated for the first time, an
“Invalid File!” message pop-up
Dialog Box (Figure 6-15) will appear
because the Firmware File has not
yet been selected. Click on the
Dialog’s “
OK” Screen Button (Figure
6-15 a), and select the proper
Firmware File. Once the Firmware
File is selected, the message will no
longer appear again.
Figure 6-15 Invalid File! Dialog Pop-Up
Screen
Figure 6-15 Invalid File! Dialog Pop-Up Screen