Chapter 11: Sensor Verification
ValProbe RT User Manual 107
To enter additional Setpoints or delete setpoints select on the appropriate icon. Once all
setpoints and criteria are entered, save the Verification Setup under a specific name.
Note: The minimum difference between any two setpoints should be set no lower than 8° C.
If any set points are below the minimum, the software prompts the User a reminder on
the bottom of the screen to update the setpoints.
If desired, setup printing is available by selecting the Printer icon. To delete a setup, select
the Trash Bin icon.
If multiple Setups are generated and saved with different configurations, they are all listed on
the right of the screen by Setup name and sorted by creation date. To modify an existing
setup, double-click on it to open it, modify it and then click Save to save the changes or
Cancel to revert changes.
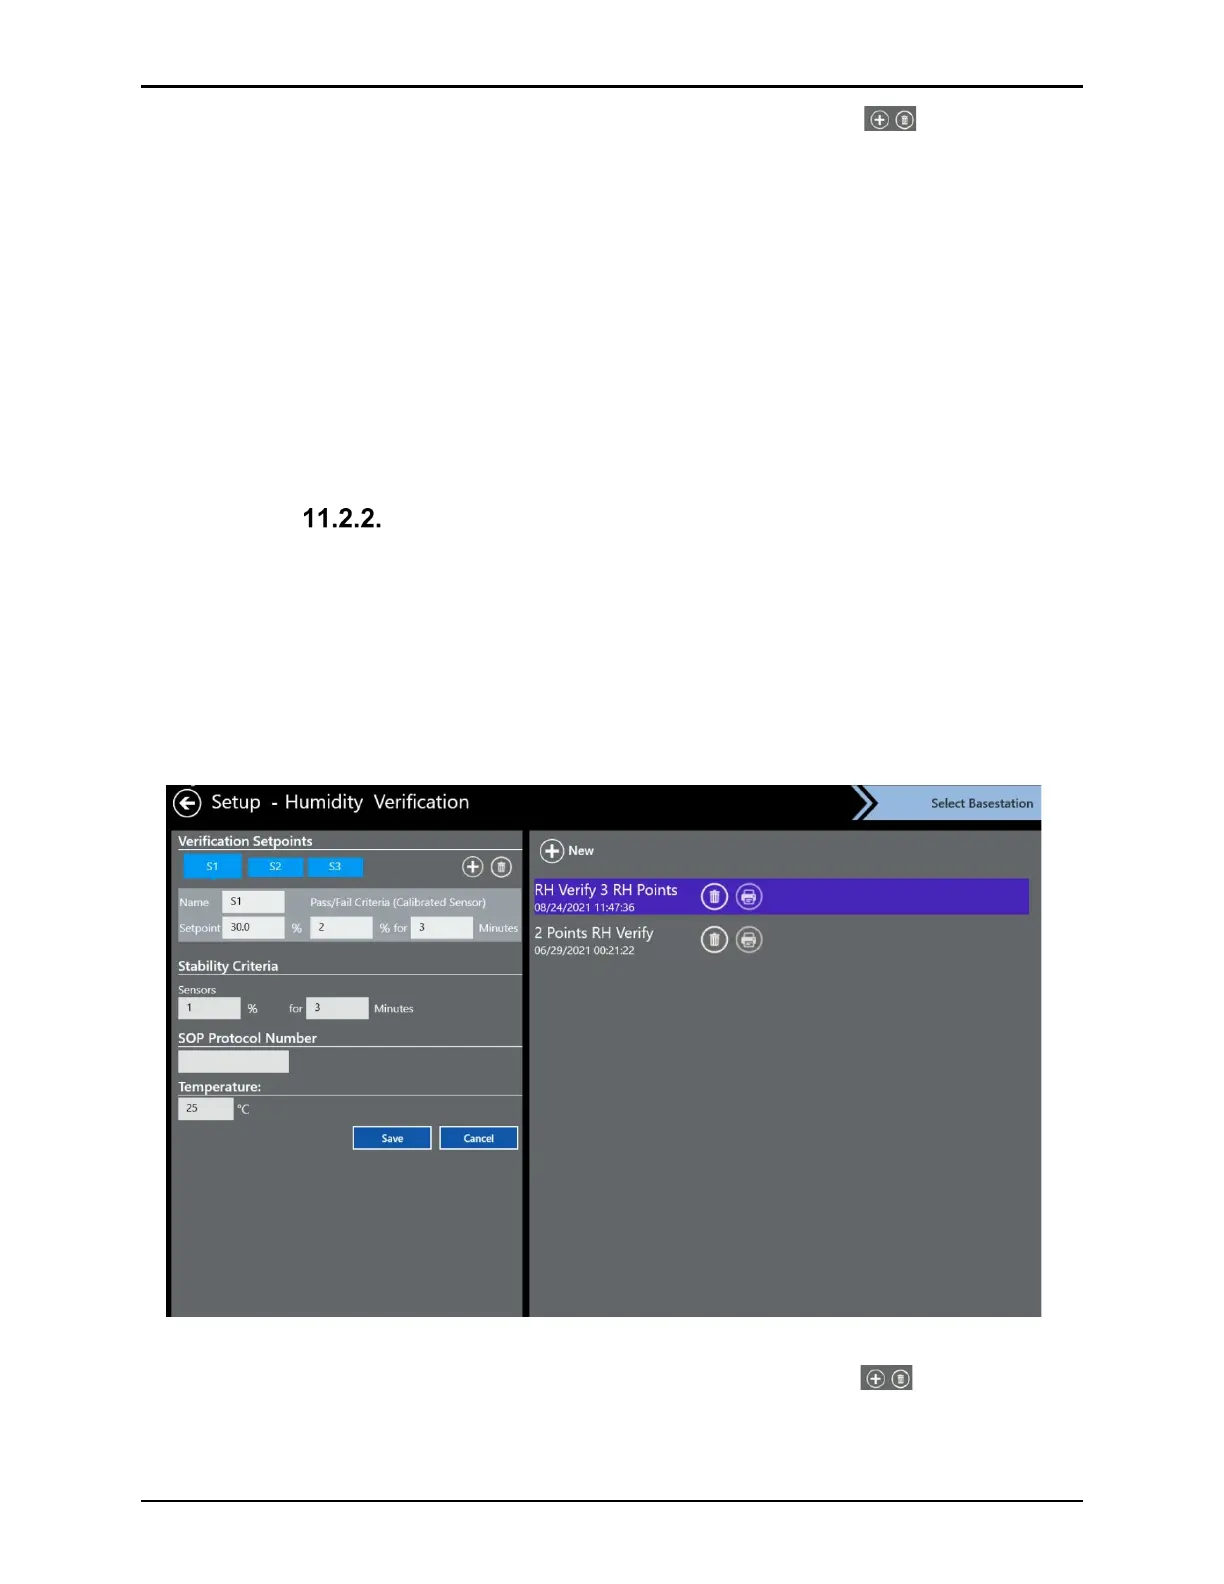
Humidity Verification
If you select Humidity, the Setup Humidity Verification screen opens, the following options are
available:
• Choose between one to six humidity setpoints
• Define for each setpoint the name, setpoint humidity %, and Pass / Fail criteria
• Define sensor stability and minimum duration
• SOP protocol numbers (up to 50 characters) or other information
Figure 141: Humidity Verification
To enter additional setpoints or delete setpoints select on the appropriate icon. Once all
setpoints and criteria are entered, save the Verification Setup under a specific name.