Chapter 7: Defining Assets
ValProbe RT User Manual 69
7.3. Creating A New Asset
To enter a new asset into the ValProbe RT system, go to the Asset Hub screen and select the
Plus (+) icon. The New Asset screen opens.
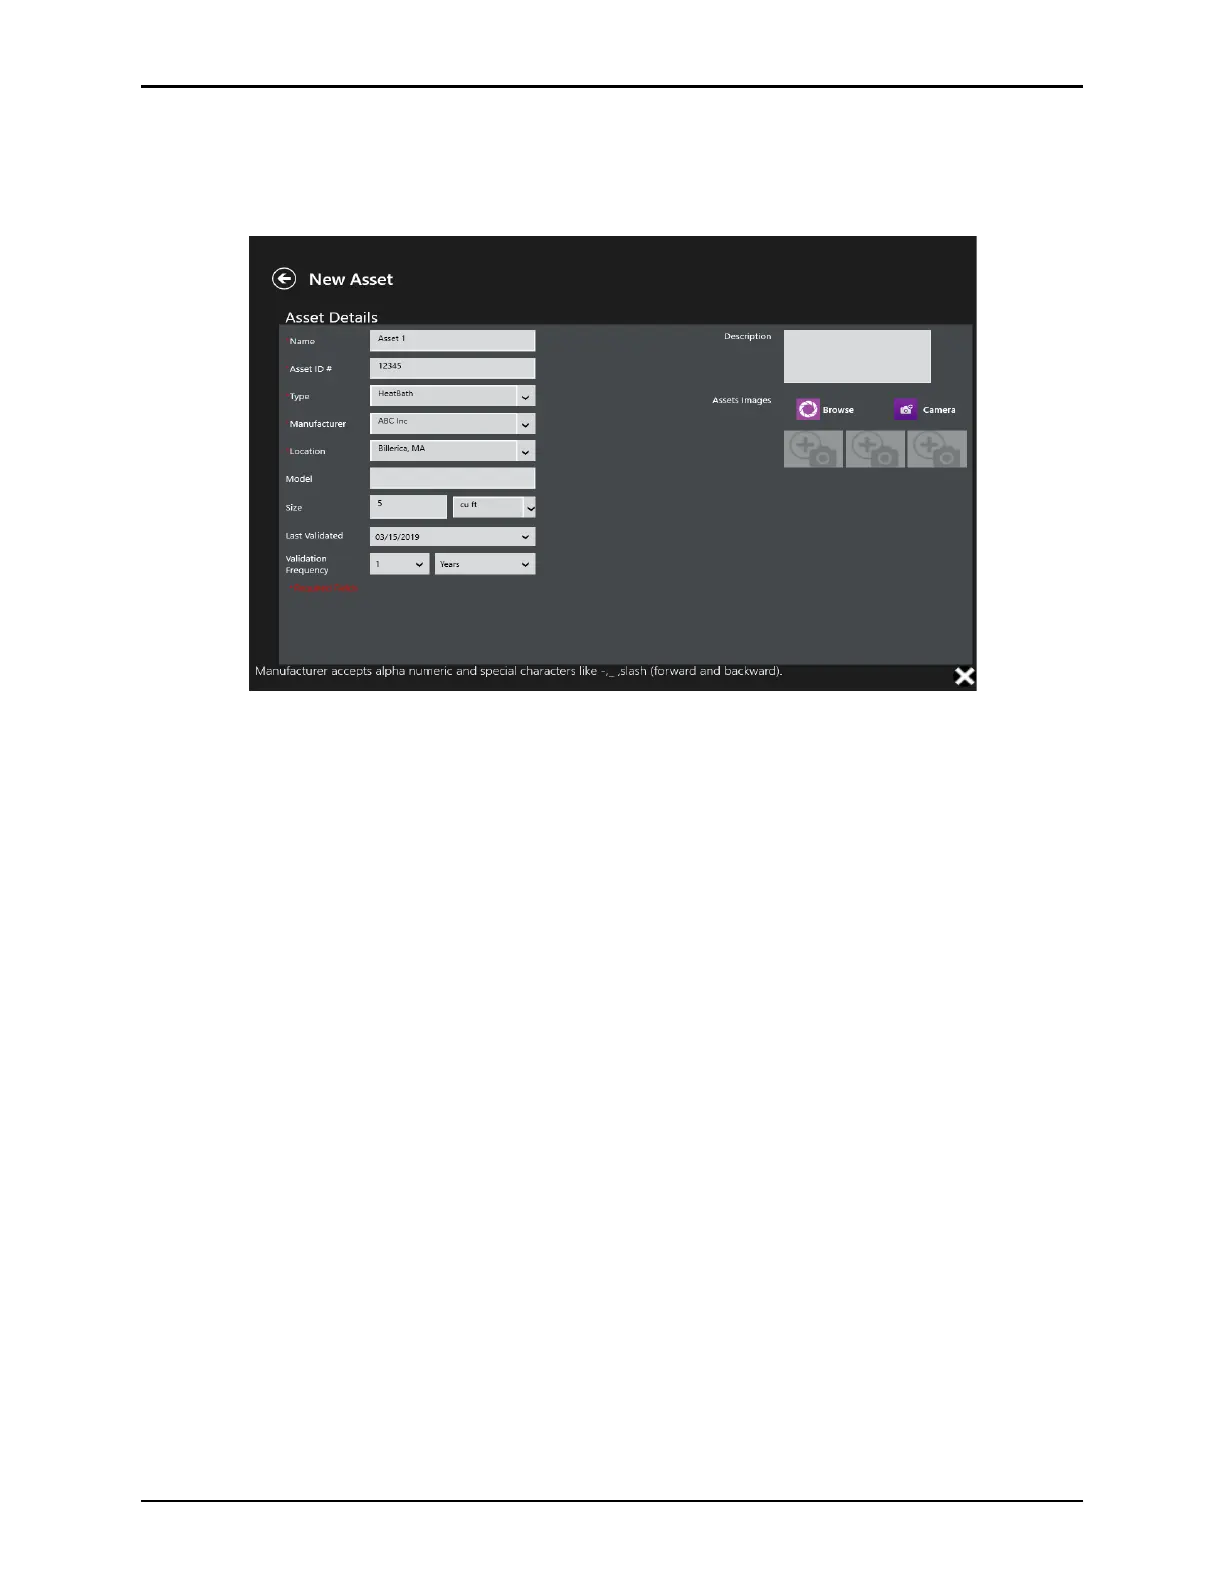
Figure 93: New Asset Screen
Enter each new asset details separately, use the textboxes and dropdowns to enter:
Note: All fields highlighted with an asterisk are required fields to allow sorting of Assets.
• Name: Asset names must be unique. Before synchronizing several asset data sets, it is
recommended to ensure there are no duplicate asset names utilized.
• Asset ID: This field is used to specify a company asset number or ID.
• Type: Select an existing asset type or enter a new type. Any new type definition will be
available in the dropdown in the future.
• Manufacturer: Specify the manufacturers name of the asset.
• Location: Specify the location of the asset. This could represent the building or
department.
• Model: Specifies the model number of the asset. This field is optional.
• Size: Specifies the volume of the asset in cubic units. In the dropdown, it is possible to
select the appropriate units or enter custom units. This field is optional.
• Last Validated: Specifies the date of the last validation of the asset. This field is
optional.
• Validation frequency: Specify the required validation frequency. This field is optional.
Enter an optional Description of the asset located on the right. Up to three images may be
uploaded to appear on the Asset Details screen, as well as a wiring layout image(s) to provide
Users with sensor placement details. Alternatively, utilize the camera to take pictures.
Select Save to save the entry and return to the Asset Hub.