Chapter 8: Defining Study Setups
ValProbe RT User Manual 72
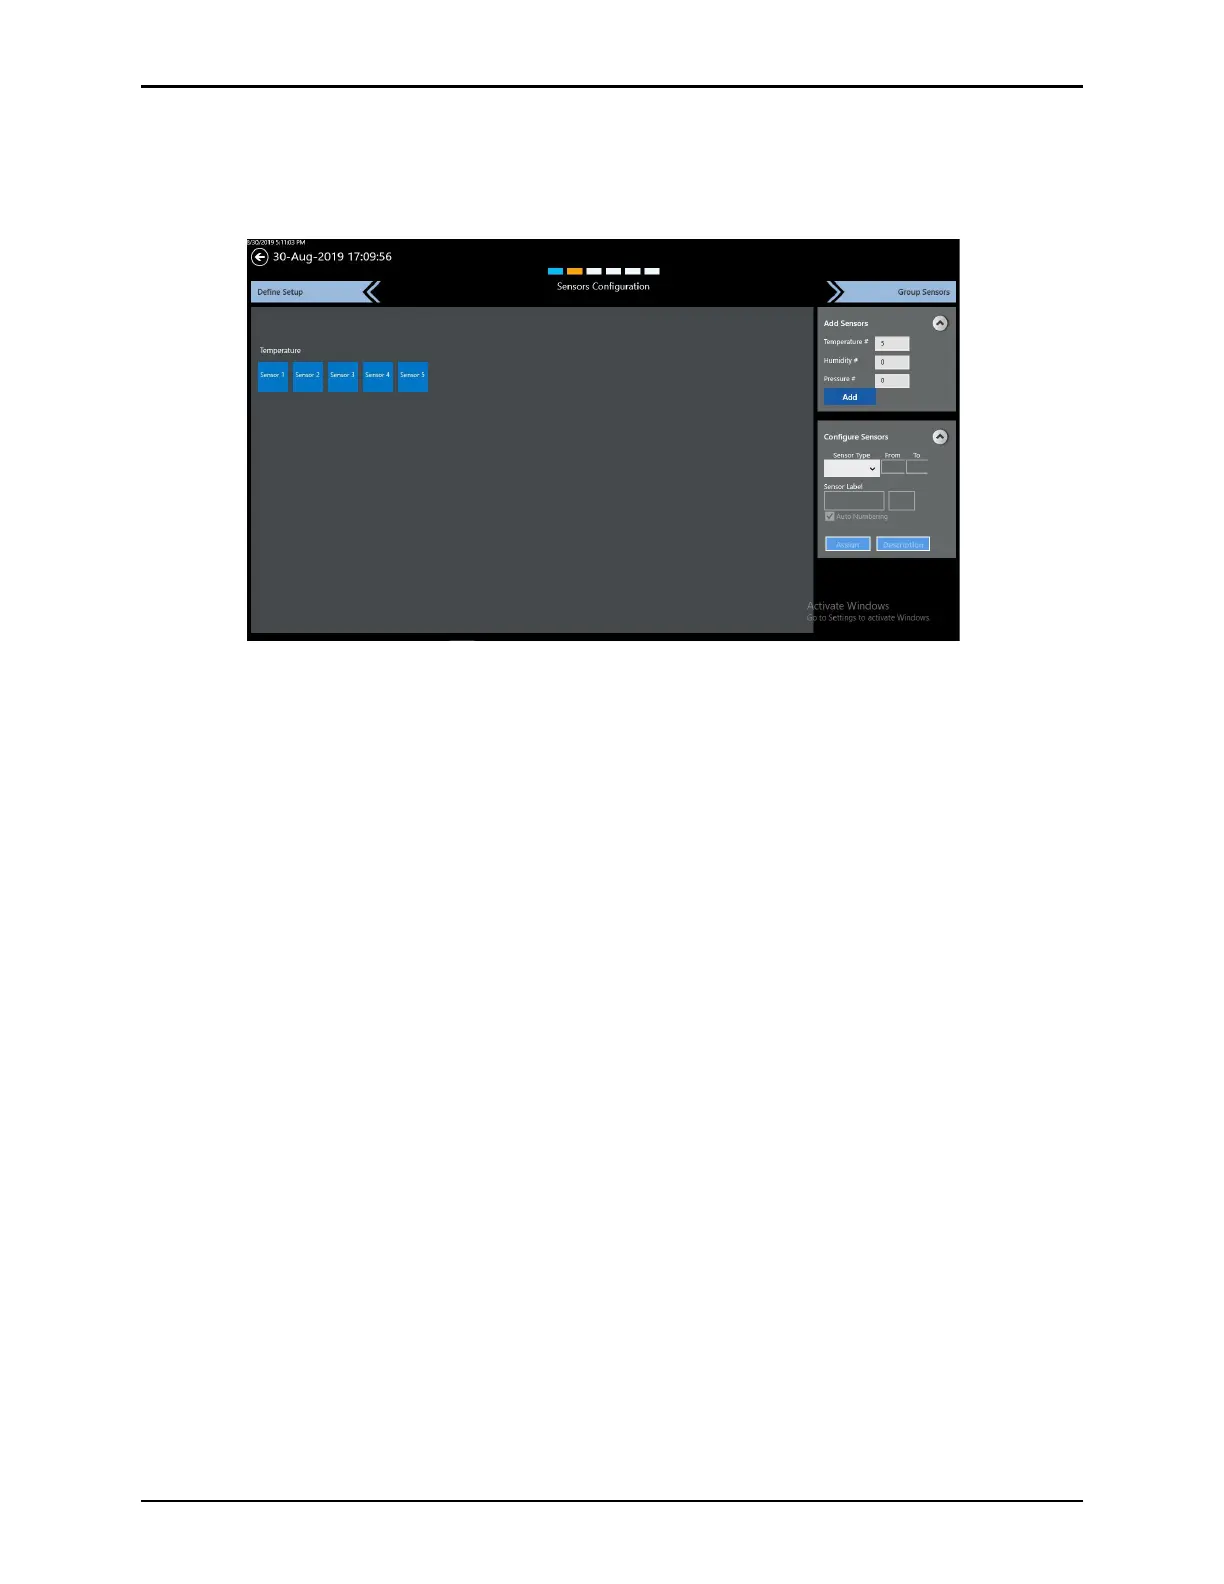
8.3. Sensors Configuration Screen
From the Asset Details screen, select Sensors Configuration to open the Sensors
Configuration screen.
Figure 96: Sensors Configuration Screen
The Sensors Configuration screen permits the User to define the number and type of sensors
to be used, as well as labels and descriptions for each defined sensor
The Sensor Configuration process is two steps:
• Add Sensors
• Configure Sensors
Note: Sensor Configuration defines the number and type of sensors intended to be used for
the study. The serial numbers of the actual Loggers and sensors are not defined in the
Setup but rather defined just prior to starting a Qualification.
Select the Down Arrow to open the Add Sensors window. For each type of sensor, define the
intended number of sensors for use. Select Add to add sensors, they newly added sensors
appear as blue tiles for each type of sensor defined (Temp, Pressure).
Select the Down Arrow to open the Configure Sensors window. For example, to select a
series of humidity sensors:
• Select Humidity from the Sensor Type dropdown.
• Defined the consecutive range of sensors to configure.
• If desired, modify the Sensor Label and define the sensor number to begin with when
Auto numbering.
• Select Assign and all selected sensors will be assigned and have the defined labels.
Repeat the procedure for Pressure or Temperature if defined.
To individually select sensors, select each sensor tile, then select the type of sensor, label,
and number. Select Assign to complete configuration of sensor.