bizhub C652/C552 7-17
7.1 System Settings
7
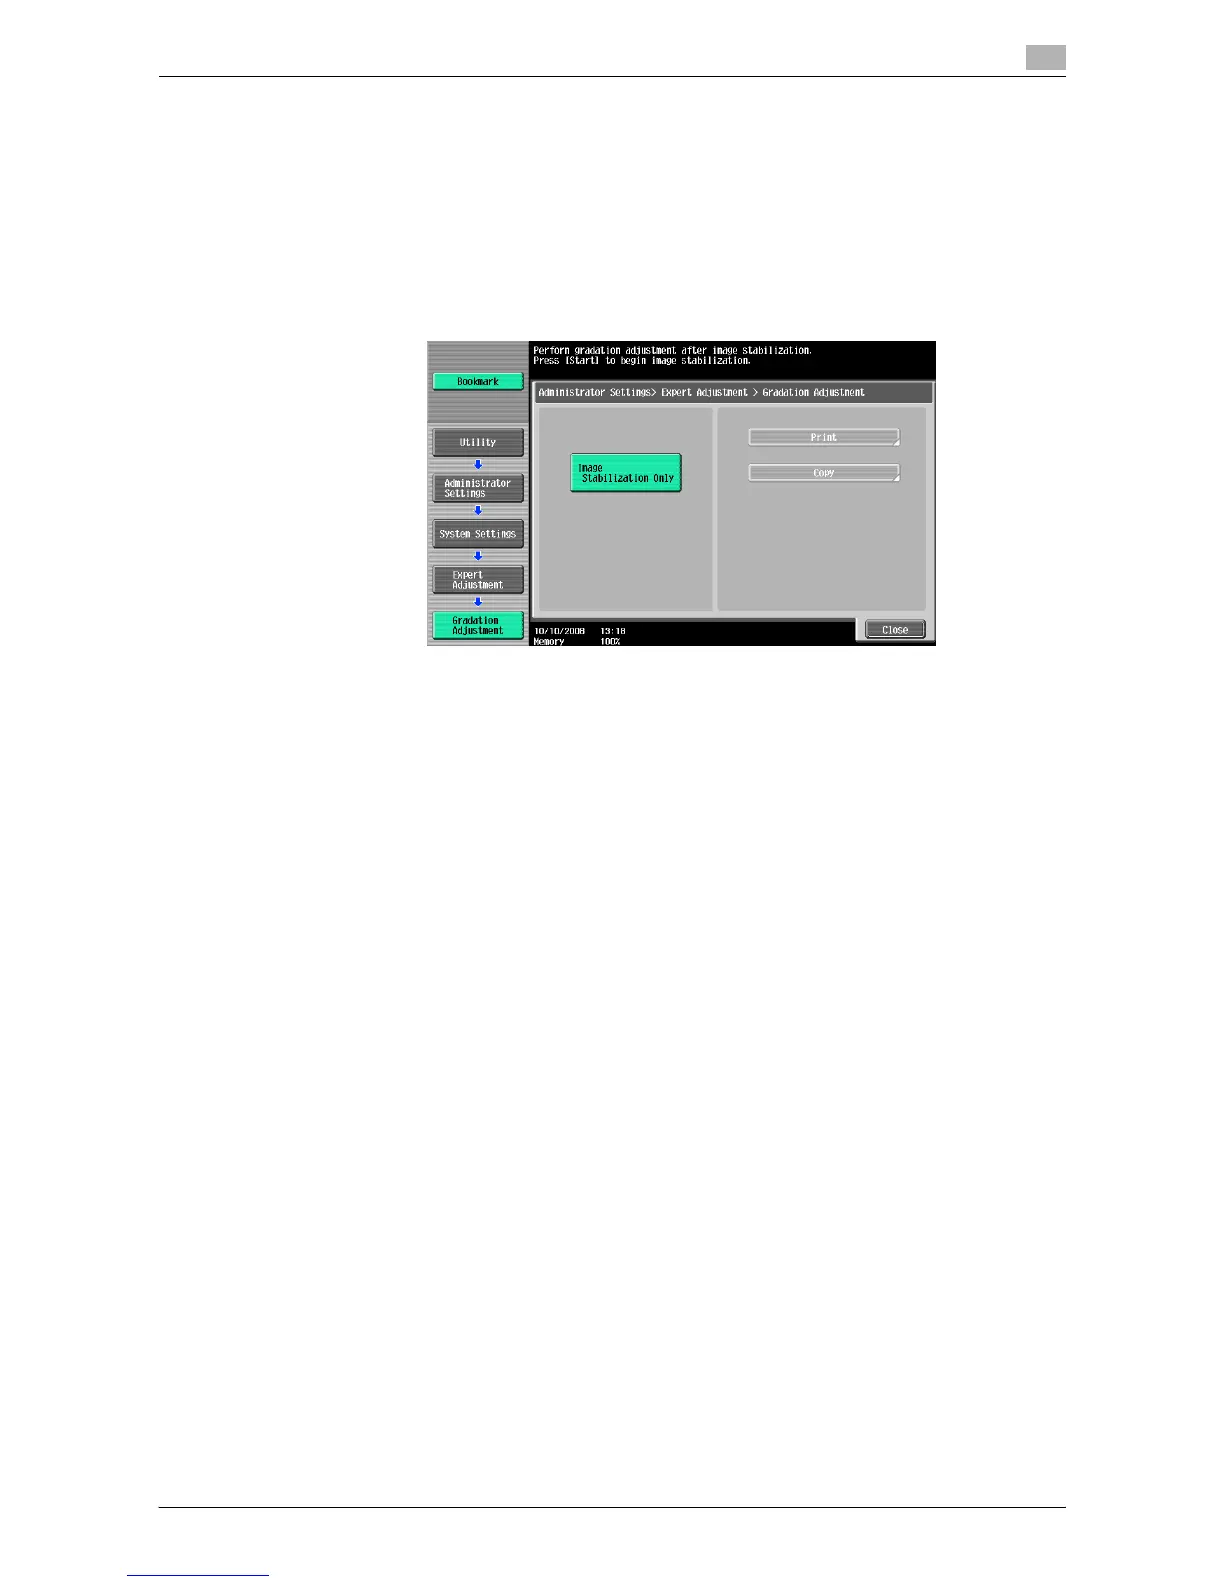
Gradation Adjustment
Adjust irregular gradation levels of print images.
0 Adjust each correction item three times.
1 Turn off the main power switch of this machine.
2 Wait at least 10 seconds, and then turn it on again.
3 Press the [Utility/Counter] key ö [Administrator Settings] ö [System Settings] ö [Expert Adjustment]
ö [Gradation Adjustment].
4 Press the [Start] key.
The image stabilization operation starts.
The correction items on the right of the touch panel become enabled.
5 Select an item to be corrected.
6 Select paper used to output a test pattern.
% As a paper size, select 11 e 17w, 8-1/2 e 11v, A3w or A4 v. By default, 11 e 17 w is selected.
% Paper in the bypass tray cannot be selected.
7 Press the [Start] key.
A test pattern is printed.
% Selecting 11 e 17w or A3w outputs one sheets, and selecting 8-1/2 e 11v or A4v outputs two
sheets.
8 Place the printed test pattern on the original glass in orientation displayed in the touch panel.
% For the test patterns of 8-1/2 e 11v or A4v, place the output two sheets side by side.
9 Place 10 or more sheets of blank paper on top of the test pattern to prevent it from becoming
transparent.
10 Close the ADF.
11 Press the [Start] key.
The test pattern is scanned.
The gradation level is automatically adjusted.
12 Repeat steps 5 through 11 two more times.