Chapter 6 - page 9
Operator’s manual ASTRONAUT
M-HE.002.1003
Always replace the teat cup liners on time to avoid substantial
differences. Worn liners may not always cause immediate
problems where milk quality or milking operation itself are
concerned. On the other hand, a substantial difference between
old and new teat cup liners makes the cows anxious and
troublesome, which may lead to an increased number of failed
milkings.
We recommend you to register the replacement dates, because
from the above mentioned you may conclude that the teat cup
liners need to be replaced within a relatively short notice.
Another possibility is to set a fixed day, for instance every third
Saturday of the month.
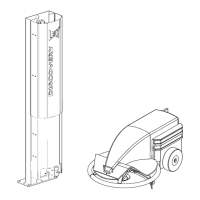
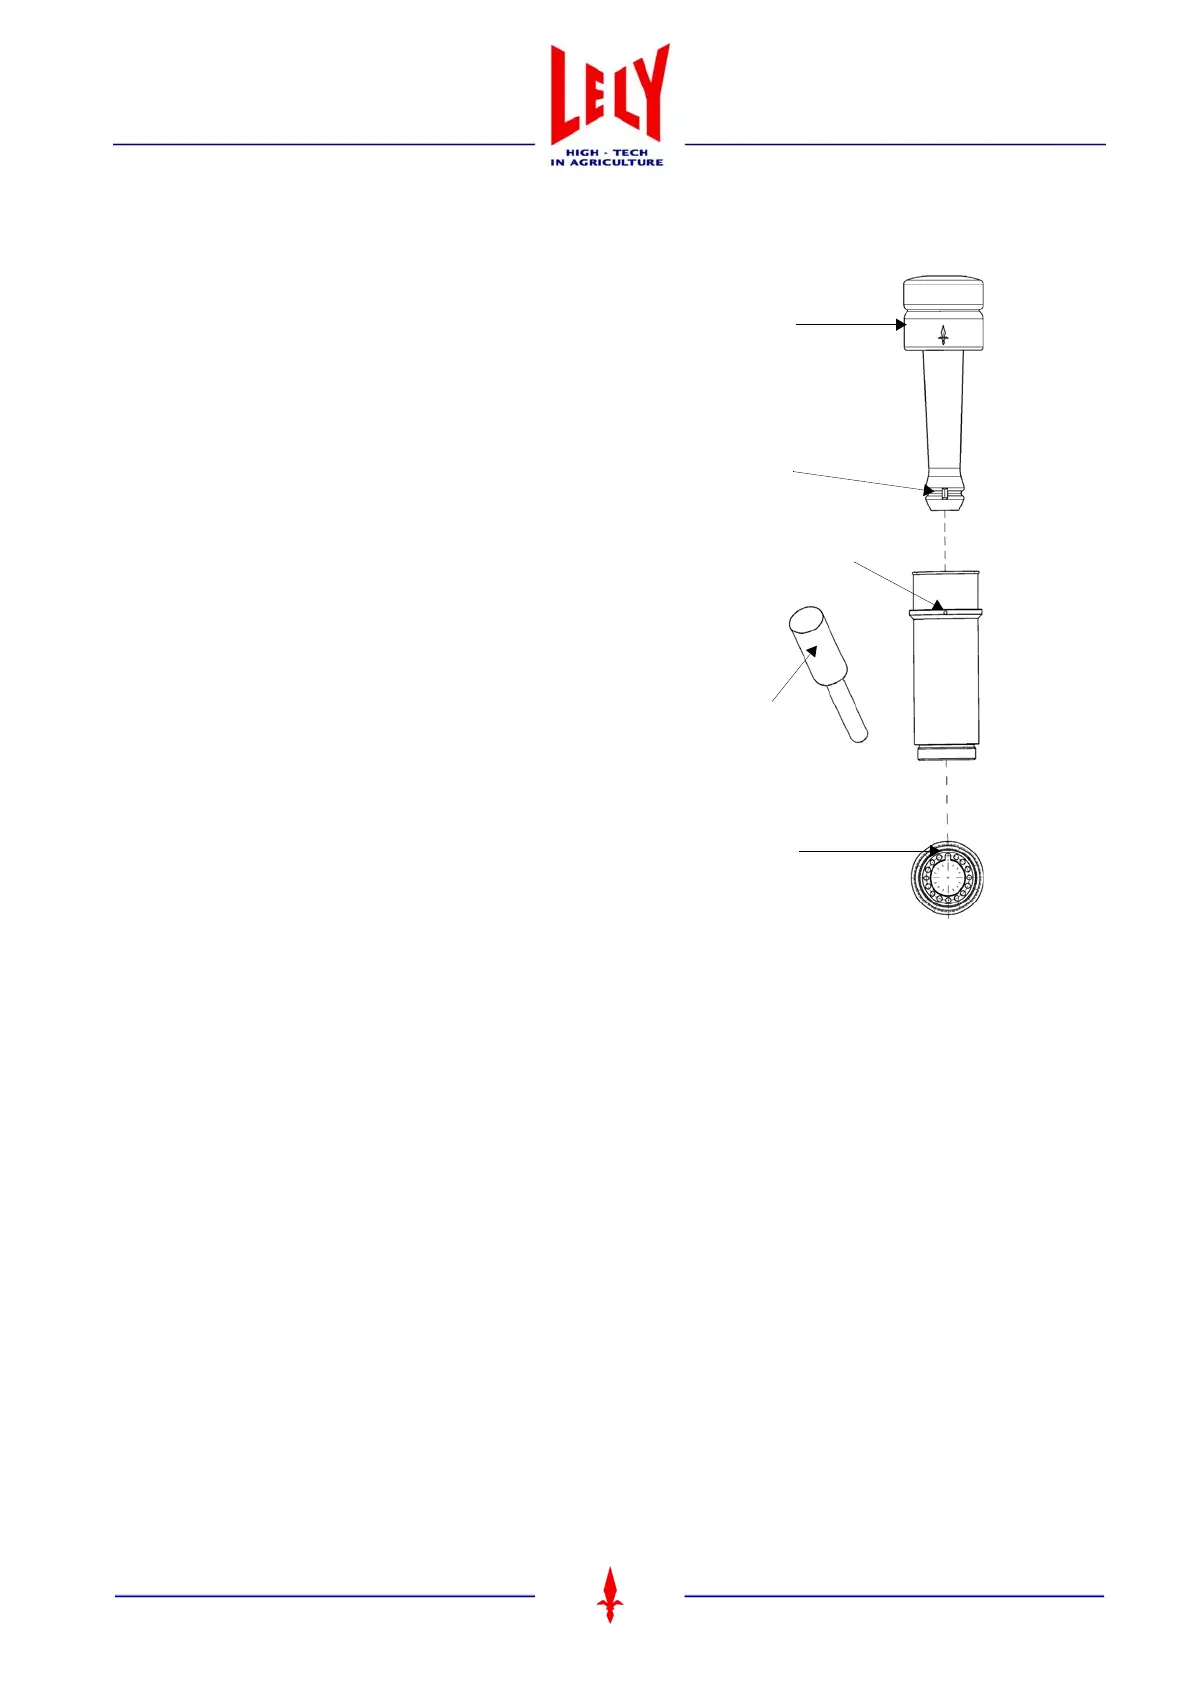
Replace the teat liners as follows:
• Use your hands to untighten the synthetic teat cup from the
stainless steel milk collecting cup.
• Remove the old teat liner.
• Place the new teat liner in the teat cup. Make sure that the
marks (A and B, figure 6.12) are positioned opposite of one
another to make sure that the liner is not twisted.
• The bulge (C) on the teat liner must be positioned into the
recess (D) at the bottom of the teat cup.
• The teat cup can be pressed from the top by means of the
tool (E) until the edge of the teat cup is positioned in the
groove at the bottom of the teat liner.
• Apply a lubricant or detergent at the bottom of the liners
interior and the outside of the cone.
• Tighten the teat cup with your hand onto the milk collecting
cup. If the teat cup is tightened, check once again if the teat
liner is not twisted.
• Start a short rinsing session. Also refer to section 3.4.3 ’Set
Cleaning’ to clean the new teat liners.
Figure 6.12 Teat liner installation
A
C
B
E
D