4.4.Adjustment after calibration
43
4
Calibration
POINT
- Refer to “3.5. Input of numerical values”
for more information about how to enter
numerical values.
3. Tap [OK].
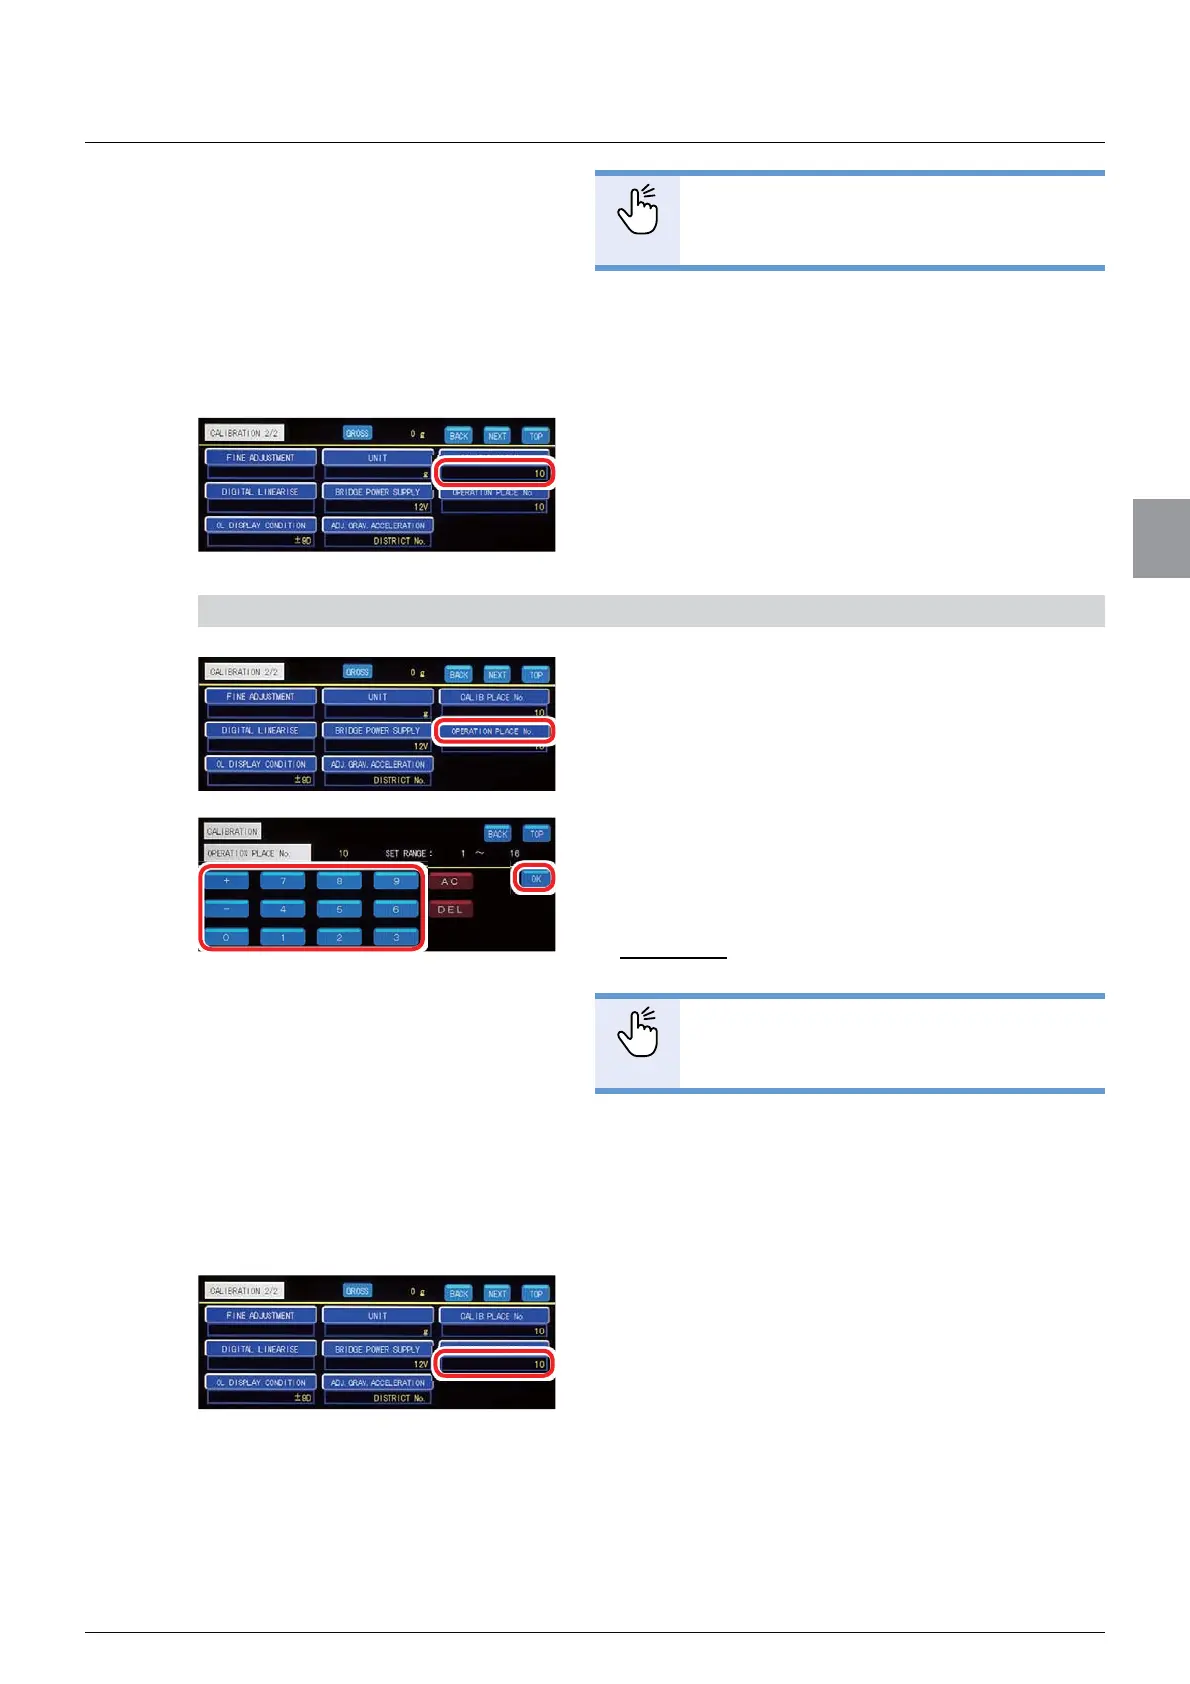
The district No. of the calibration place has been
set, and [CALIBRATION 2/2] will be displayed.
&RQ¿UPWKHGLVWULFW1RRIWKHFDOLEUDWLRQ
place.
The setting is completed if the district No. you have
entered appears under [CALIB. PLACE No. ].
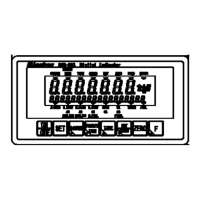
3) Specify [DISTRICT No] of the point of use
1. Tap [OPERATION PLACE No. ] on
[CALIBRATION 2/2].
The screen to specify [DISTRICT No. ] of the point
of use will be displayed.
2. Refer to the “Table of gravitational
acceleration compensation” (at the end of 4.4.5.)
to enter [DISTRICT No. ] of the point of use.
Allowable range: 1 to 16
Default: 10
POINT
- Refer to “3.5. Input of numerical values”
for more information about how to enter
numerical values.
3. Tap [OK].
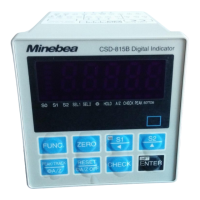
[DISTRICT No. ] of the point of use has been set,
and [CALIBRATION 2/2] will be displayed.
&RQ¿UP>',675,&71R@RIWKHSRLQWRIXVH
The setting is completed if [DISTRICT No. ] you
have entered appears under [OPERATION PLACE
No. ].