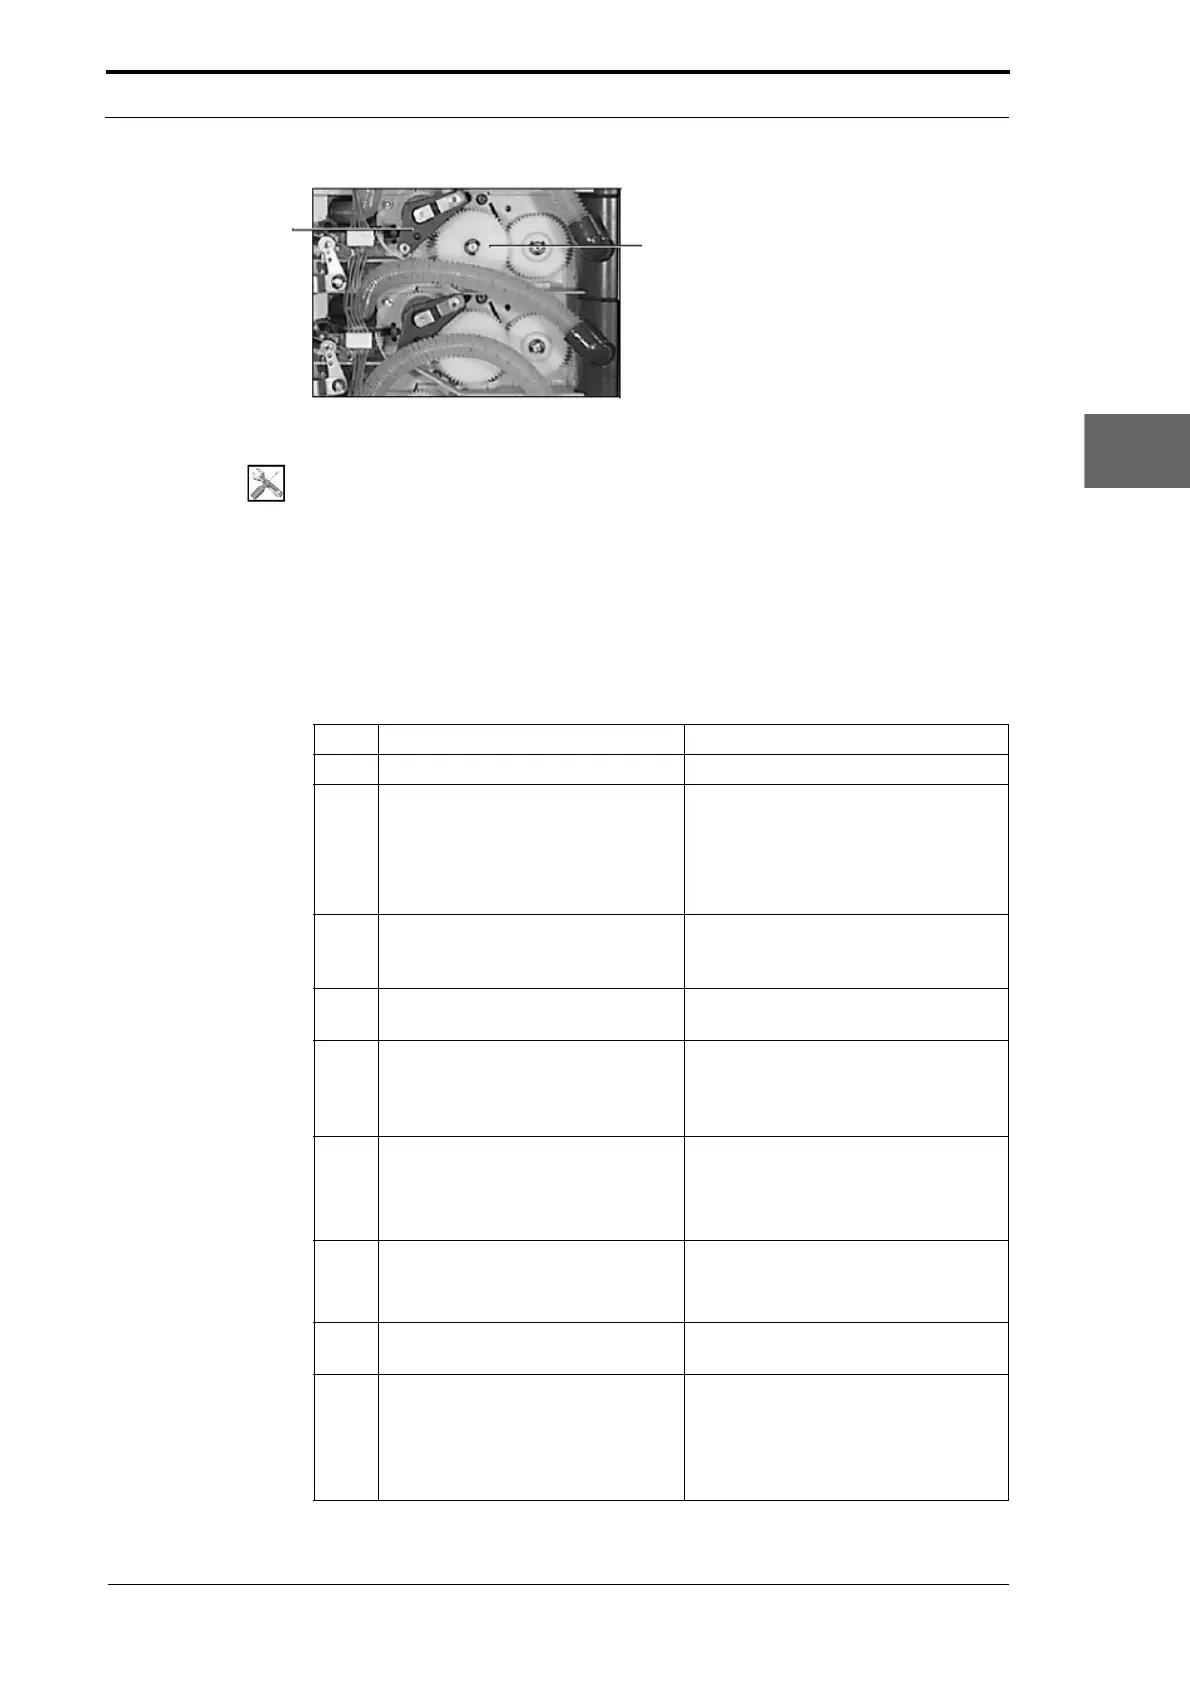
Drive Gears
Feed Clutch Plate
Assembly
Morgana DocuMaster MFC - Service Manual 143
4. Service Procedures - Replace Components - Friction Feed Bin
Figure 4.143 Friction Feed Bin Secondary Gear Drive
Tools:
• Allen Key: 3mm
• Spanner: 8mm
• Screwdriver: Small Flat-blade, Large Flat-blade.
Before you start:
• Remove the top RH side cover (See Section 4.2.5)
• Remove the top LH side cover (See Section 4.2.6)
• Remove the GUI panel (as necessary) (See Section 4.7.4).
Step Action Information
1 Remove the clutch plate assembly. (See Section 4.9.2).
2 Remove the two drive gears from
the R
H side plate.
(See Figure 4.143)
• Remove the circlip.
• Pull the gear towards you
• Be careful not to drop the drive
pins in the shaft behind the gear.
3 Turn the earth tab on the LH side
plate away from the outer conveyor
shaft.
4 Remove the two circlips from both
ends of the outer
conveyor shaft.
5 Remove the two flanged bushes
from both ends of the
outer
conveyor shaft.
Note: Each flanged bush is under-cut
behind the flange on one side. The
under-cut must be below the bush
when it is installed.
6 Remove the outer conveyor shaft.
• Slide the shaft into the RH side
plate to release the LH end of the
shaft.
• Pull the shaft towards you.
7 Remove the conveyor wheels from
the shaft.
• Lubricate with water if required.
• Slide the conveyor wheels off the
shaft.
8 Fit the replacement conveyor
wheels.
9 Do a check that the conveyor
wheels are aligned
and turn
straight.
• When the machine has been
reassembled, turn on CLEANING
mode (see Section 4.13.2).
• Adjust the conveyor wheels with
the shaft of a large screwdriver.