34 User Manual Version 3.1
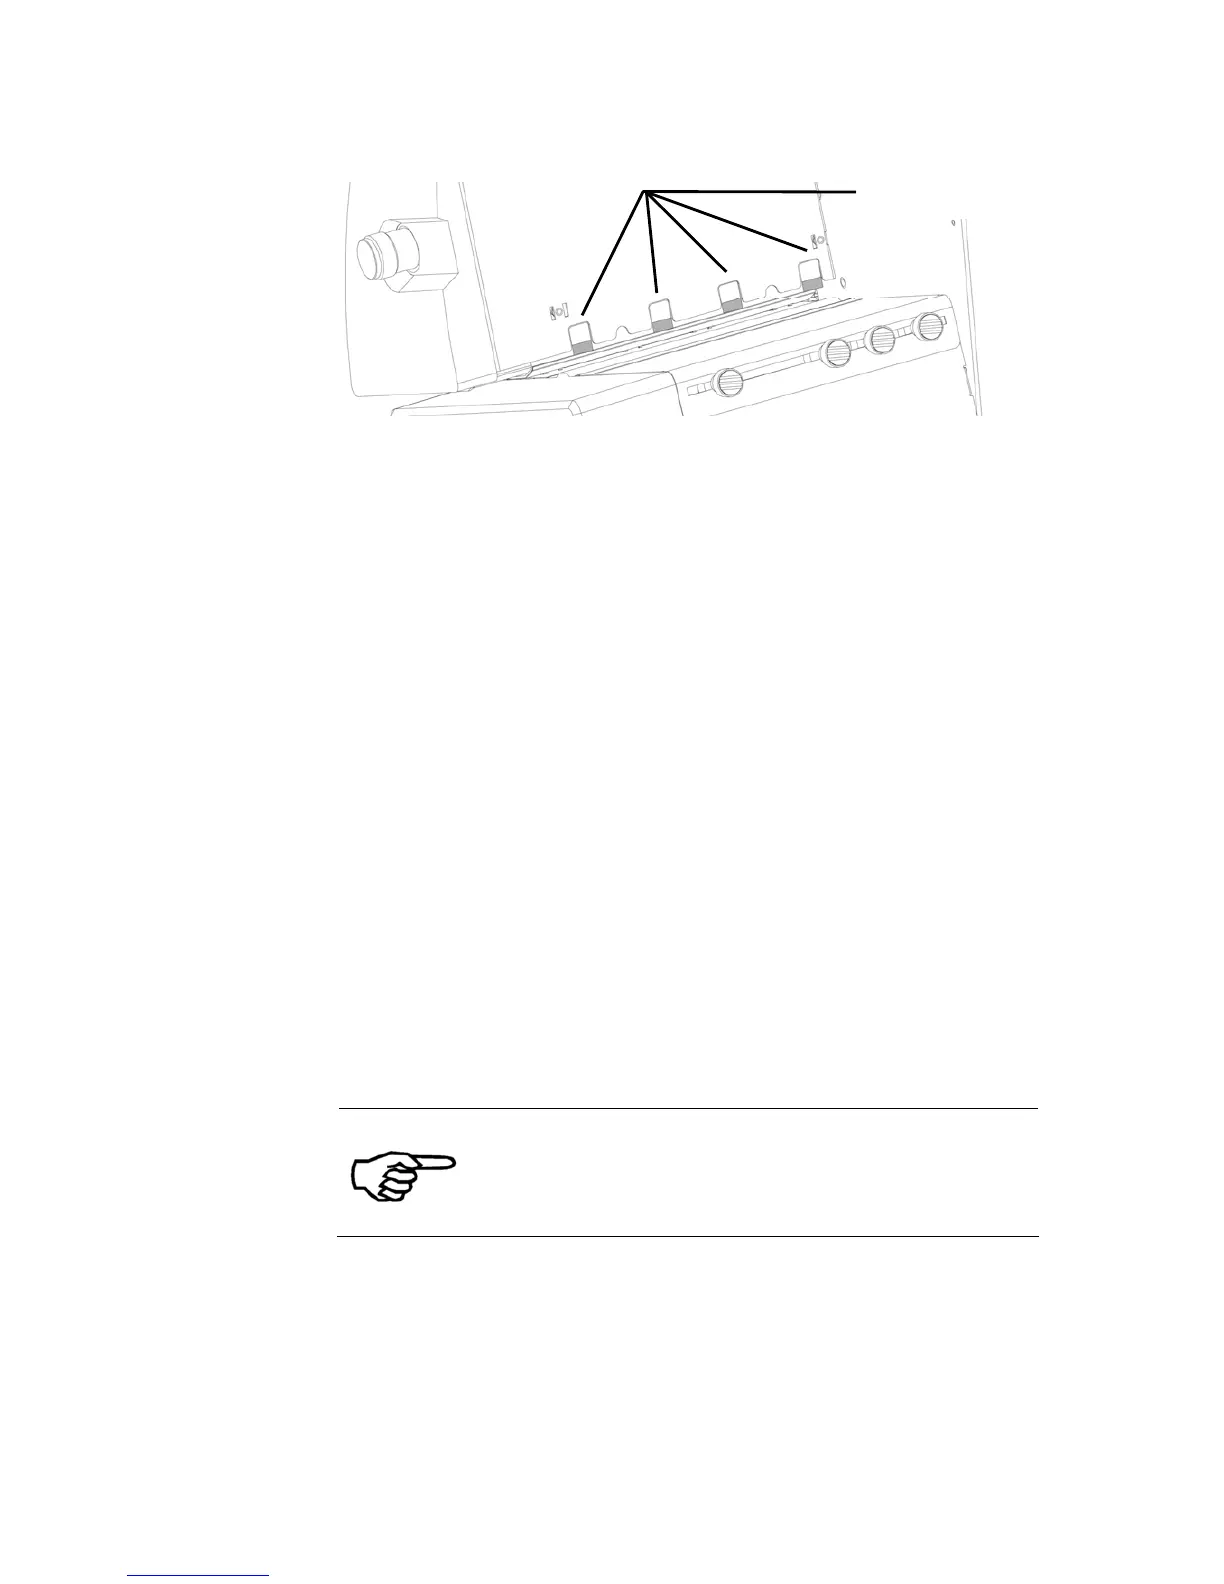
Figure 11: Separation fingers
2. Adjust the
paper side
guides
• Loosen the fixing screws (C) of both paper side guides (see Figure
12).
• Move the two paper side guides apart.
• Put in one medium in the feeder according to your desired print
position. Use the ruler to determine the position. Please note that
the print directions NOR (Normal) and REV (Reverse) have
different zero positions (see Figure 13). For further information
about the print direction please see chapter 5.6 „How to set the
print direction (orientation)”, on page 40.
• Make sure that you medium covers the paper sensor. The position
of the paper sensor is indicated on the label with the scale (see
Figure 14).
• Push the side guides back towards the medium.
• The side guides should be close to the medium so that it cannot
turn when it is pulled into the printer. But the side guides should
not clamp the medium.
• Position the paper feed ramp in the middle of the two side guides.
• See Figure 12 for an sample setup with a C5 envelope.
Different material sizes
The optional available paper side guides for different
formats makes the feeding of these materials more
comfortable. Please see chapter 9.2, on page 135
for further information.
separation fingers