ADJUSTMENT STEPS
Pos: 61.27 /Bedienungsan leitungen/Gerät e spezifisch/Druc ker/Menüpunkte Druc ker/Ü3/Ü4/Ü4_130315_C ARRIAGE CORRECT._AS-700/ 710 @ 0\mod_12547298519 87_912.doc @ 4183 @
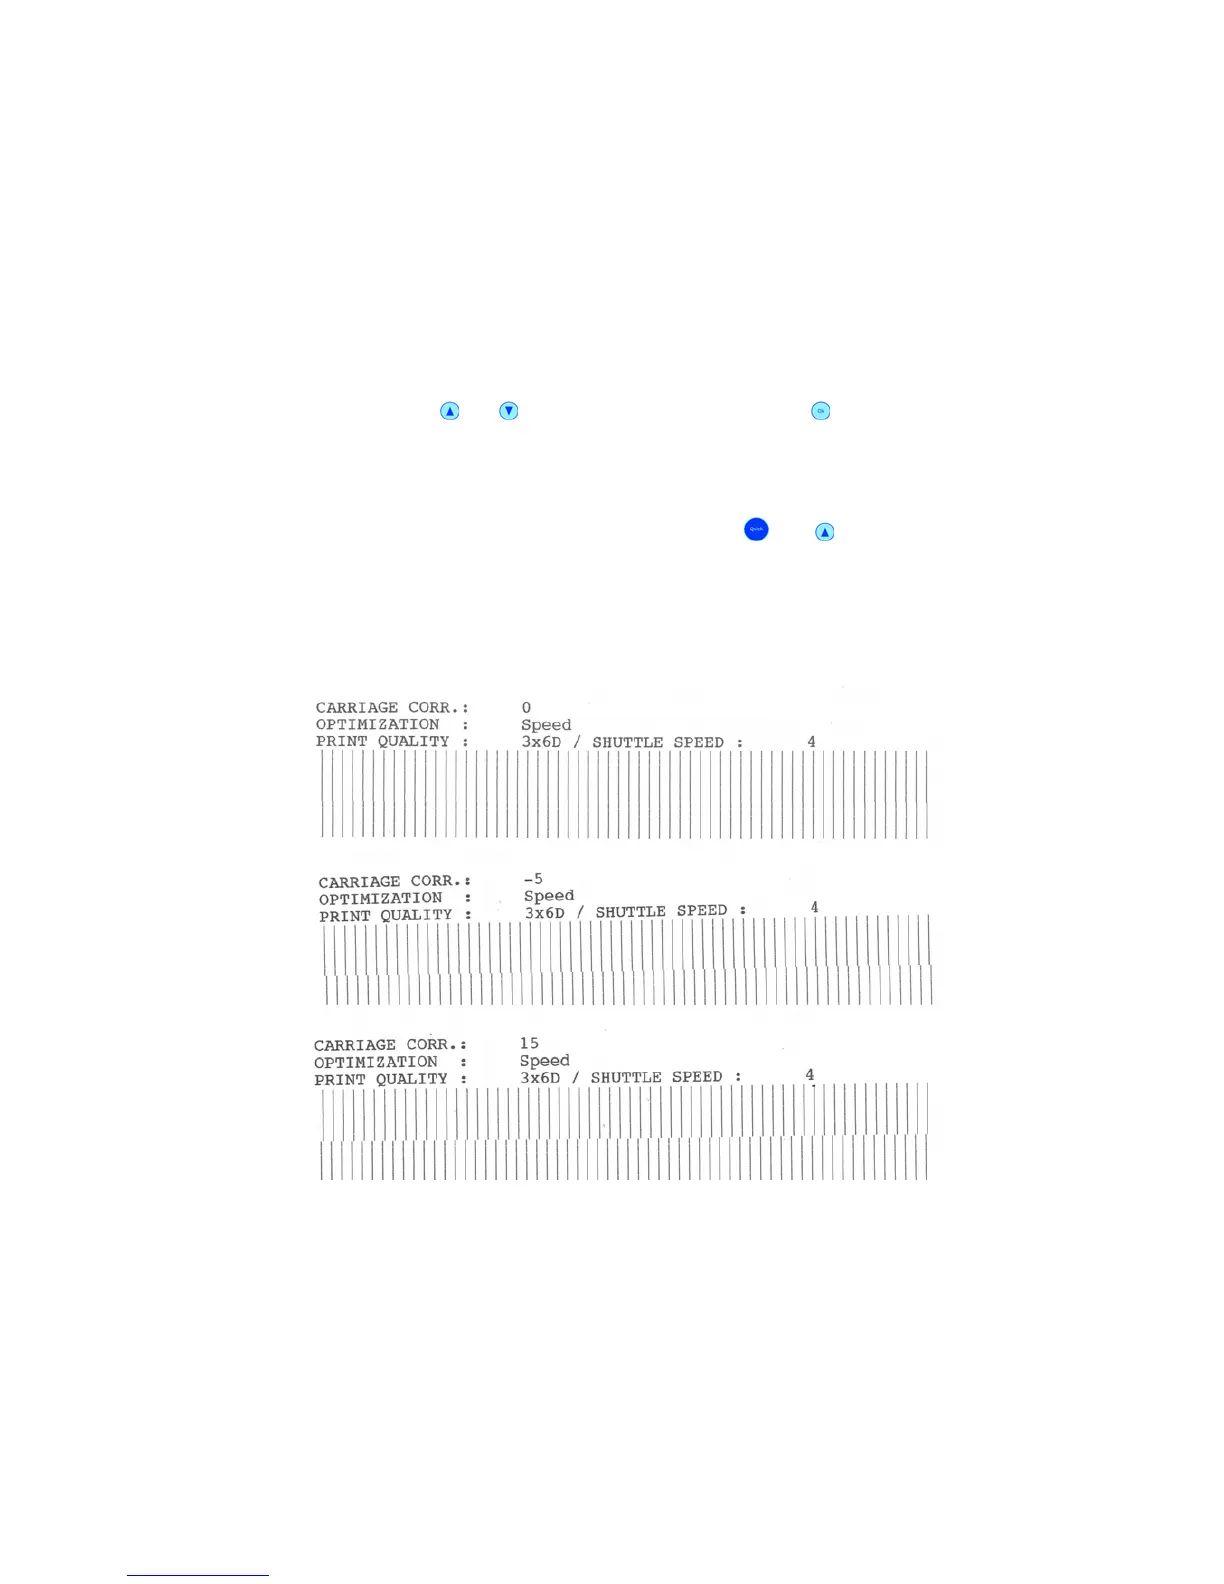
CARRIAGE CORRECT.
Here you can set adjust a horizontal offset between the print of two carriage movements.
The beginning of the print can be adjusted in 0.04 mm (
1
/
600
’’) increments.
To set an offset use the
or buttons and press the “Ok” button to confirm your
setting. Your setting will now be displayed as “Current” setting.
-15, -14, ..., -1, 0, +1, ..., +14, +15
Default: 0
To test an offset setting, use the key combination “Quick”
and (Test Print) button. The
printer will print a TEST PRINT. See sample test pages in Figure 20.
Check the test print if there is a visible offset between the different lines of the carriage
movements and set a new offset value if necessary.
Figure 20: CARRIAGE CORRECT.
Pos: 61.28 /Bedienungsan leitungen/Gerät e spezifisch/Druc ker/Menüpunkte Druc ker/Ü3/Ü4/Ü3_1304_Ad just TOF_Shuttle_Hea d @ 0\mod_1254749905983_9 12.doc @ 4233 @