5.3 How to setup the feeder
To setup the feeder you need to perform the following steps in this order:
1. Adjust the separation
2. Adjust the paper side guides
3. Fill the feeder with material
4. Adjust the paper feed ramp
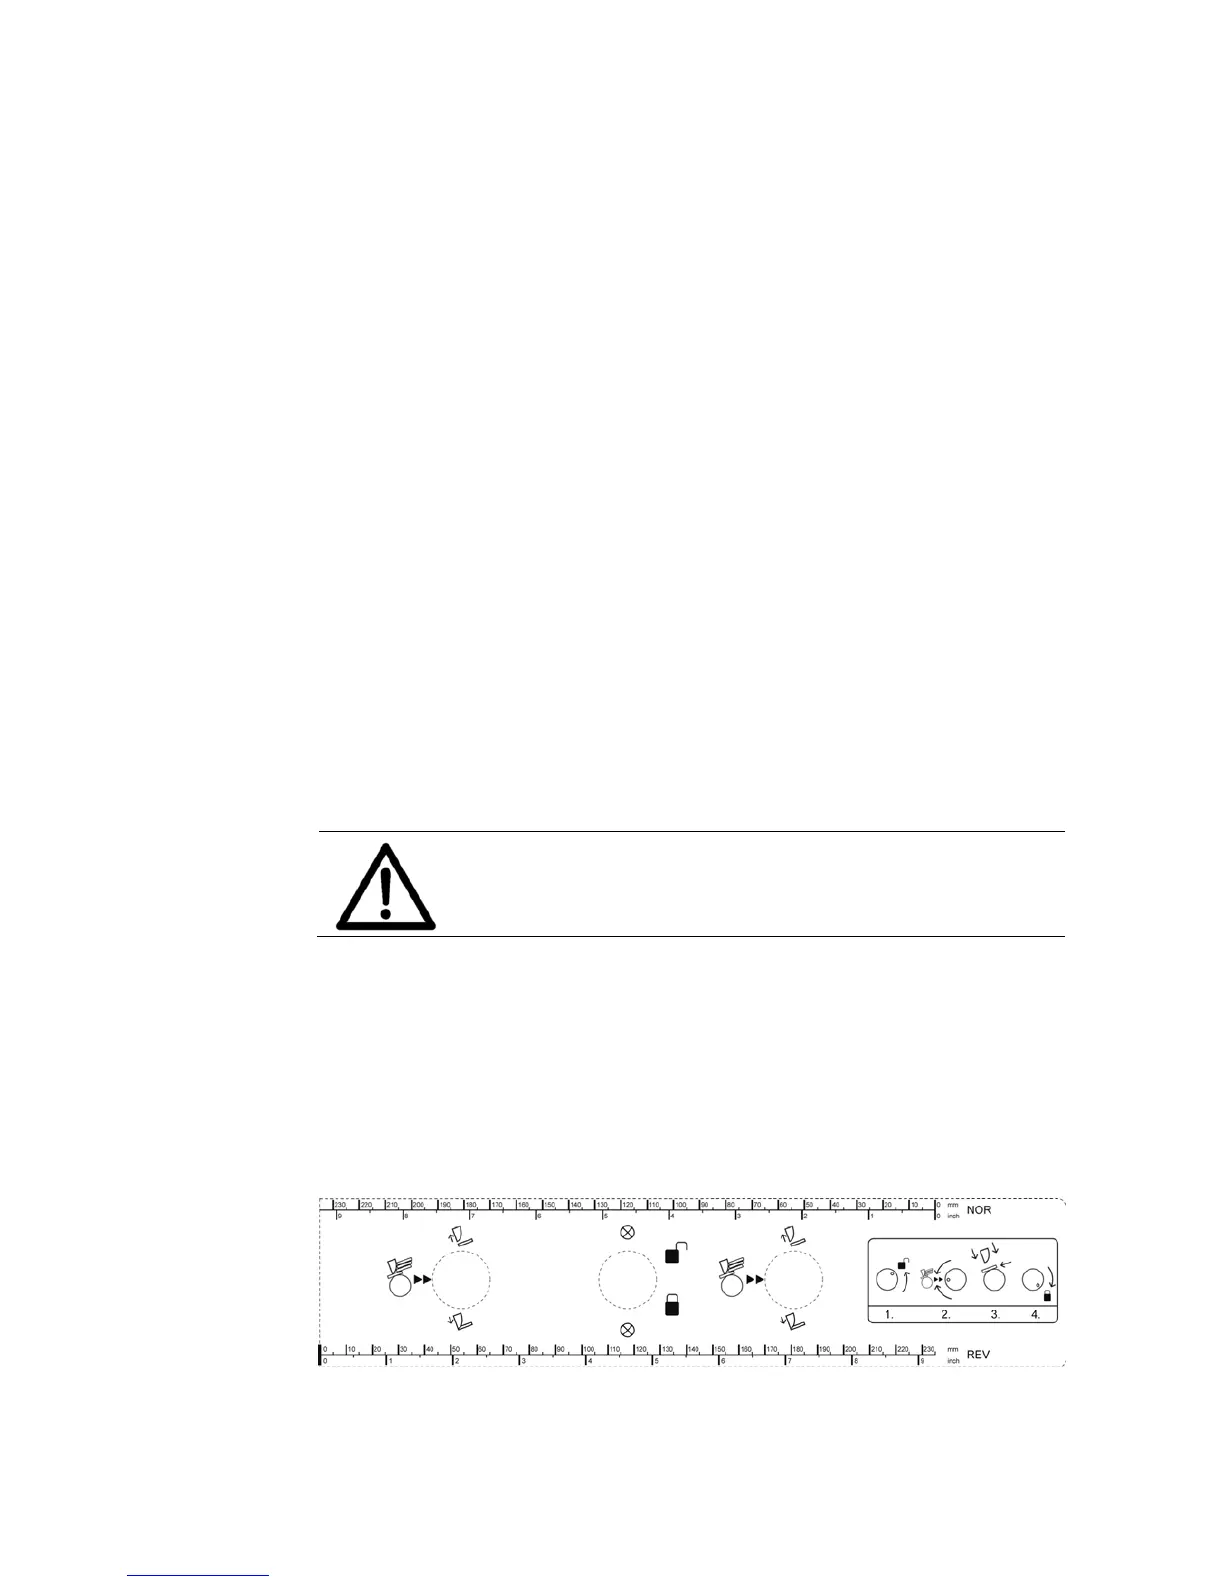
1. Adjust
the
separation
• Unlock the separation lock knob (A) by turning it counter-clockwise.
• Set both separation adjustment knobs (B) to the mid-position. The mid-
position is indicated by the two arrows ``.
• Lift the complete separation by pulling the separation lock knob (A)
upwards.
• Depending on your medium put one or two pieces under all four
separation fingers (see Figure 11).
Thin medium (e.g. single sheets with 100 g/m²)
= two pieces under the fingers
Envelopes
= put the thickest part of the envelope (= flap) under the fingers
When using a narrow medium put two or more pieces next to each
other so that there is material under each separation finger.
Setup all separation fingers
Make sure that there is a medium under each separation
finger. Otherwise unused fingers could wear the feed
roller.
• Drop the separation fingers so that they sit on the medium.
• Lock the separation lock knob (A) by turning it clockwise. Now the
separation fingers are fixed at the correct height.
• Pull out the medium.
• If the paper becomes skewed as it is pulled in, make fine adjustments
with the separation adjustment knobs (B).
•