Correct IP address syntax
Don’t enter the unnecessary “0
” digits of the IP address in the
properties window. If the IP address is not entered correct, the PC
cannot establish a connection to the printer.
Example:
NOT correct
: 192.168.005.008
Correct: 192.168.5.8
3. Check
customs
settings
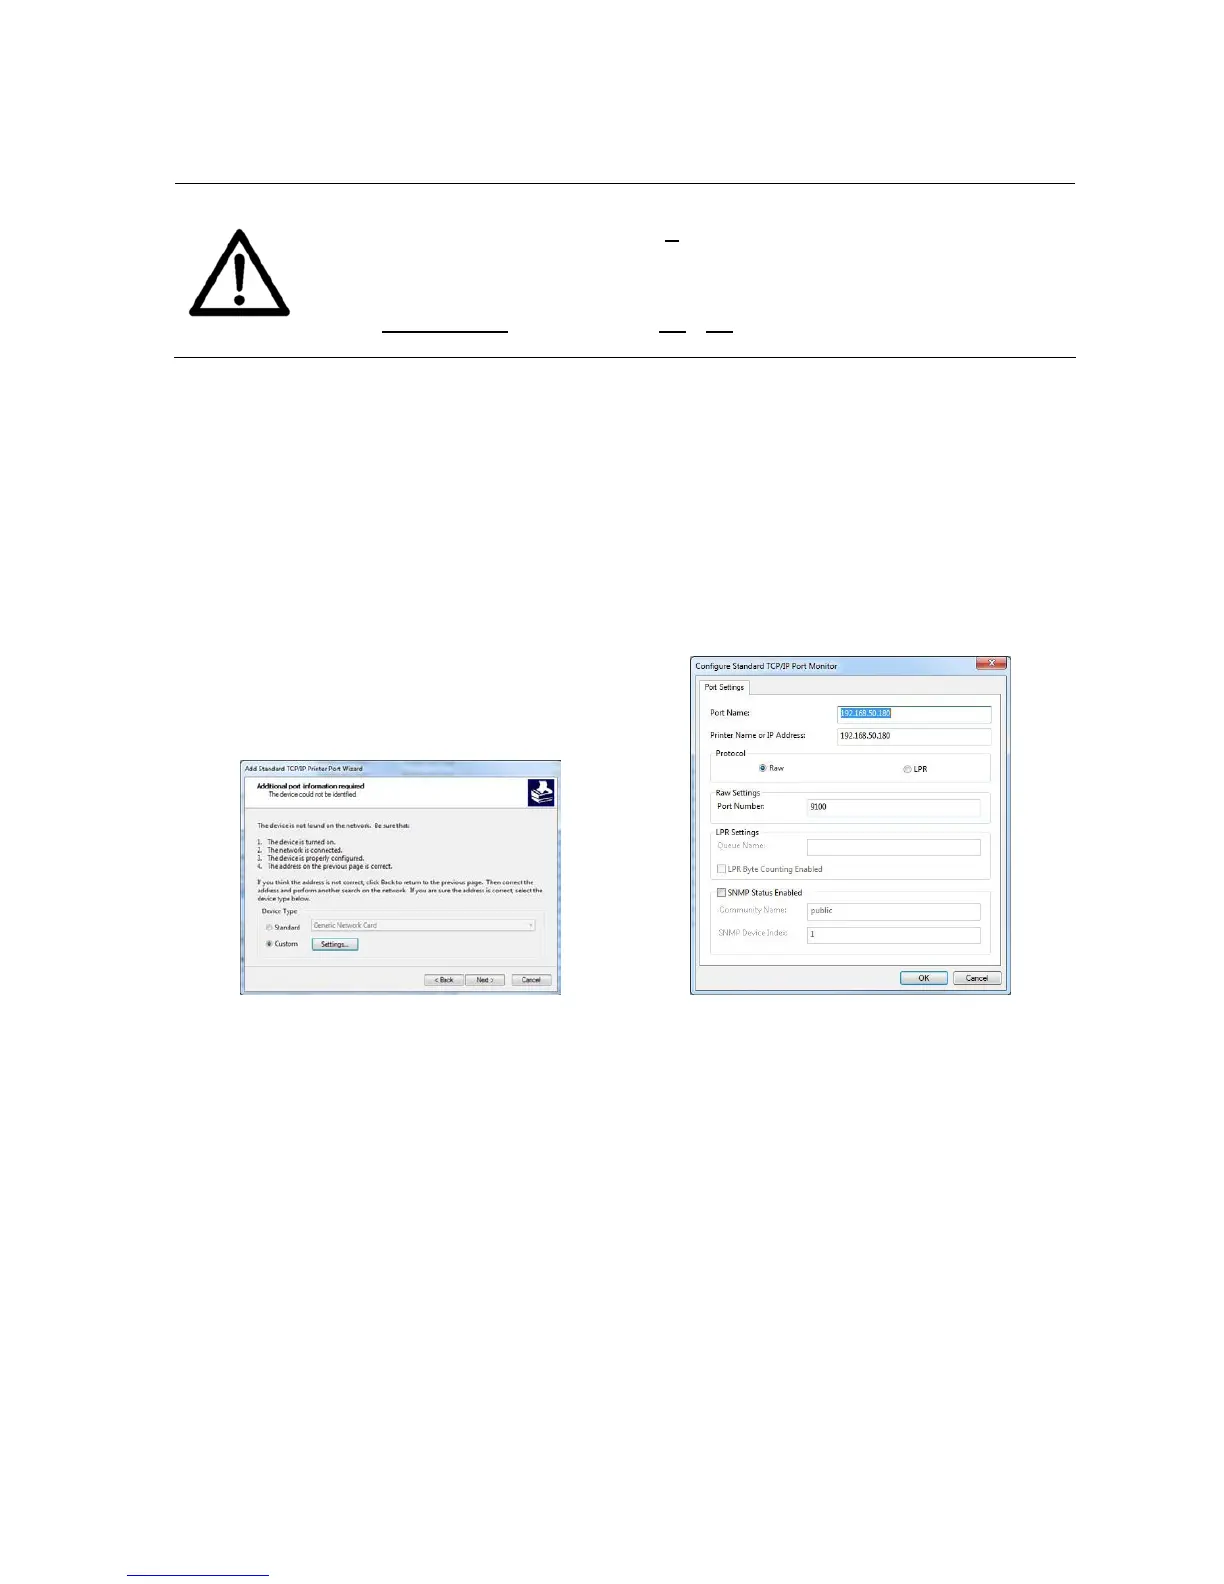
• After the detection select “Custom” and click on “Settings…” (see
Figure 43).
• Set the “Port number” to the same value as set in the printer.
Then click on “OK”. Make sure the Protocol is set to “RAW” (See
Figure 44. This figure only shows a sample IP address. Make sure
to enter the IP address used in your installation).
• Check the settings and click on “Finish”.
Figure 43: Custom settings Figure 44: Custom settings of printer port
• Now this printer driver is ready to send data via the TCP/IP port.
Make sure that the box at the new “Standard TCP/IP Port” is
checked (see Figure 45).
• To use the Ethernet connection for printing, select this printer
driver in your software application.