Page | 214
RATE
The RATE knob operates in similar fashion to SELECT. Rotate the knob to modify the transition Rate for
delegated layers. Or press the knob to cycle through the standard Slow, Medium and Fast presets.
Hint: You can assign the A and B rows of M/Es as well as the main PGM and PREV rows to color groups by
turning the respective Select and Rate knobs with the Shift button held down.
FADE & TRANS
These two buttons provide a quick way to control the Transition Bin selection for the delegated
switcher layer(s). The FADE and TRANS (Transition) buttons are mutually exclusive; selecting
either one cancels the other, and only the currently active button remains lit.
Pushing FADE offers a quick and convenient way to select the Crossfade transition. Push the
TRANS button to activate the last-used transition icons for a video layer (or layers. For new
sessions, TRANS jumps to the first transition in the bin.
PERFORMING TRANSITIONS
Just as in the user interface, the TriCaster control surface provides both local and main transition controls.
MAIN T-BAR, TAKE AND AUTO
These controls correspond exactly to their Live Desktop counterparts, and affect all currently delegated video
layers (BKGD, DSK 1-4) at the same time.
LOCAL TAKE & AUTO
Again, just as in the Live Desktop, local Take and Auto buttons are provided for DSK 1 - DSK 4. These perform
a cut or transition respectively, affecting only the corresponding switcher layer.
Hint: When a DSK layer is fully displayed on Program out, its local Take button (on the Live Desktop as well
as the control surface) remains lit.
21.3.4 M/E CONTROLS
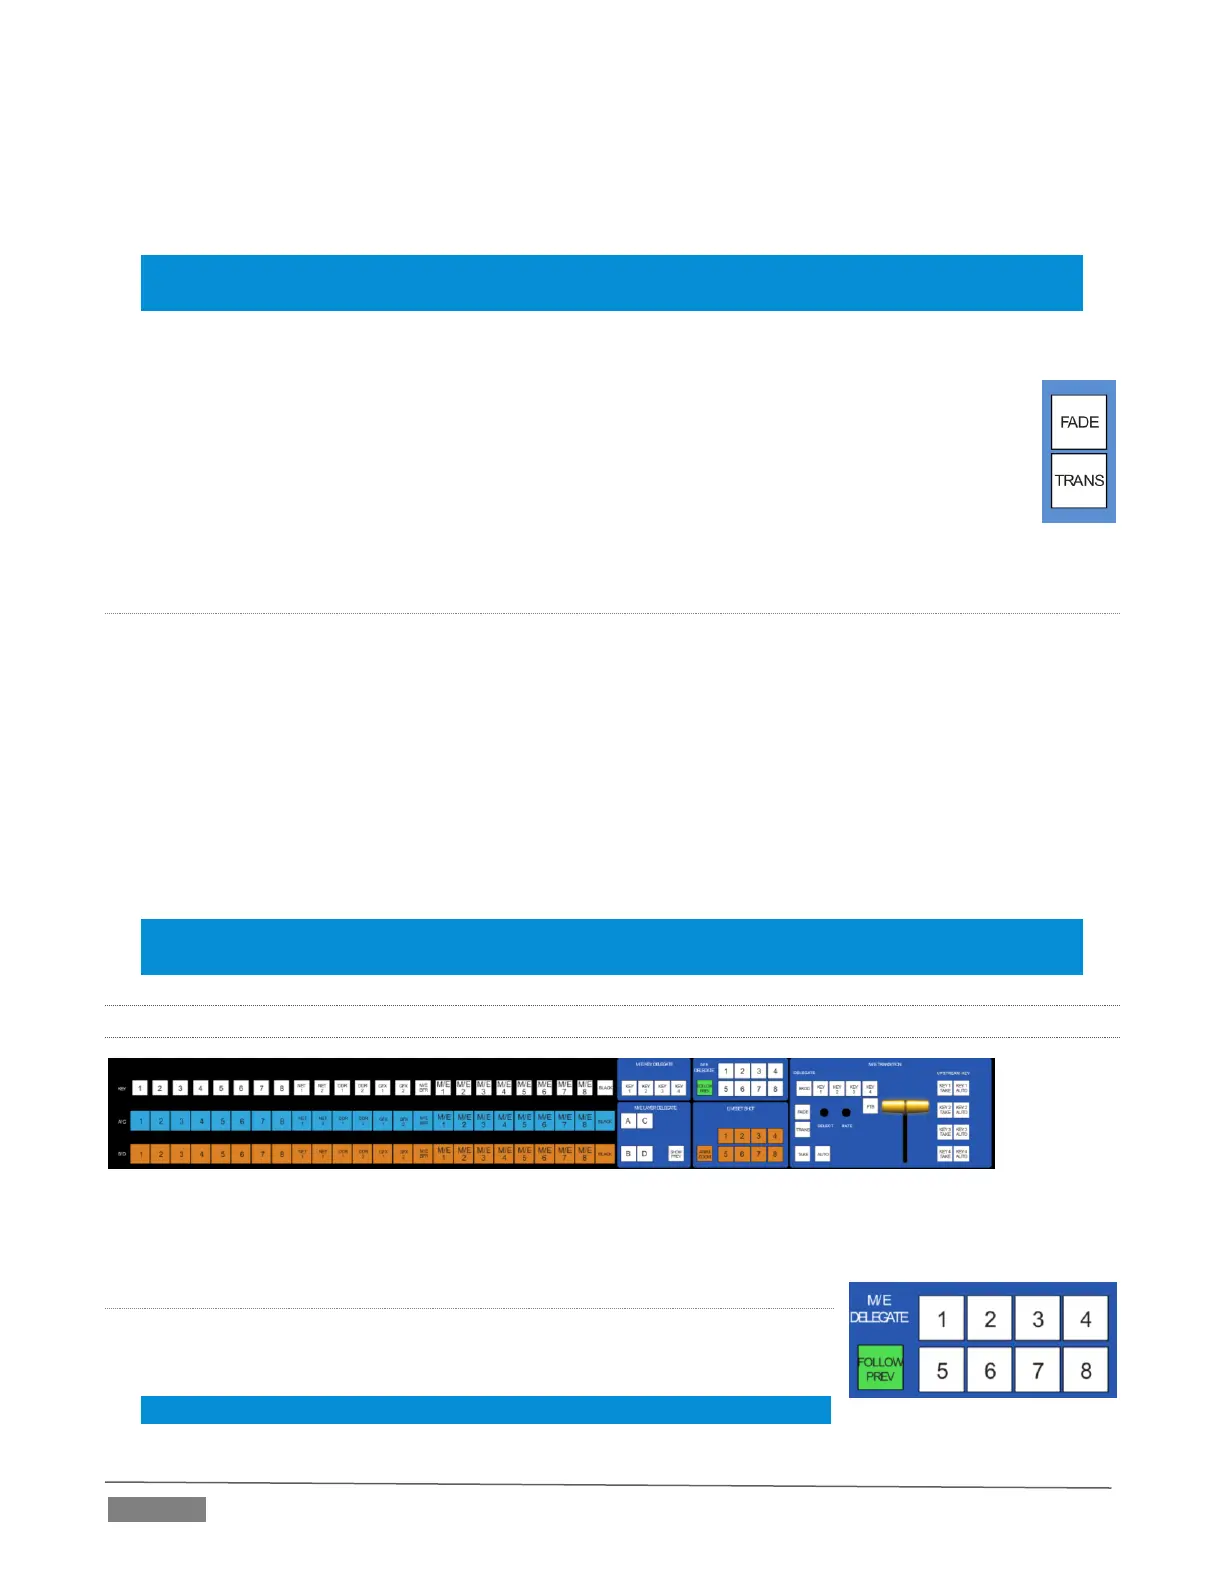
FIGURE 21-7
This section of the control surface corresponds to the tabbed M/E pane on the Live Desktop.
M/E DELEGATE
As you’d expect, the eight buttons in the M/E DELEGATE group (Figure 21-8)
are used to select (or multi-select) which M/E(s) are being controlled.
Hint: Delegate buttons also toggle the visibility of the M/E pane.
 Loading...