Page | 273
3. At the time of writing, Wirecast
®
does not fully
support interlaced video, so you must also
checkmark De-Interlace at the bottom of the
Network video source menu.
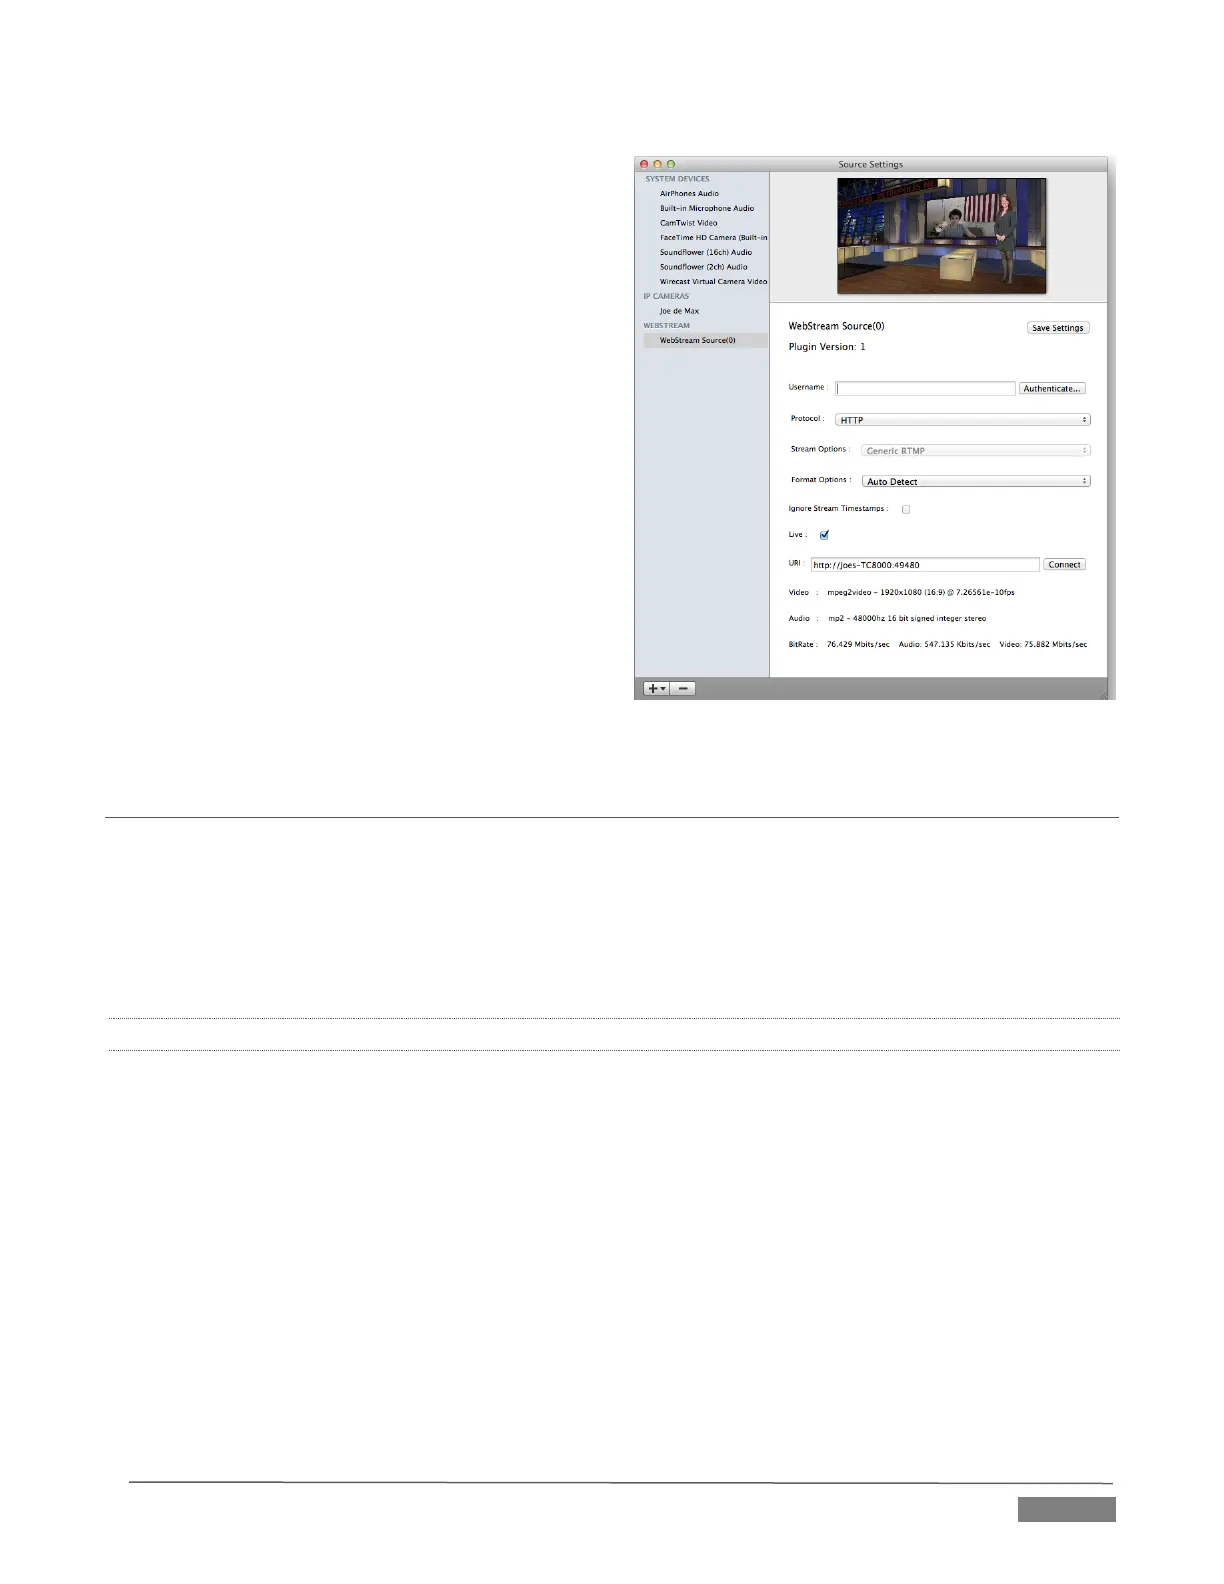
4. Next, open the Sources menu in the Wirecast
®
interface (Figure 21-68), and select the “New
Web Stream” option.
The Source Settings dialog will open.
5. Set Protocol to “HTTP”.
6. Type the Network URL displayed in TriCaster’s
Output Configuration pane into the Wirecast
®
URL field.
TriCaster’s Network video output should now appear
in Wirecast
®
, ready to be added to a shot like any other
valid source.
A.2 SESSIONS
SUPPLEMENTARY QUESTION:
Q: What is a session?
A: Sessions can be thought of as ‘top-level presets’. They store all of the settings, playlists, device
configurations, and so on for a given live production. See Section 5.1.
A.2.1 START AN SD SESSION?
1. Connect your SD sources to TriCaster’s input connectors (see Section 3.4).
2. Connect your SD monitors to TriCaster’s output connectors (see Section 3.7.1)
3. Select the New icon in the Home Page of the Startup Screen.
4. Click the Enter Session Name link (under Session Name at right) and supply a name for the new
session.
5. Select a Volume (hard drive) for the new session.
 Loading...