Section 10 Transferring Data 10-3 Data Transfer Using SPMA
NS-Designer Operation Manual
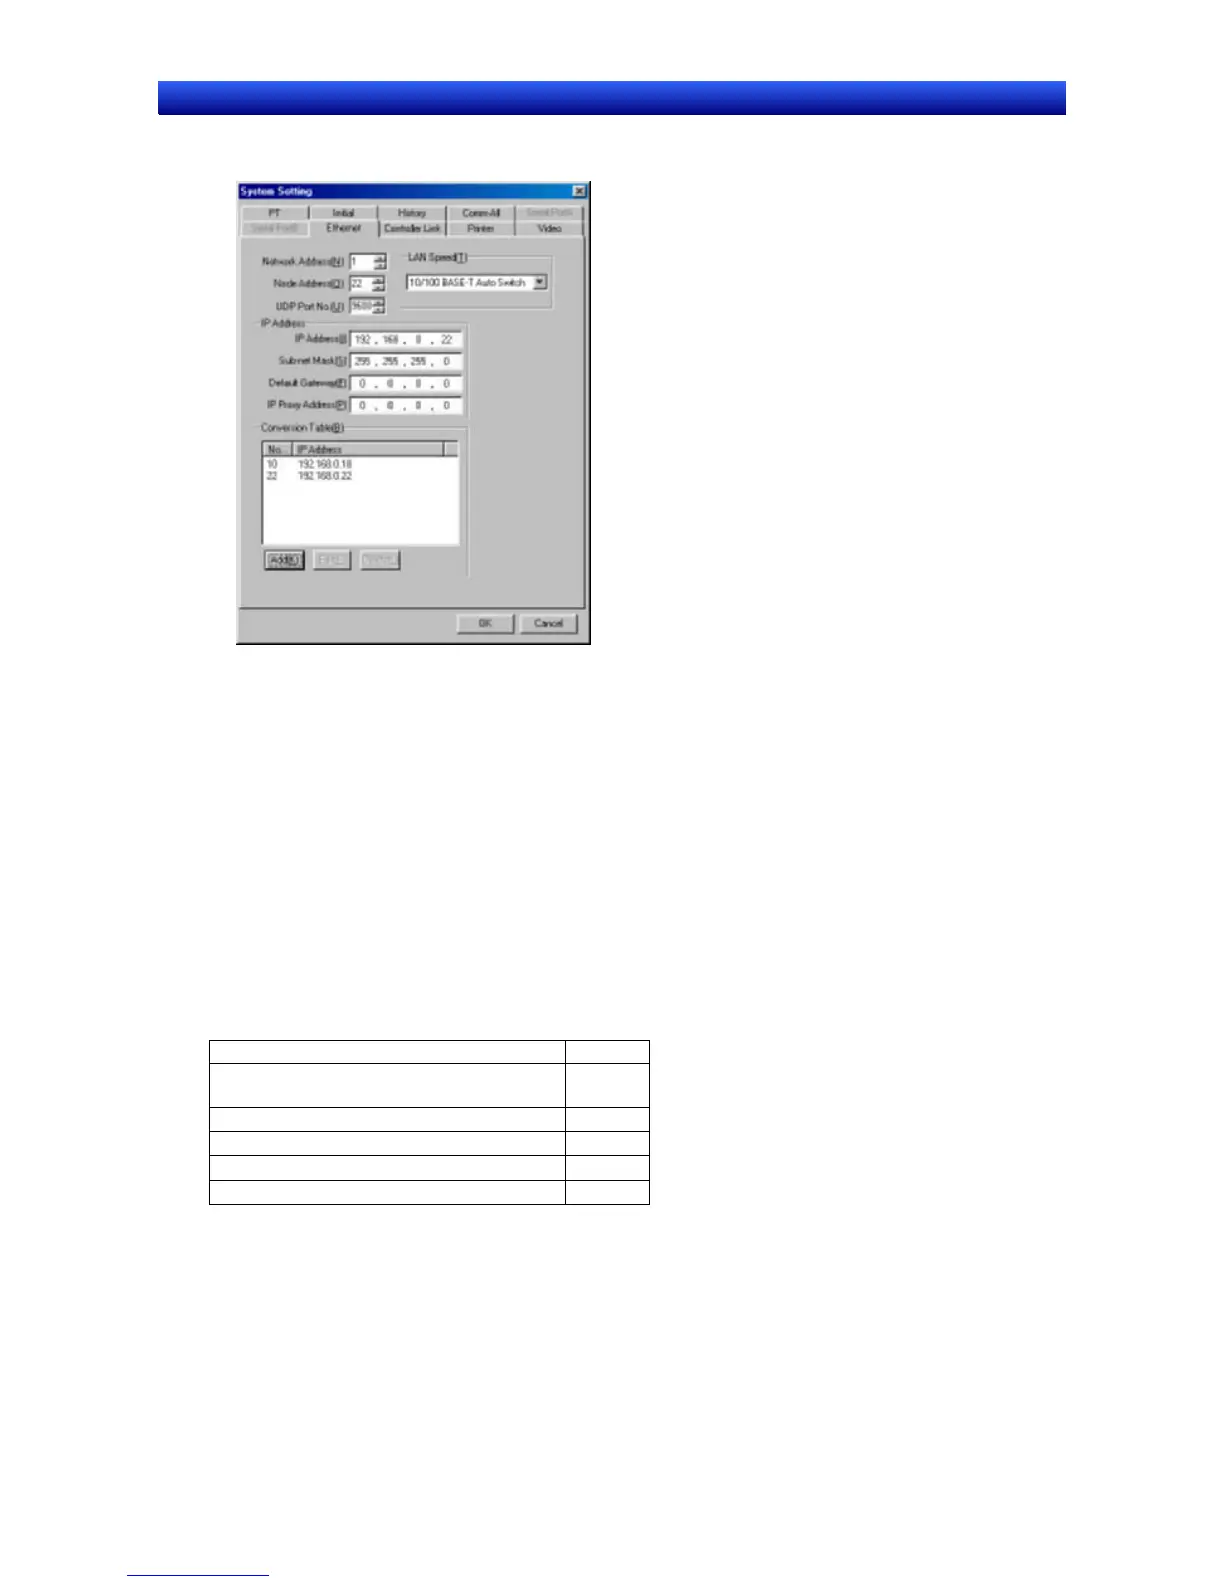
3. Click the Ethernet Tab and make the following settings.
4. Set the network address between the computer and NS-Designer as the network address. In this
example, 1 is set.
5. Set the PT’s node address as the node address. In this example, 22 is set.
6. Set the IP address set for the PT as the IP address. In this example, 192.168.0.22 is set.
7. Next set the subnet mask. In this example, 255.255.255.0 is set.
8. Next, click the Add Button at the bottom left of the dialog box to display the IP Address Setting
Dialog Box. In this example, the node address and IP address set for the PT and computer are set.
9. Click the OK Button.
10. Transfer the above settings together with any desired screen data to the PT.
Settings on the PLC
Start up CX-Programmer. Connect the computer directly to the PLC. Create the following routing table
and transfer it to the PLC.
Item Setting
SIOU (unit number of the PLC’s Controller
Link Unit)
2
Local Network 3
Remote Network 1
Relay Network 3
Relay Node 5
10-55