133
Clocks Section 7-9
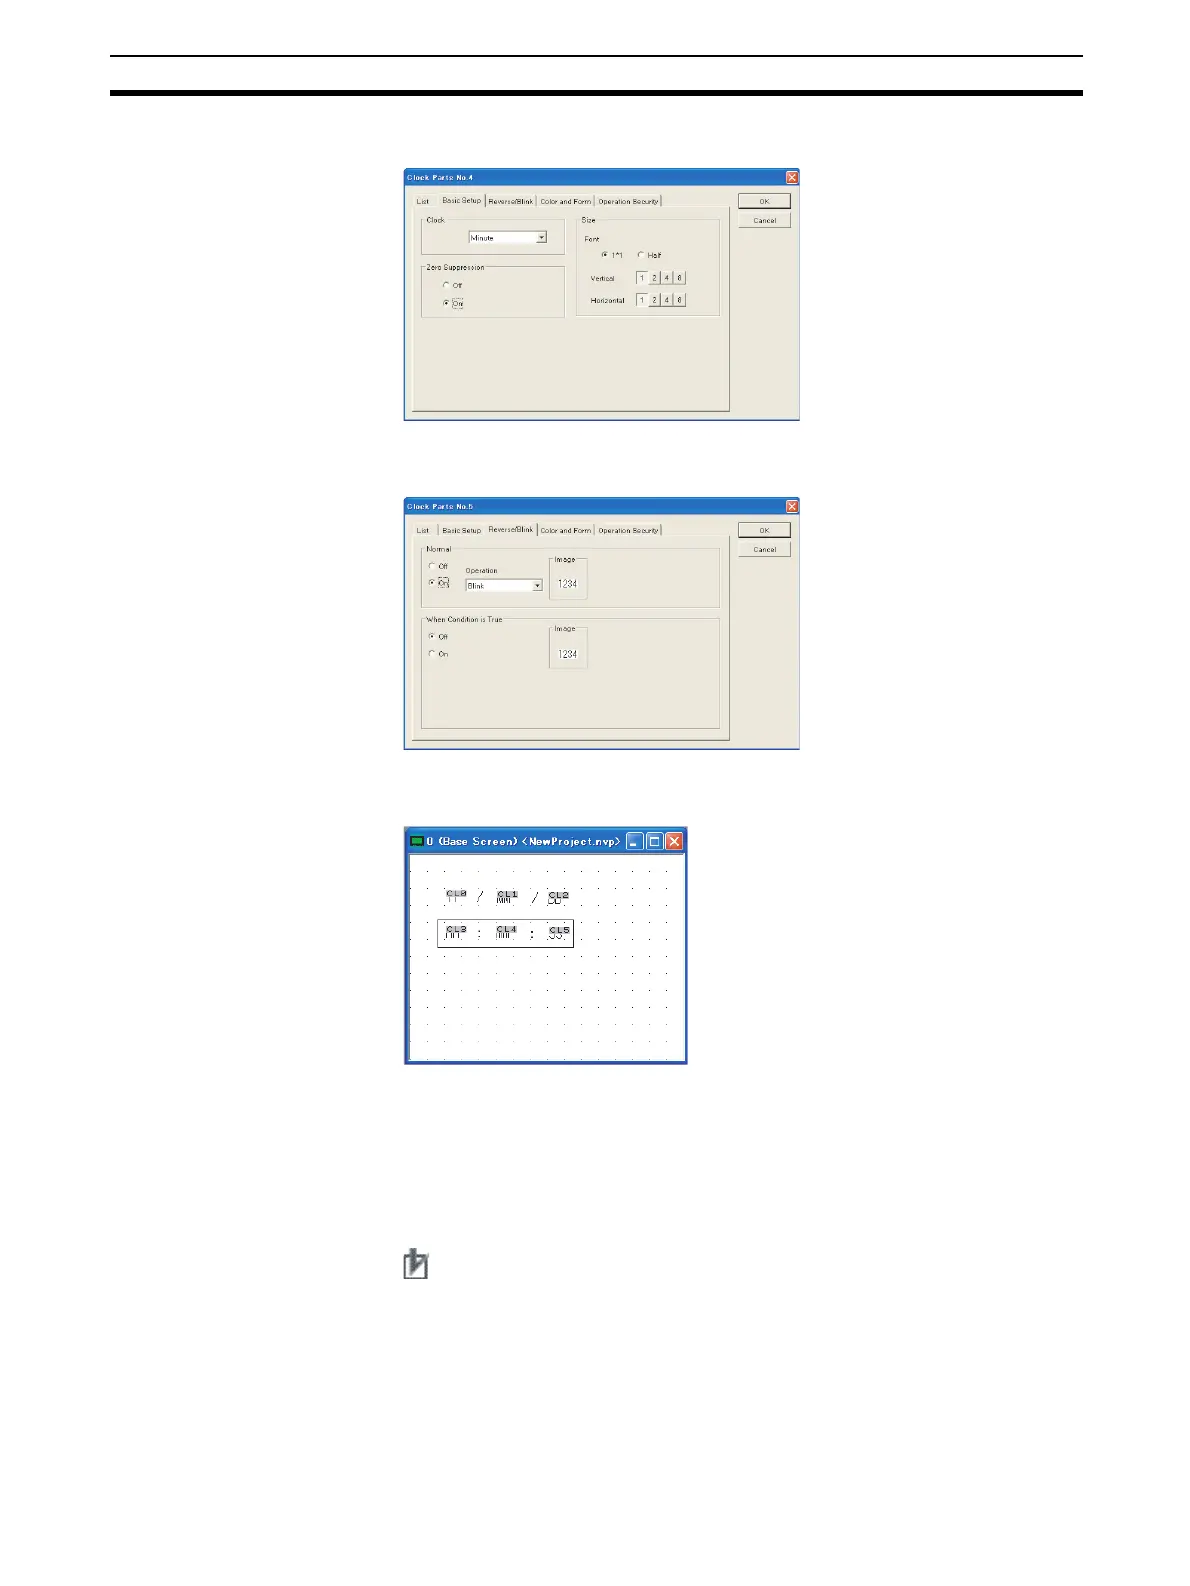
7. Double-click the data part in the lower center and change the settings.
8. Double-click the data part at the lower right and change the settings.
9. Enter character strings and frames on the base screen.
10. Transfer the screen to the PT.
11. Check the display on the PT.
When the transfer has been completed, the clock parts created on the NV-
Designer will be displayed on the PT.
Double-click "CL4" at the
upper right and change the
settings as shown below.
Click the OK Button when you
are finished.
Basic Setup
Clock: Minutes
Double-click "CL5" at the
upper left and change the set-
tings as shown below.
Click the OK Button when you
are finished.
Basic Setup
Clock: Seconds
Reverse/Blink: Normal,
Blink
After all settings have been
made, enclose the date and
time in a rectangle as shown
on the left, and then enter the
year, month, day, hour, min-
utes, and seconds.
Precaution for Correct Operation
When using a clock part, you can select either the PT clock or PLC clock in the
NV Configuration.
• Clock in the PT
Settings can be made with the NV4W/NV3Q, provided a Battery is installed.
•PLC Clock
Always set the PLC clock when a Battery is not being used.
• Refer to 6-2-8 Setup 1 Tab Page for details on clock settings.