Chapter F - ADJUSTMENTS
F-8 Planmeca Compact i
MECHANICAL ADJUSTMENTS
Technical Manual
D-7) Lower the arm to its lowest position.
D-8) Repeat the procedure if necessary. There are totally seven steps to decrease the
tension of the gas spring (from the fully increased spring).
Problems in adjusting the gas spring:
If the tension of the gas spring can not be adjusted, the y-spring may be damaged. In this
case the gas spring can be adjusted as follows:
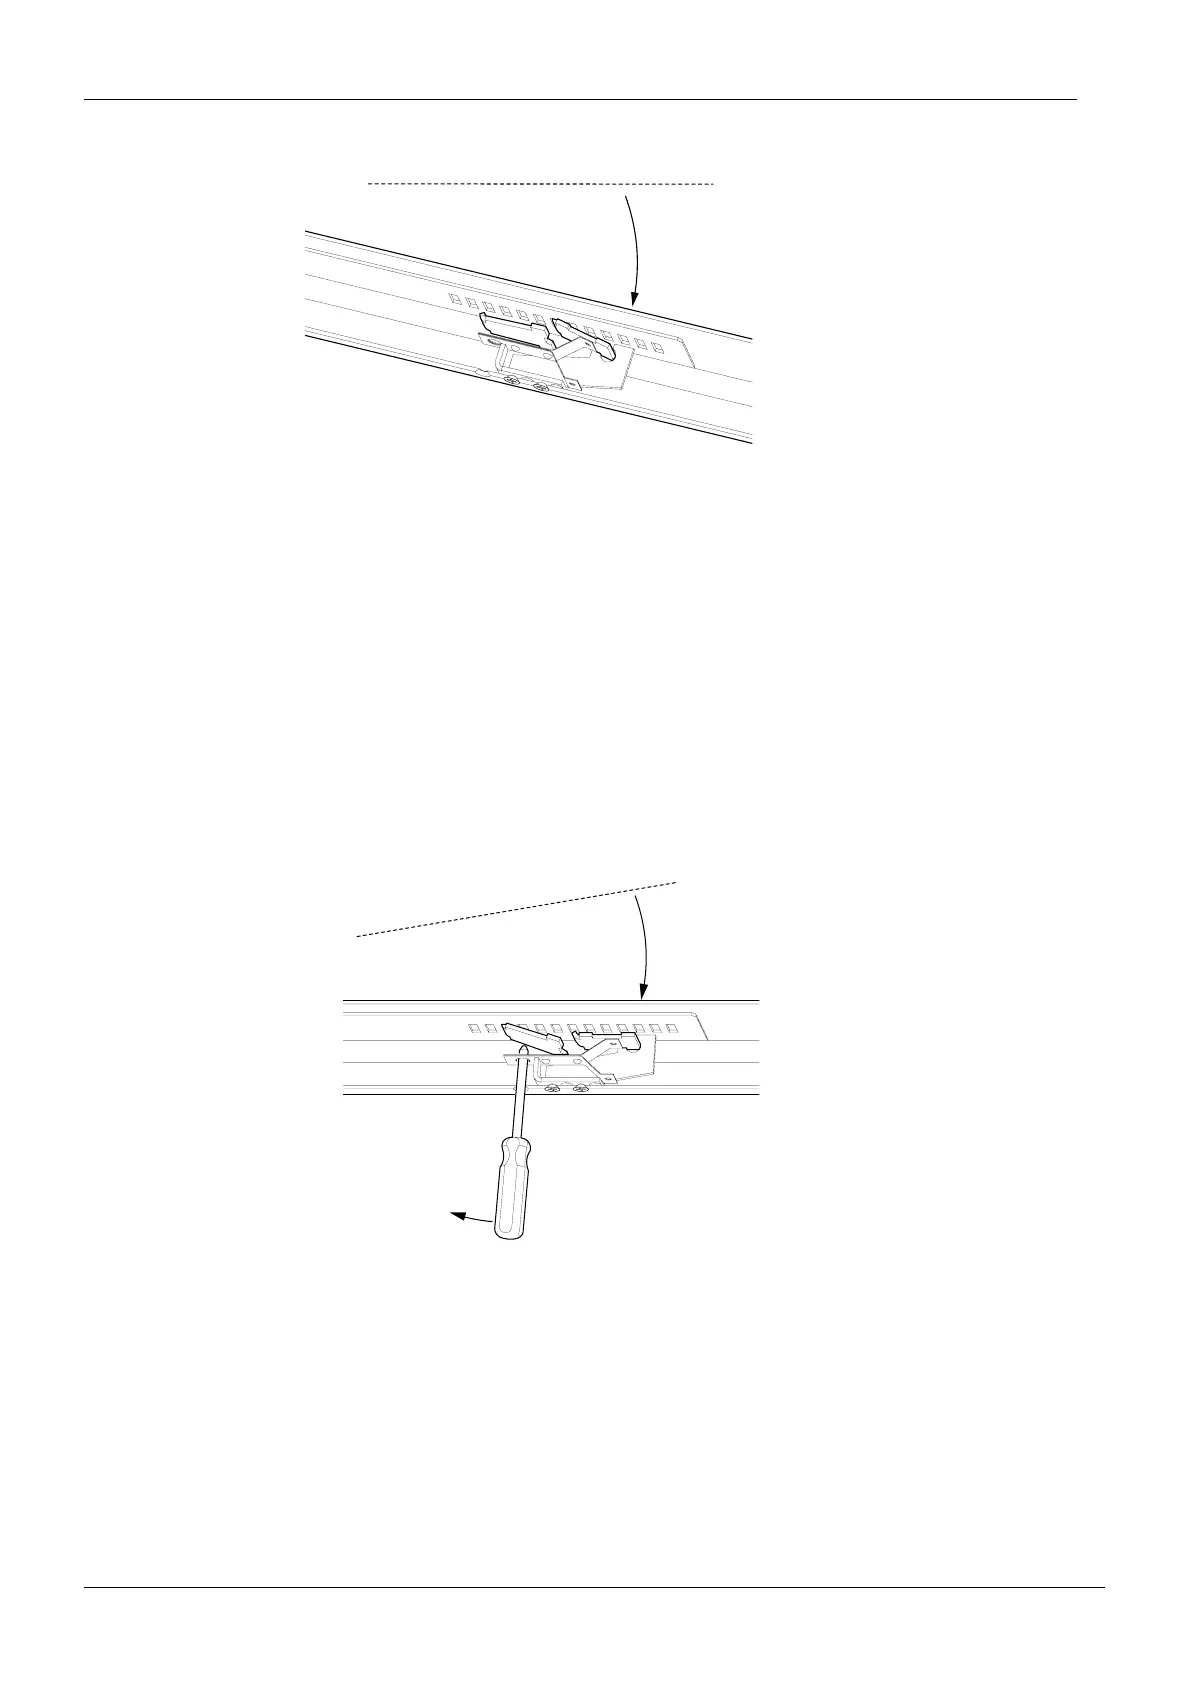
After step I-3 or D-5 do not remove the screwdriver from the arm, but turn the handle of the
screwdriver carefully away from the instrument console (see figure below) while lowering the
arm. This will help the hook of the spring support to go into the groove.
varsikuvaD-7.eps
The adjusting hook releases from the groove. The y-spring
inside the adjustment mechanism pushes the spring support
into a groove of the adjustment plate. The tension of the
gas spring is now decreased by one step.
varsikuvaD-8.eps