Chapter H - FOOT CONTROL
Planmeca Compact i H-9
ADJUSTMENTS
Technical Manual
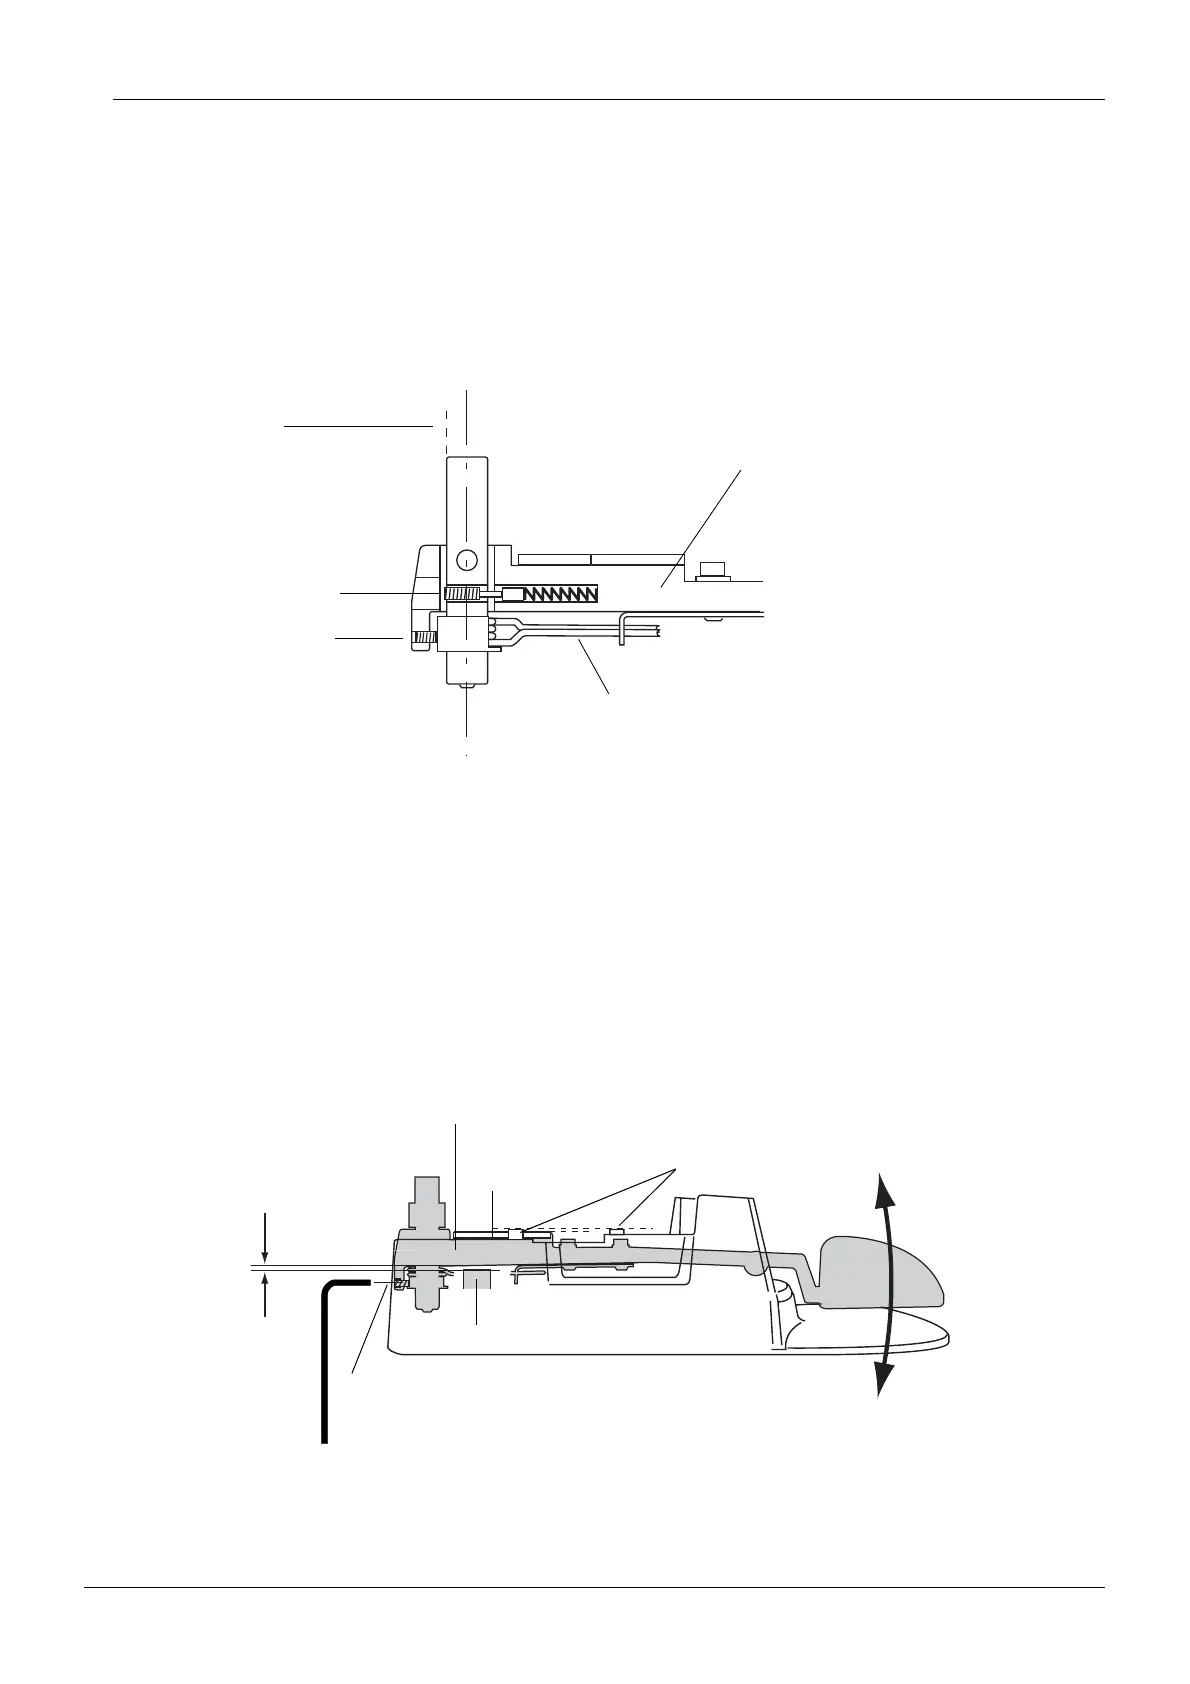
2.3 Adjusting tension and angle of the foot control pedal
a) Remove the foot control cover as described in section “Removing foot control cover” on page
H-1.
b) Adjust the pedal tension by tightening/loosening the tension adjusting screw.
For the recommended adjustment, first tighten the tension adjusting screw so that the screw
head is level with the surface of the pedal axle (dashed line), then unscrew it one turn.
c) Judging by eye, adjust the slope of the sector plate so that it is parallel with the four PCB
supports by tightening the angle adjusting screw.
d) Adjust the angle of the pedal by tightening/loosening the angle adjusting screw. The front end
of the pedal should move 4-5mm vertically (up/down) for convenient use of the foot control. If
the pedal is tilted too much, the front end of the pedal’s sector plate could touch the foot
control PCB and damage it quickly.
Additionally, check that the adjusting rod does not touch the pedal as you push the pedal
down. The clearance between the pedal and the adjusting rod should be approx. 0.5mm
when you push the pedal down.
e) Reassemble the foot control in reverse order.
f) Calibrate the foot control as described in section “Calibrating foot control” on page H-15.
tension.eps
Tension adjusting screw
Pedal centering spring
Foot control pedal
Surface of the pedal axle
Angle adjusting screw
(dashed line)
adjpedal2.eps
Adjusting rod
Sector plate
Angle adjusting screw
PCB supports
0.5mm
Foot control pedal