Chapter F - ADJUSTMENTS
Planmeca Compact i F-31
BLEEDING OF THE SPRAY WATER SYSTEM
Technical Manual
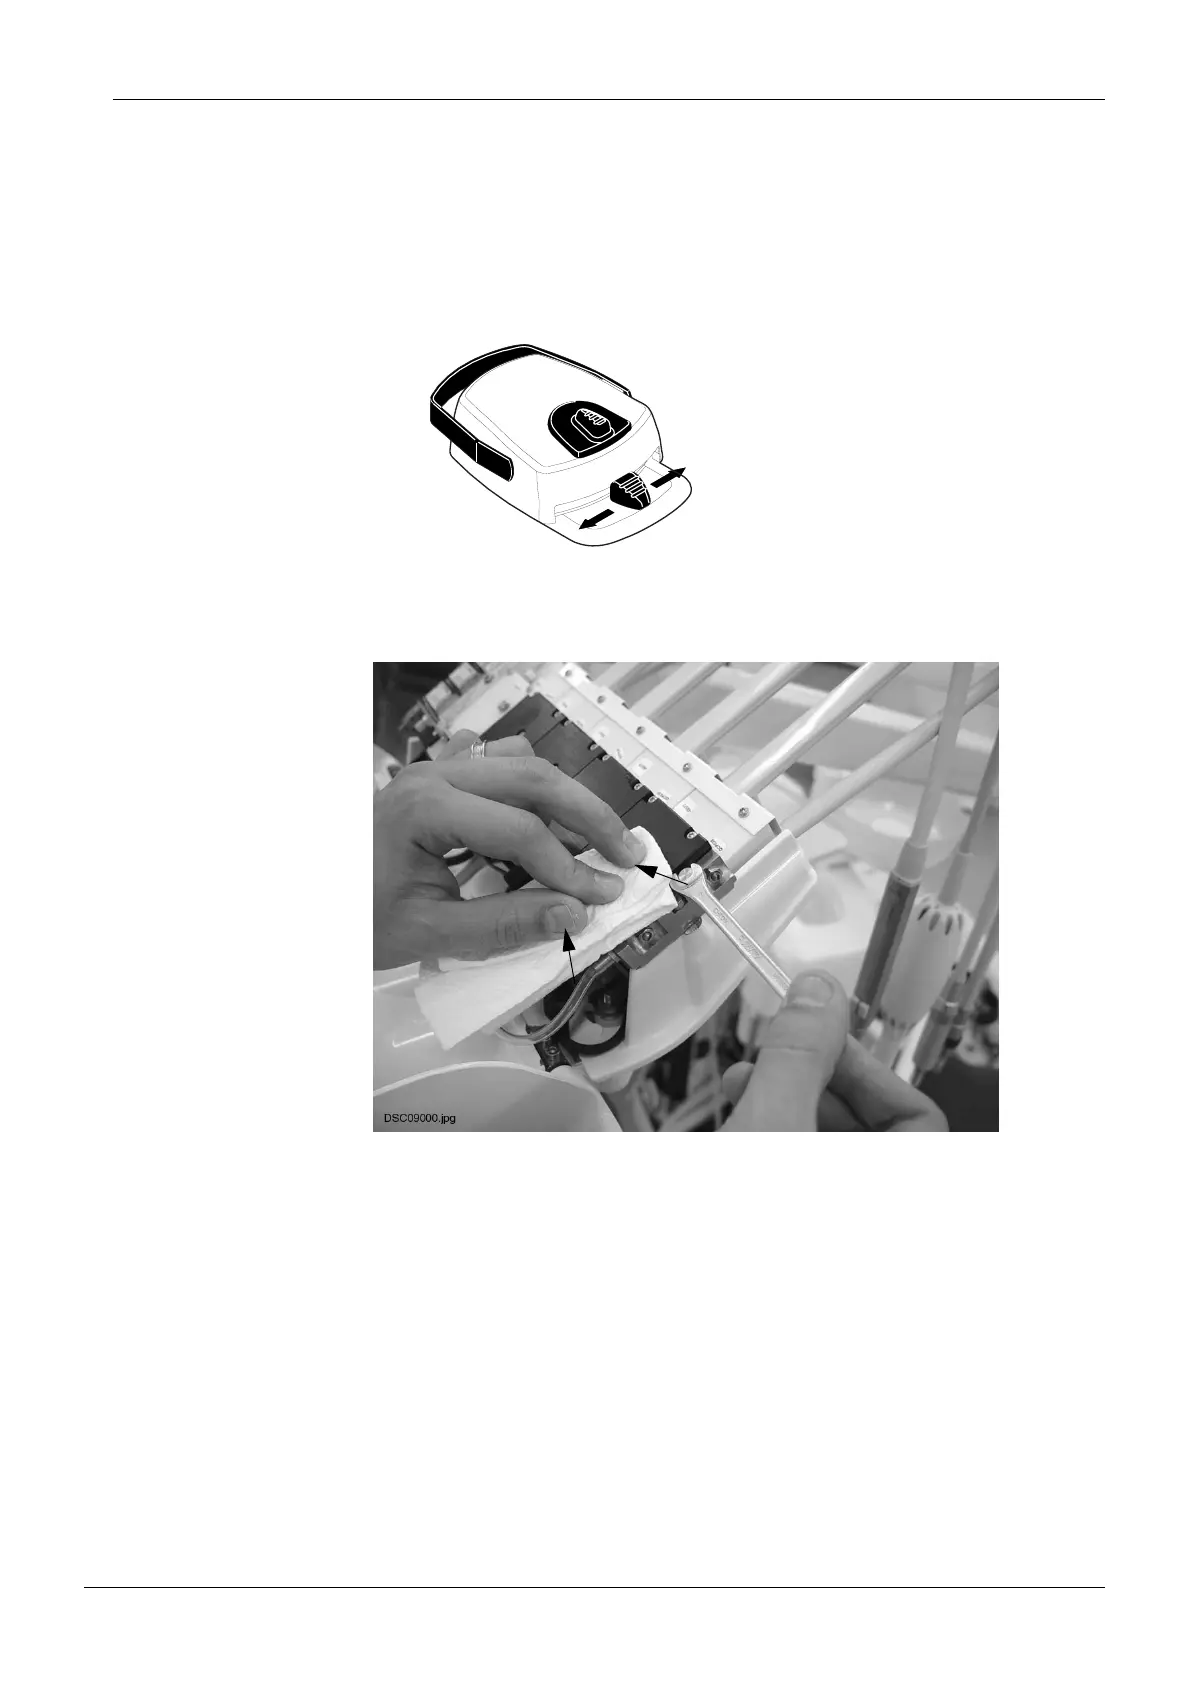
5 BLEEDING OF THE SPRAY WATER SYSTEM
• Activate the instrument (turbine or micromotor).
• Press the instrument spray key to turn on the spray water.
• Operate the activated instrument with foot control.
• Loosen the bleeding screw until the water bleeds out (while the instrument is running).
NOTE If the water is not bleeding out properly then loosen the two nuts a little. When
the bleeding is done then tighten the nuts again.
• Tighten the bleeding screw so the the water flow stops.
• Release the foot control and return the instrument to its place.
• Remove the label attach the console cover and place the instrument on its position.
NOTE Always make sure that the instrument hose is correct to the used instrument.
The control system identifies the instrument hose, not the instrument. The
control system does not recognize the instrument change.
NOTE Make sure that the hoses are properly connected to the console to avoid leak-
age.