Chapter G - PARTS REPLACEMENT & REPAIR
Planmeca Compact i G-37
VALVES & FILTERS REPLACEMENT
Technical Manual
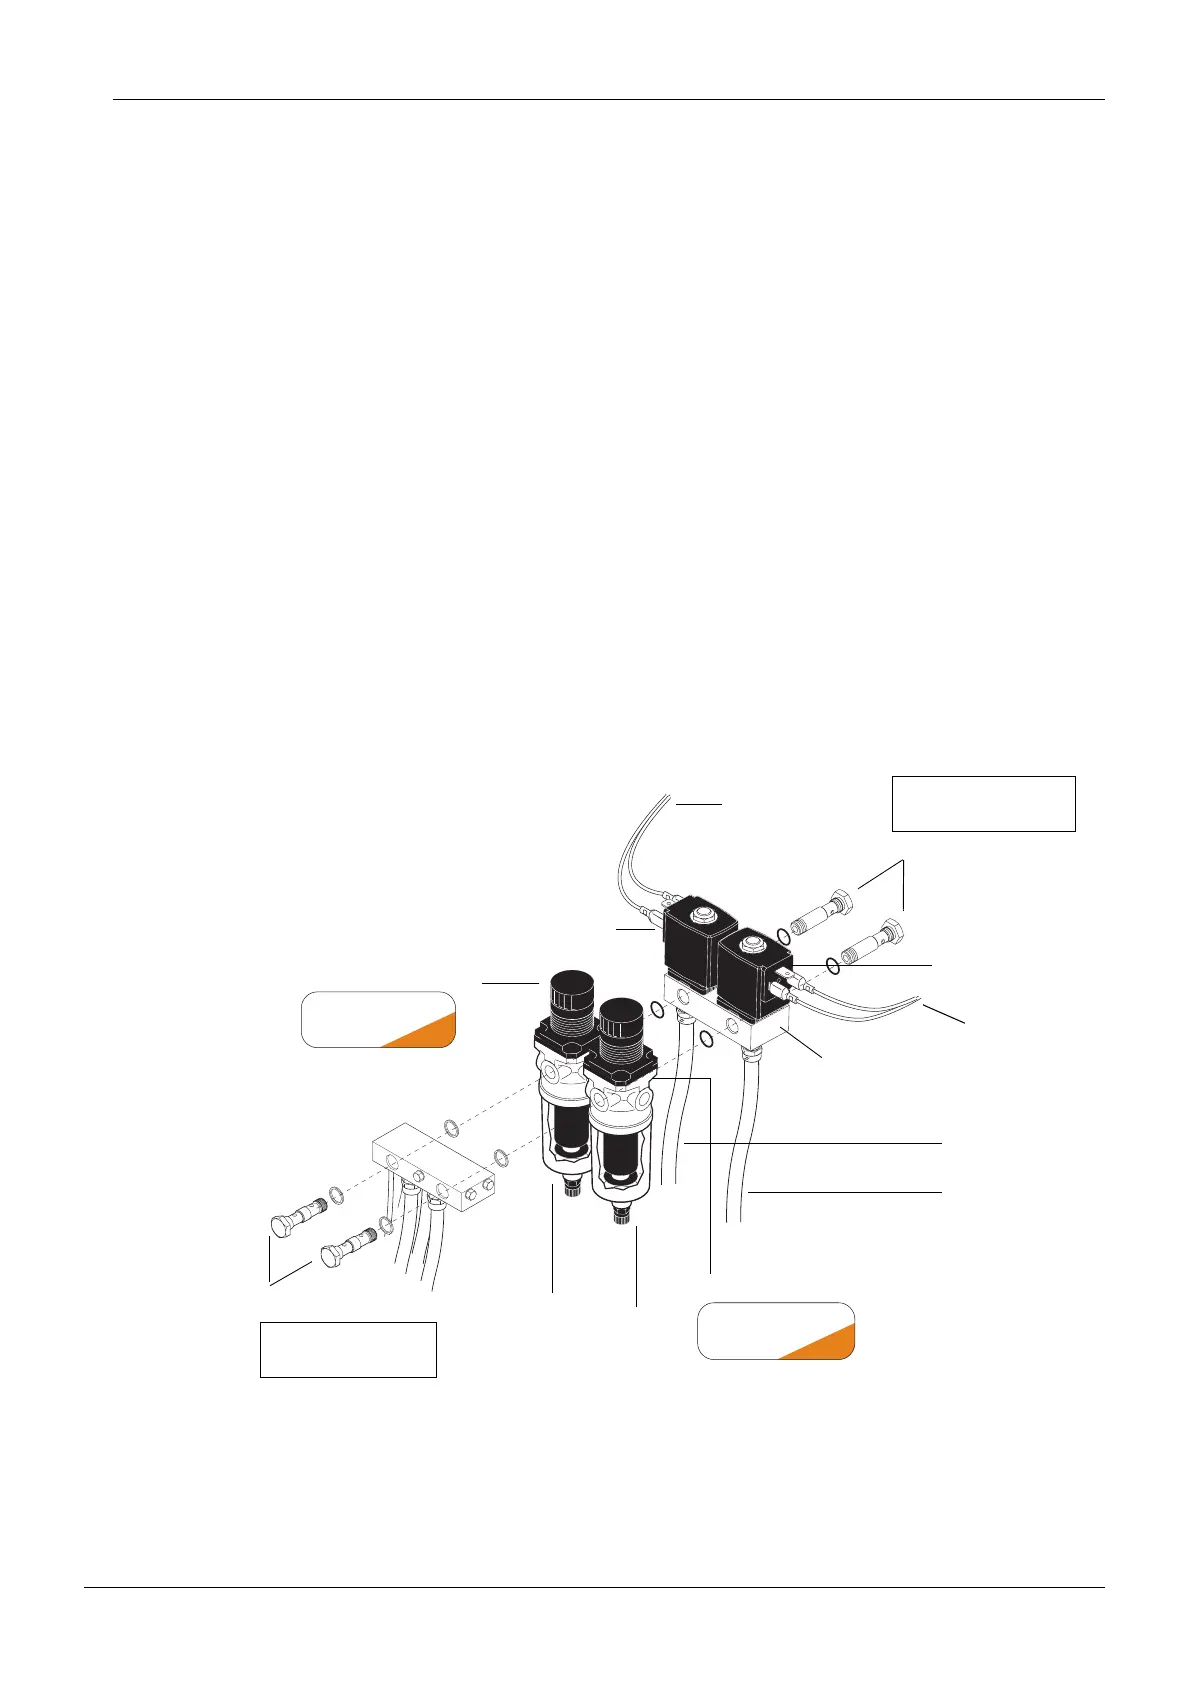
7.3 Replacing water and air filter/regulator assemblies
CAUTION Ensure that the water and air supply lines are turned off.
a) Decompress the water and air pressures as described in section 7.1 “Decompressing water
and air pressures” on page G-36.
b) Loosen the two screws attaching the magnetic valve assembly to the cuspidor plate and lift off
the magnetic valve/pressure regulator assembly.
c) If necessary for easier access, disconnect the control cable from the main valve you are
working on.
d) Detach the water (N108-DS02) or air (N108-DS01) filter/regulator by unscrewing the two bolts
which hold it in position.
If necessary, detach the water or air filter by unscrewing it from the water or air regulator.
e) Install the new filter/regulator into position in reverse order.
NOTE Be careful not to overtighten the bolts. (Max. Torque 7 Nm)
f) Adjust the pressure regulator as described in section 3.1 “Adjusting internal water & air
pressures” on page F-26:
• water 280 kPa (2.8 bar) (41 psi)
• air 550 kPa (5.5 bar) (80 psi)
g) Apply pressure to test that there are no air or water leaks.
replacereg1202.eps
Air filter/regulator
Water filter/regulator
Air main valve
Water main
valve
Valve cable
(blue leads)
Valve cable
(green leads)
Valve
attachment block
N108-DS01
In P. max. 16 bar
Out P. 0,5-10 bar
CAMO
ZZ
I
Made in Italy
N108-DS02
In P. max. 16 bar
Out P. 0,5-10 bar
CAMO
ZZ
I
Made in Italy
Bolts
Bolts
Water inlet tube
Air inlet tube
NOTE!
Max. Torque 7 Nm
NOTE!
Max. Torque 7 Nm
Water filter
Air filter