Chapter G - PARTS REPLACEMENT & REPAIR
Planmeca Compact i G-23
ELECTRICAL PARTS REPLACEMENT
Technical Manual
5.4 Replacing instrument multiplexer PCB
a) Perform the pre-replacement preparations described in section 3.1 “Preparations before
instrument multiplexer related replacements” on page G-7.
b) Remove the multiplexer assembly from the console casting as described in section 3.2
“Replacing the whole multiplexer” on page G-7.
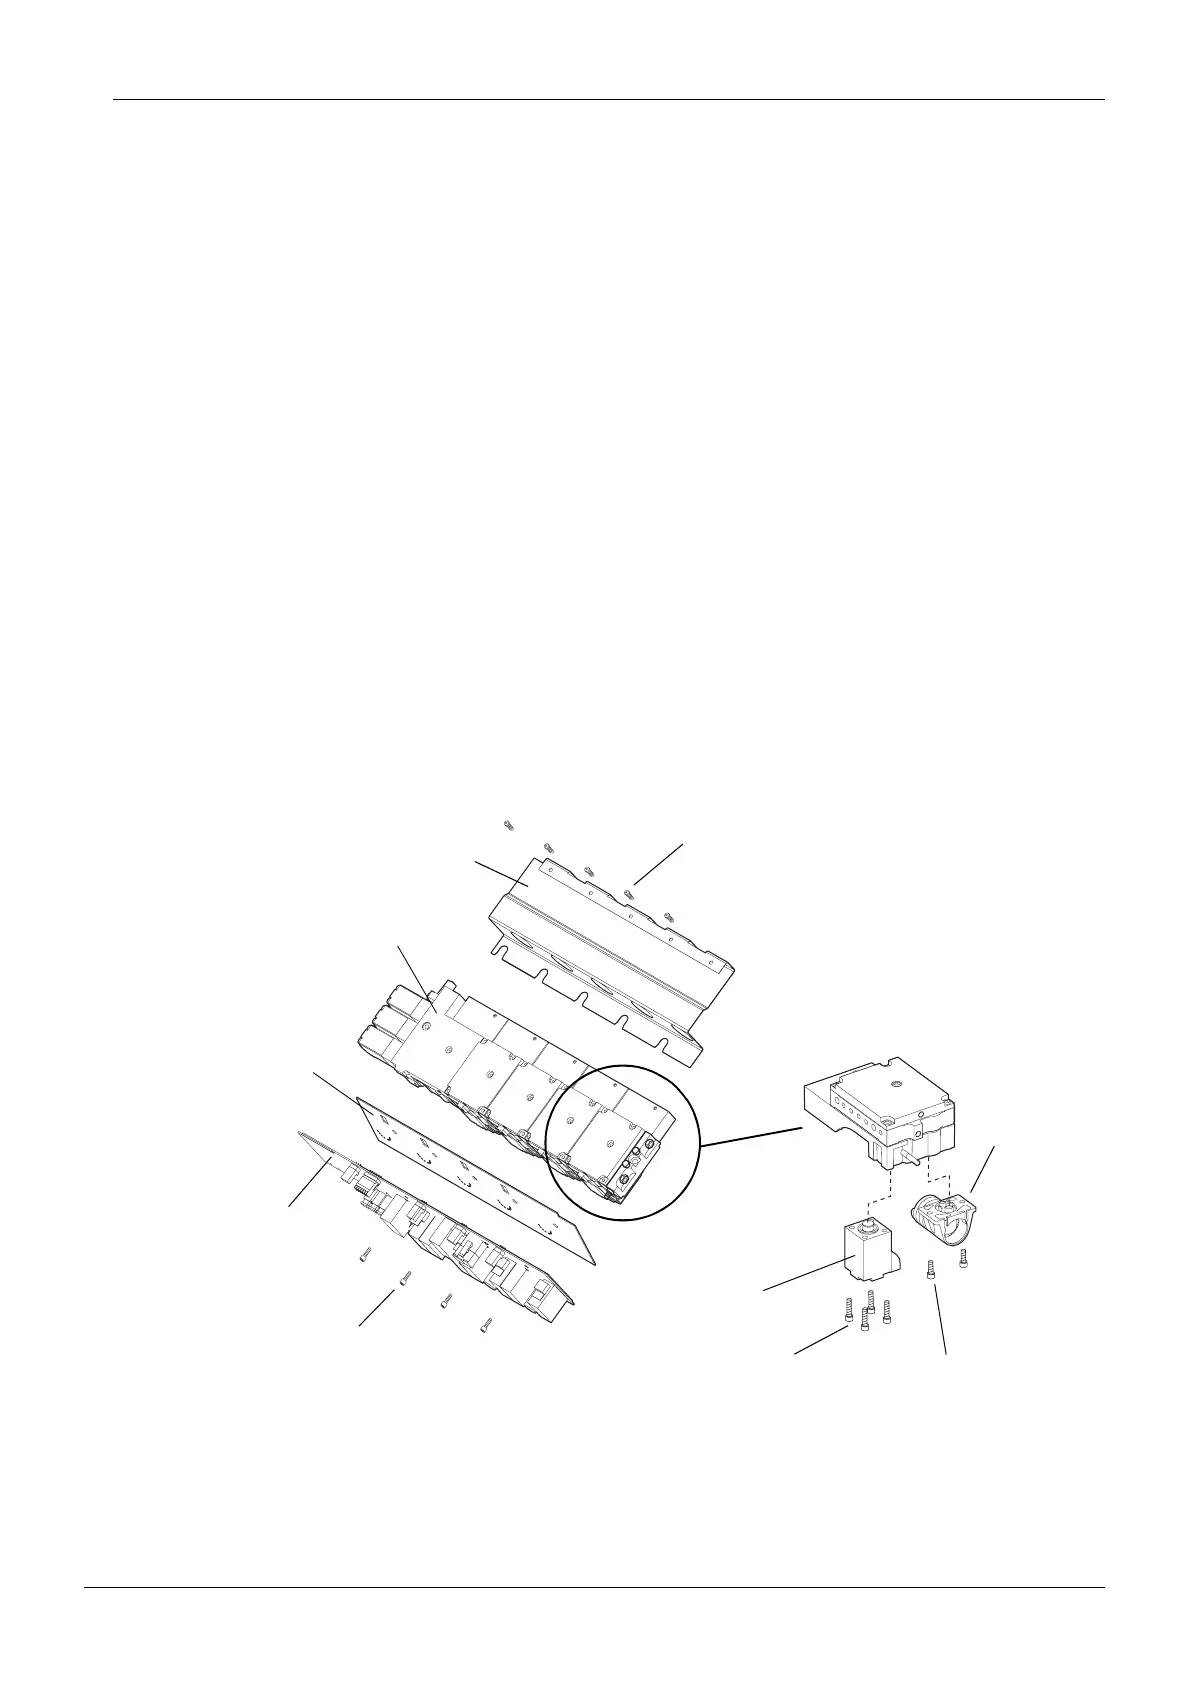
c) Unscrew the five TORX WN1451 3x6 PT screws and remove the multiplexer plate.
d) Disconnect the five instrument control valve cables from the Instrument multiplexer PCB.
e) Disconnect the three proportional valve cables from the Instrument multiplexer PCB.
f) Disconnect the Pressure sensor cable from the Instrument multiplexer PCB.
g) Remove the five instrument control valves by unscrewing the M3x35 DIN 912 screws.
h) Unscrew the ten M3x8 DIN 912 screws that are holding the quick connector housings in
position. Do not try to remove the quick connector housings.
i) Unscrew the four M4x6 DIN 912 screws that connect the Instrument multiplexer PCB to the
multiplexer blocks.
j) Remove the Instrument multiplexer PCB by lifting and pulling it simultaneously.
k) Carefully detach the quick connector housings from the PCB. Avoid bending the quick
connector pins.
l) Install the new Instrument multiplexer PCB in reverse order.
m) Bleed the multiplexer according to the instruction described in chapter F, section 5
“BLEEDING OF THE SPRAY WATER SYSTEM” on page F-31
TORX WN1451 3x6 PT
Multiplexer plate
Multiplexer blocks
Protective
membrane
Instrument
multiplexer PCB
M4x6 DIN 912
M3x35 DIN 912 M3x8 DIN 912
Quick
connector
housing
Instrument
control valve