Chapter F - ADJUSTMENTS
F-20 Planmeca Compact i
ELECTRICAL ADJUSTMENTS
Technical Manual
2.2 Calibrating lift motor position sensor
WARNING
During the calibration of the lift motor position sensor all software limits are
ignored.
Special care must be taken for not to damage the unit by driving the lifting
adapter to its mechanical limits.
a) Enter service mode 79. The display will show letter L (for lift motor) followed by two horizontal
lines.
b) Enable lift motor movements by holding down the spit position key for 10 seconds.
c) Using the C and D keys from the control panel, drive the lifting adapter to position where the
upper edge of the adapter and the calibration mark at the side of the lifting column are
aligned.
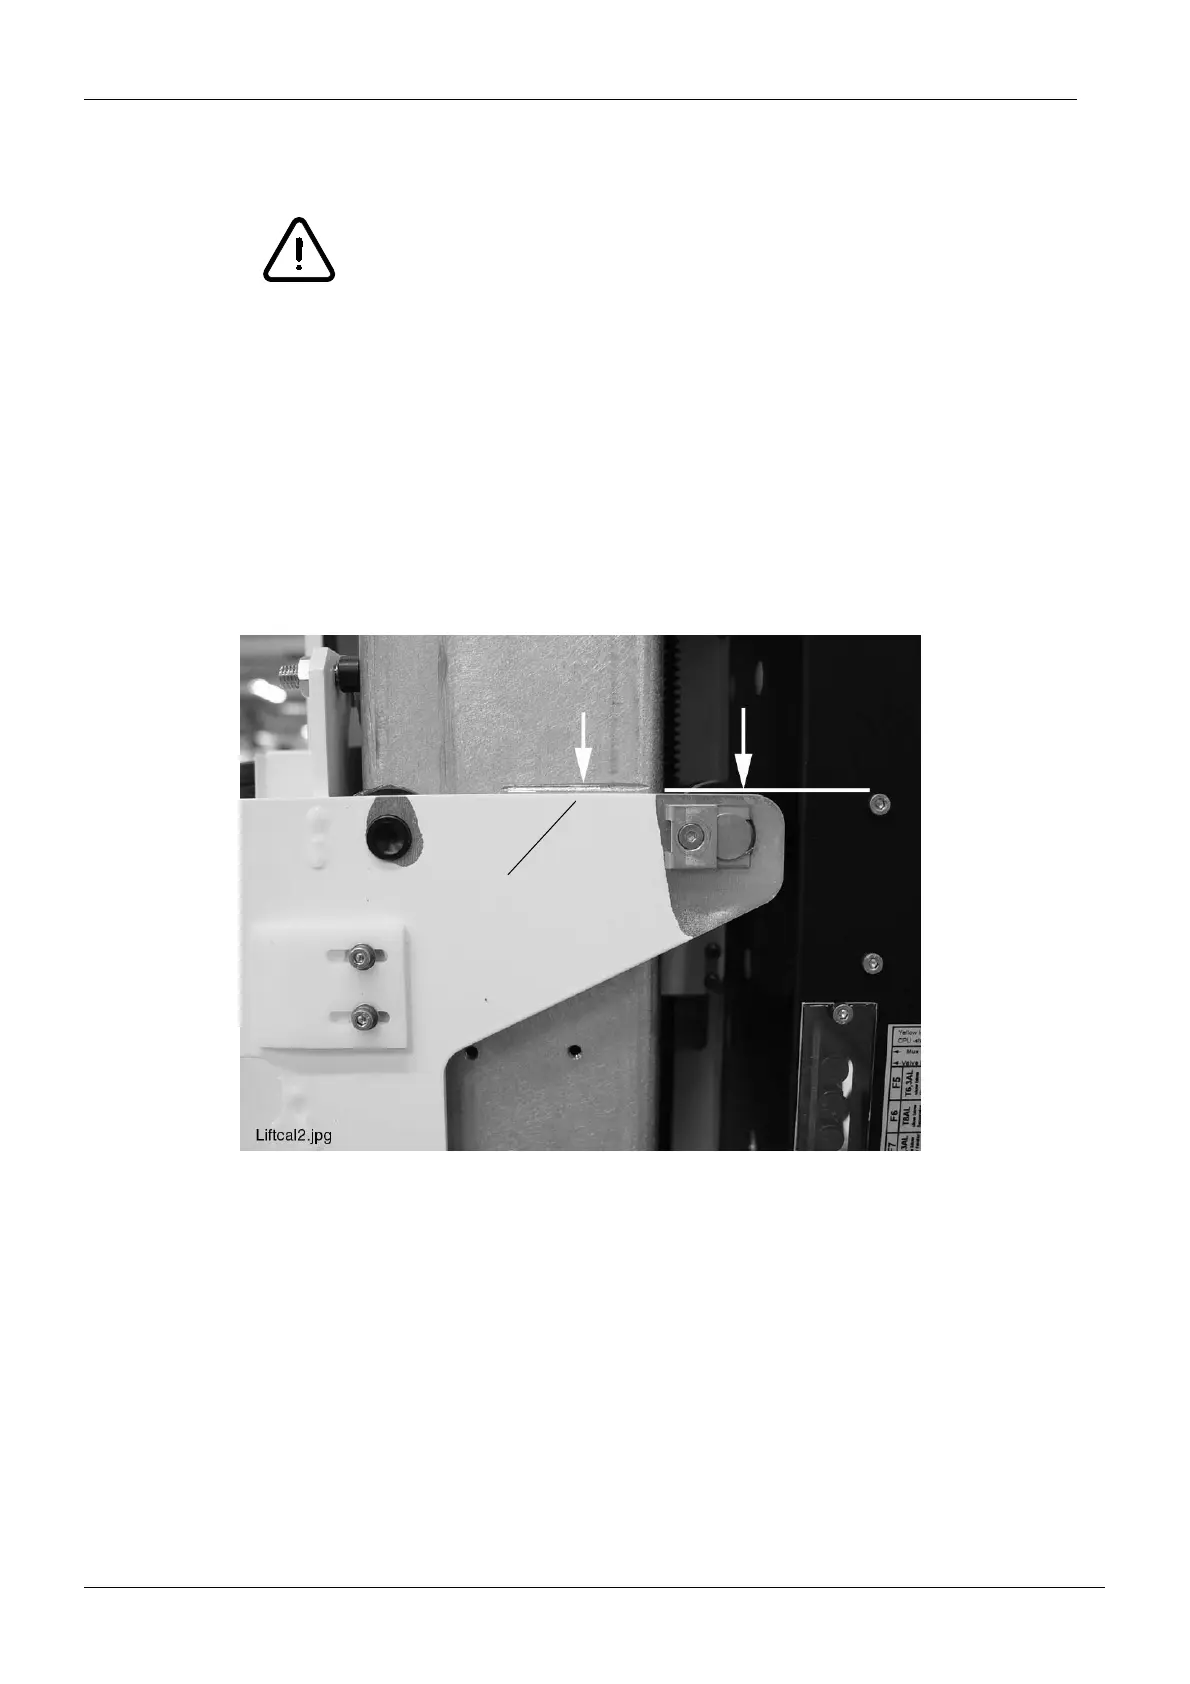
The upper edge of the lifting adapter
and the calibration mark at the side
of the lifting column are aligned.