Chapter G - PARTS REPLACEMENT & REPAIR
G-38 Planmeca Compact i
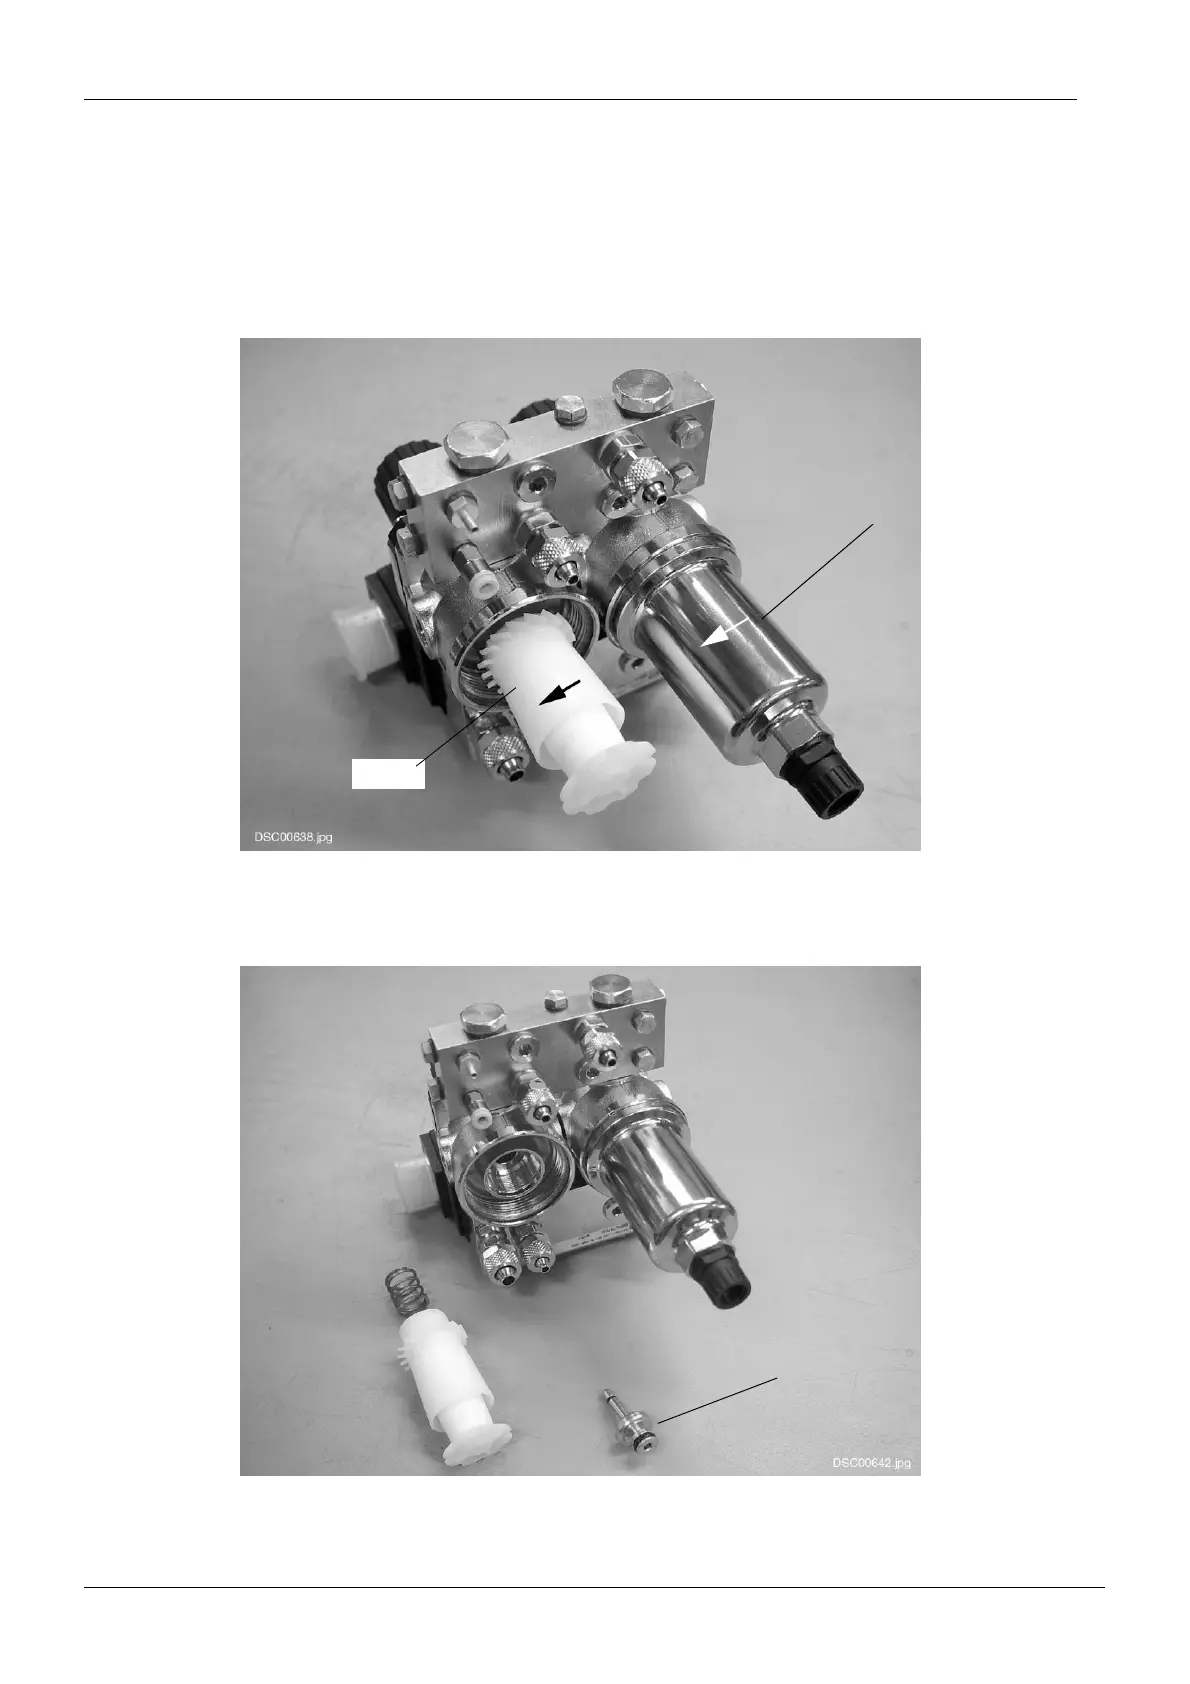
VALVES & FILTERS REPLACEMENT
Technical Manual
7.4 Replacing water and air filters and the water regulator plug
a) Decompress the water and air pressures as described in section 7.1 “Decompressing water
and air pressures” on page G-36.
b) Open the filter cup. Use the 17mm fork spanner if needed.
c) Remove the filter by unscrewing it from the regulator.
d) Water regulator: replacing the plug
If needed, the plug can be replaced after the water filter is removed. Pull the plug away from
the regulator. Lubricate the new plug with non-toxic vaseline and place it to the regulator.
e) Attach the new filter to its position and attach the filter cup. Be careful not to overtighten the
filter cup, you should be able to open it manually.
Filter cup
Filter
Plug