Chapter H - FOOT CONTROL
Planmeca Compact i H-15
ADJUSTMENTS
Technical Manual
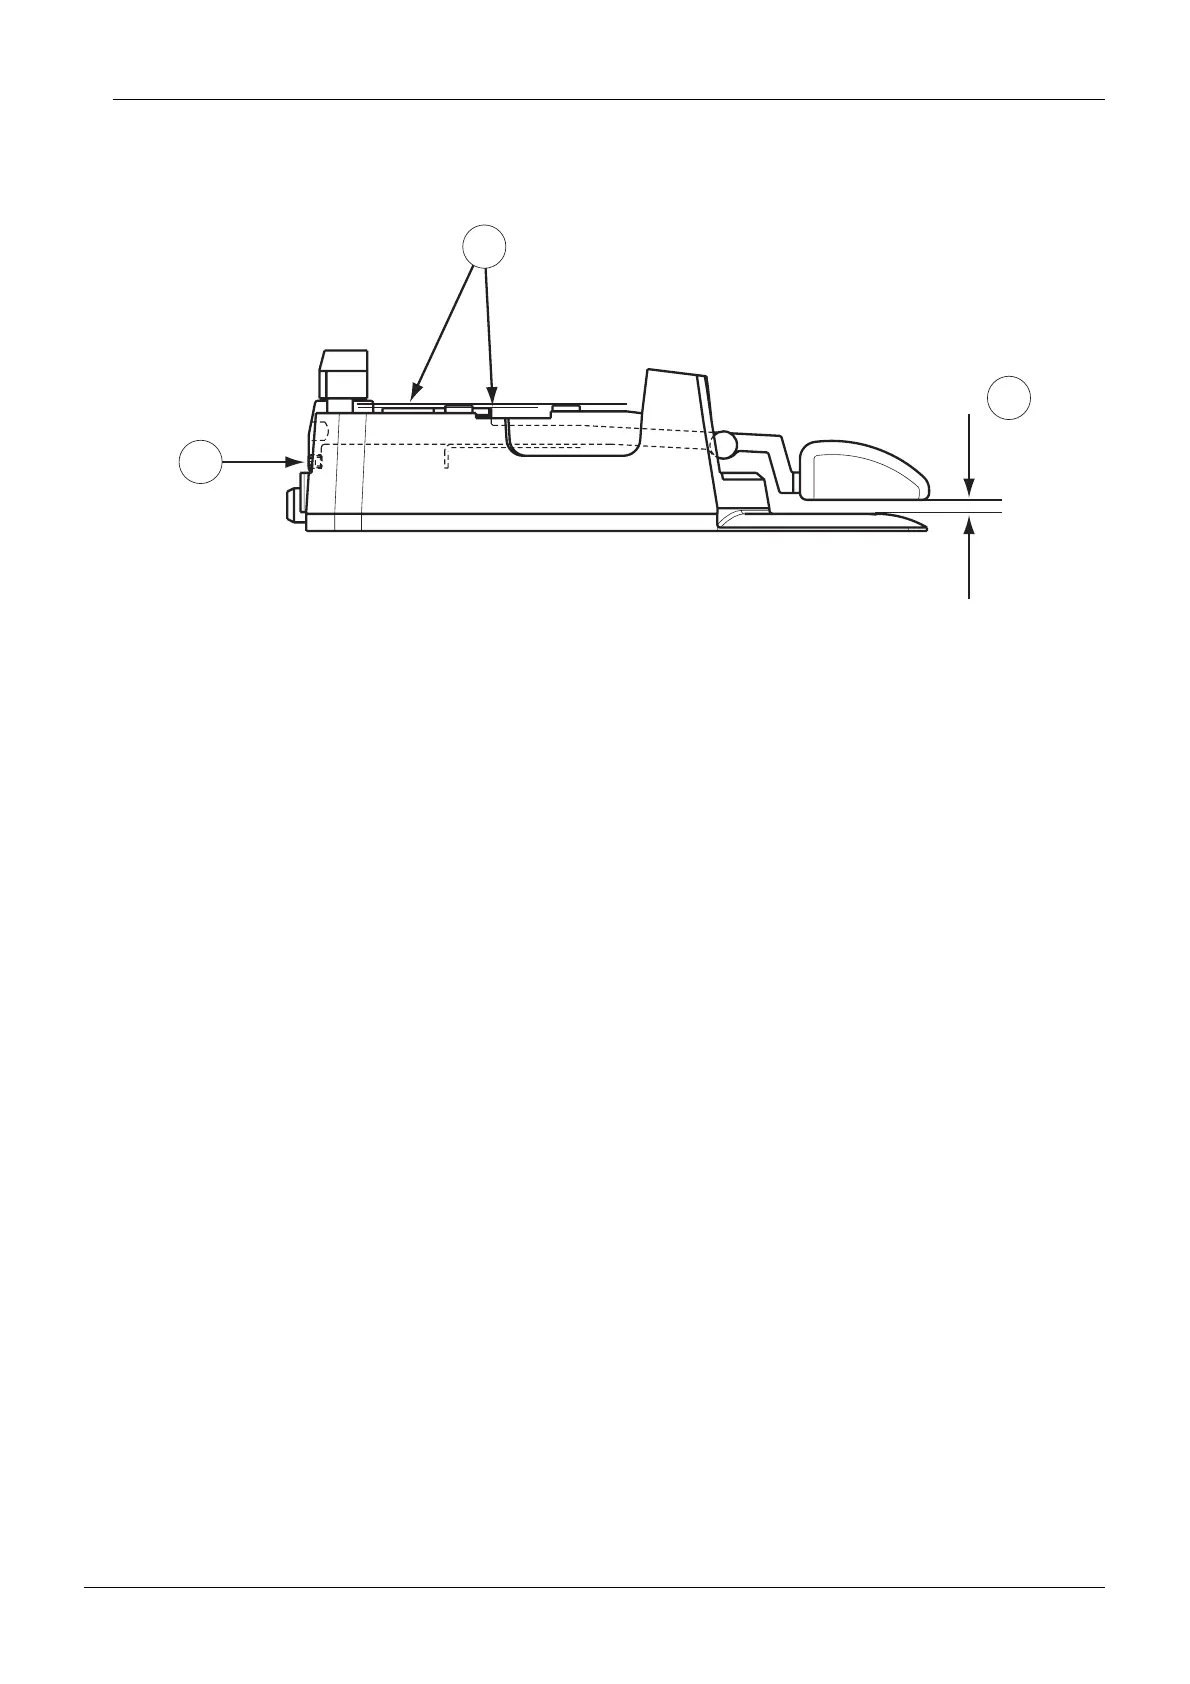
foot control (2). If the pedal is tilted too much, the front end of the pedal’s sector plate could
touch the foot control PCB (3) and damage it quickly.
q) Reassemble the foot control in reverse order.
r) Calibrate the foot control as described in section “Calibrating foot control” on page H-15.
2.6 Calibrating foot control
The principle of the calibration of the foot control is that there are six pedal positions that need
to be determined (left down/up, center down/up and right down/up). Hold the foot control
pedal in the desired position and determine the position by moving the chair control to any
direction (direction “chair up” (C) recommended).
The order in which the six positions are determined is irrelevant. However, the unit suggests
the calibration to be done in the same order as demonstrated in this section by showing the
next pedal position to determine on the display. In the case that the pedal positions are deter-
mined in any other order, the unit shows the undetermined pedal positions on the display.
Furthermore, any pedal position already determined, can be determined again without con-
fusing the unit.
In the case that the foot control calibration fails for some reason, an error code will be dis-
played after exiting the foot control calibration mode.
Entering and exiting the foot control calibration mode
a) To enter the foot control calibration mode, insert a screwdriver through the opening at the
bottom of the foot control. Press and hold down the calibration switch with the screwdriver for
4 seconds. The blinking sequence of the indicator light inside the foot control cover alters and
the first pedal position to determine is suggested on the display.
4mm
1
3
2
Fcntrl8.eps