Chapter G - PARTS REPLACEMENT & REPAIR
Planmeca Compact i G-41
CABLES & TUBES REPLACEMENT
Technical Manual
8 CABLES & TUBES REPLACEMENT
8.1 Replacing OP delivery arm cable
NOTE Be careful not to break the bowl collar when you replace the console arm
cable.
a) Release the tension of the gas spring (i.e. decrease the tension as much as possible) as
described in section 1.3 “Adjusting balance of the OP delivery arm” on page F-3.
b) Detach the instrument console from the console arm as described in section 9.1 “Detaching
the instrument console from the OP delivery arm” on page G-42.
c) Detach the console arm from the cuspidor as described in section 9.3 “Replacing the whole
OP delivery arm” on page G-44.
d) Slide the arm joint cover from over the console arm joint.
e) Attach a draw cord to the cuspidor end of the console arm cable.
f) Pull the console arm cable from the console arm joint in a way that the draw cord is pulled
inside the rotating arm.
g) Continue pulling the console arm cable from the instrument console end of the console arm.
h) Pull the new console arm cable to inside the console arm using the draw cord according to
the dimensions given below. Ensure that the cable is not stretched or rubbed by the arm
castings in any position of the arm.
i) Assemble the protective membrane carefully around the console arm joint.
j) Assemble and attach the console arm in reverse order.
k) Adjust the balance of the console arm as described in section 1.3 “Adjusting balance of the
OP delivery arm” on page F-3.
l) If necessary, adjust the angle of the instrument console as described in section 1.4 “Adjusting
angle of the OP delivery arm instrument console” on page F-9.
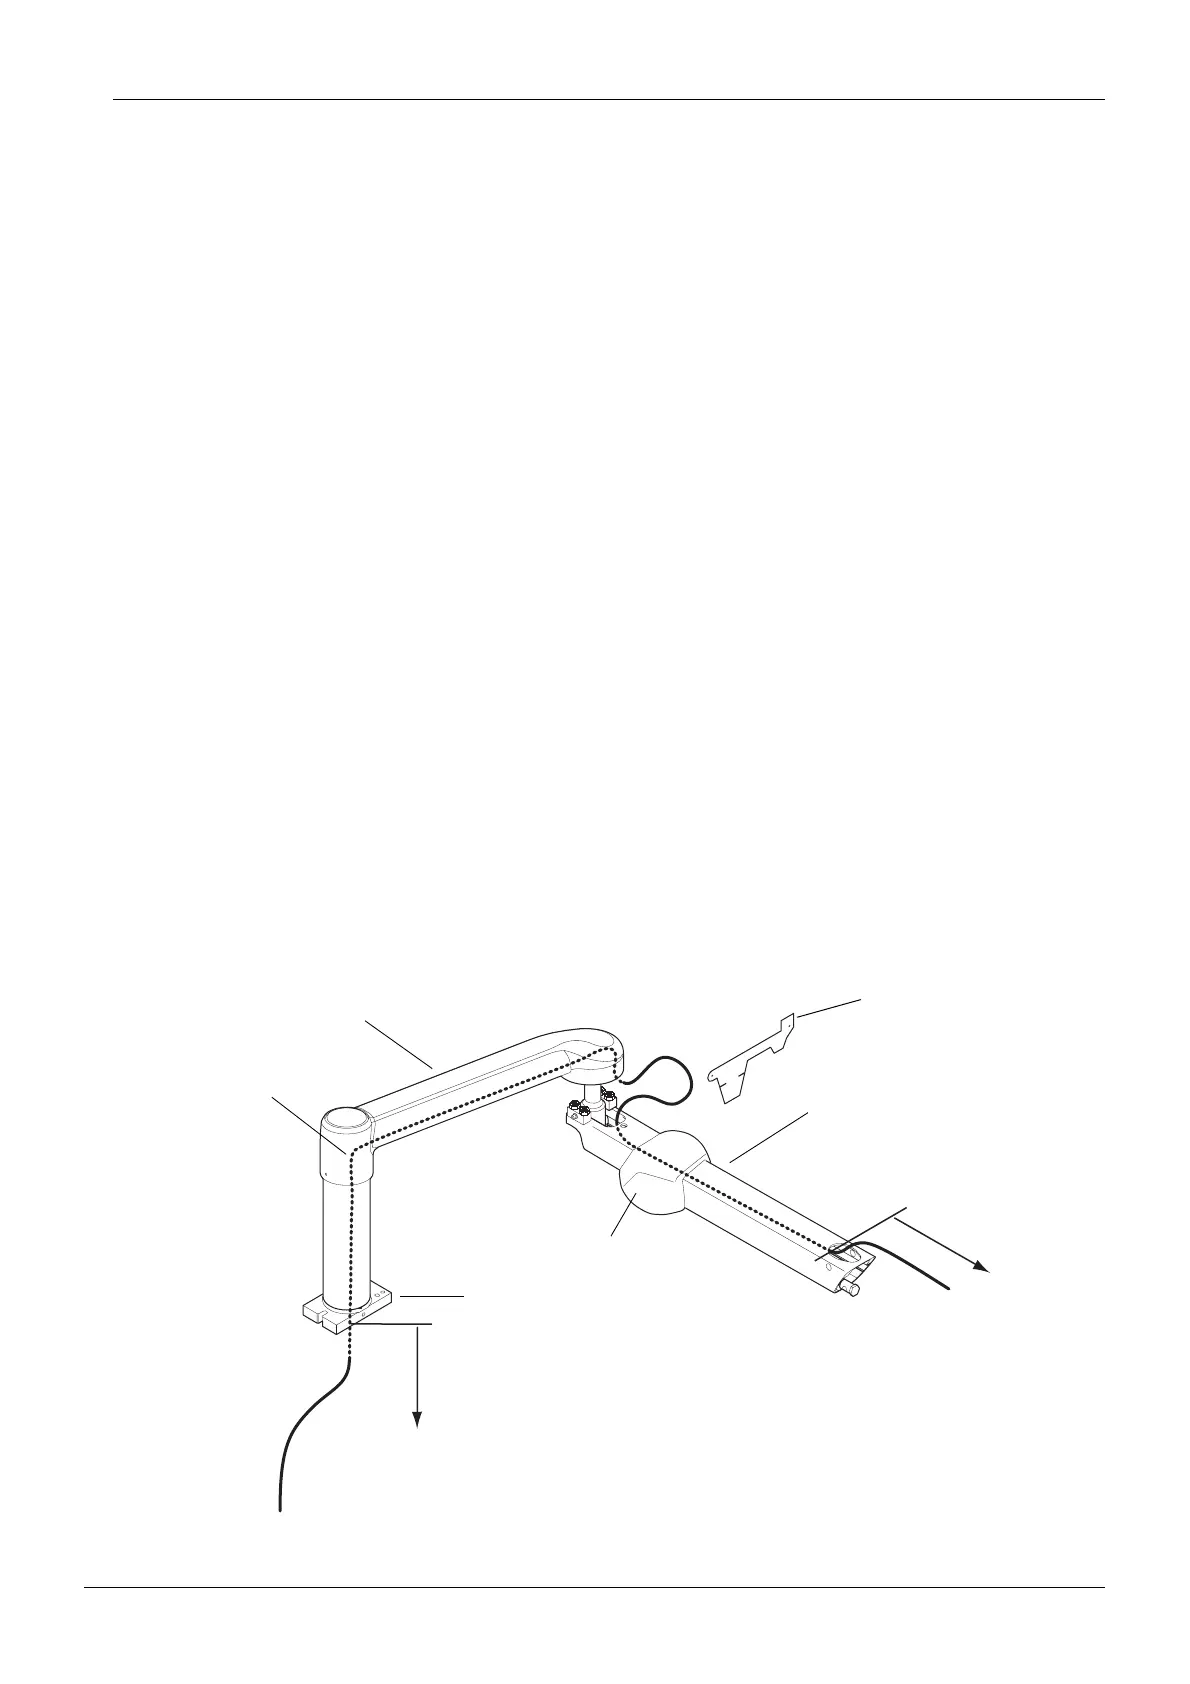
Protective
membrane
Lifting arm
Arm joint cover
Rotating arm
Console arm adapter
Console arm cable
Cables approx. 70 cm (28 in.)
Tubes approx. 140 cm (55 in.)
Cables approx.
Tubes approx.
55 cm (22 in.)
30 cm (12 in.)