Chapter G - PARTS REPLACEMENT & REPAIR
Planmeca Compact i G-39
VALVES & FILTERS REPLACEMENT
Technical Manual
f) Adjust the pressure regulator as described in section 3.1 “Adjusting internal water & air
pressures” on page F-26:
• water 280 kPa (2.8 bar) (41 psi)
• air 550 kPa (5.5 bar) (80 psi)
g) Apply pressure to test that there are no air or water leaks.
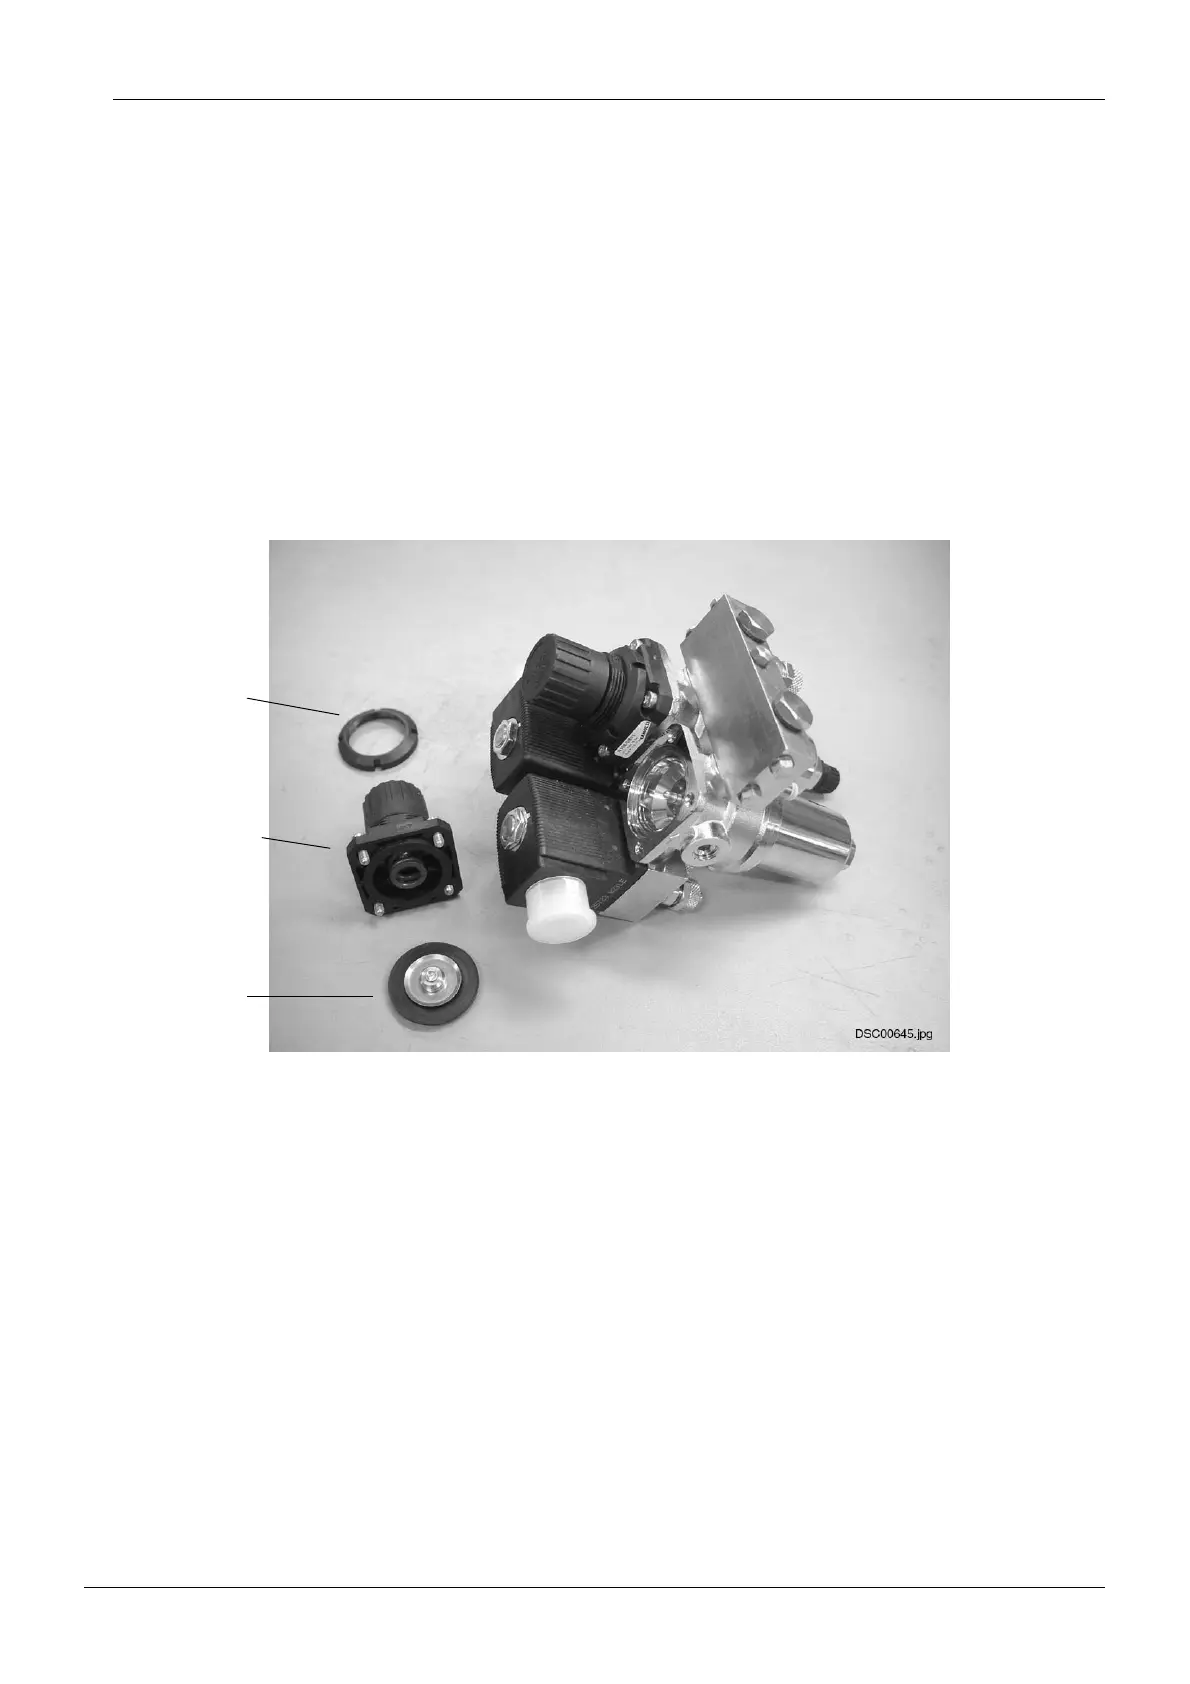
7.5 Replacing the water / air regulator membrane
a) Remove the lock ring from the regulator cap.
b) Unscrew the four attachment screws of the regulator cap and remove the cap.
c) Replace the membrane. Note, that the air regulator membrane has a small opening in the
middle of the membrane.
Lock ring
Regulator cap
Membrane