Chapter G - PARTS REPLACEMENT & REPAIR
G-40 Planmeca Compact i
VALVES & FILTERS REPLACEMENT
Technical Manual
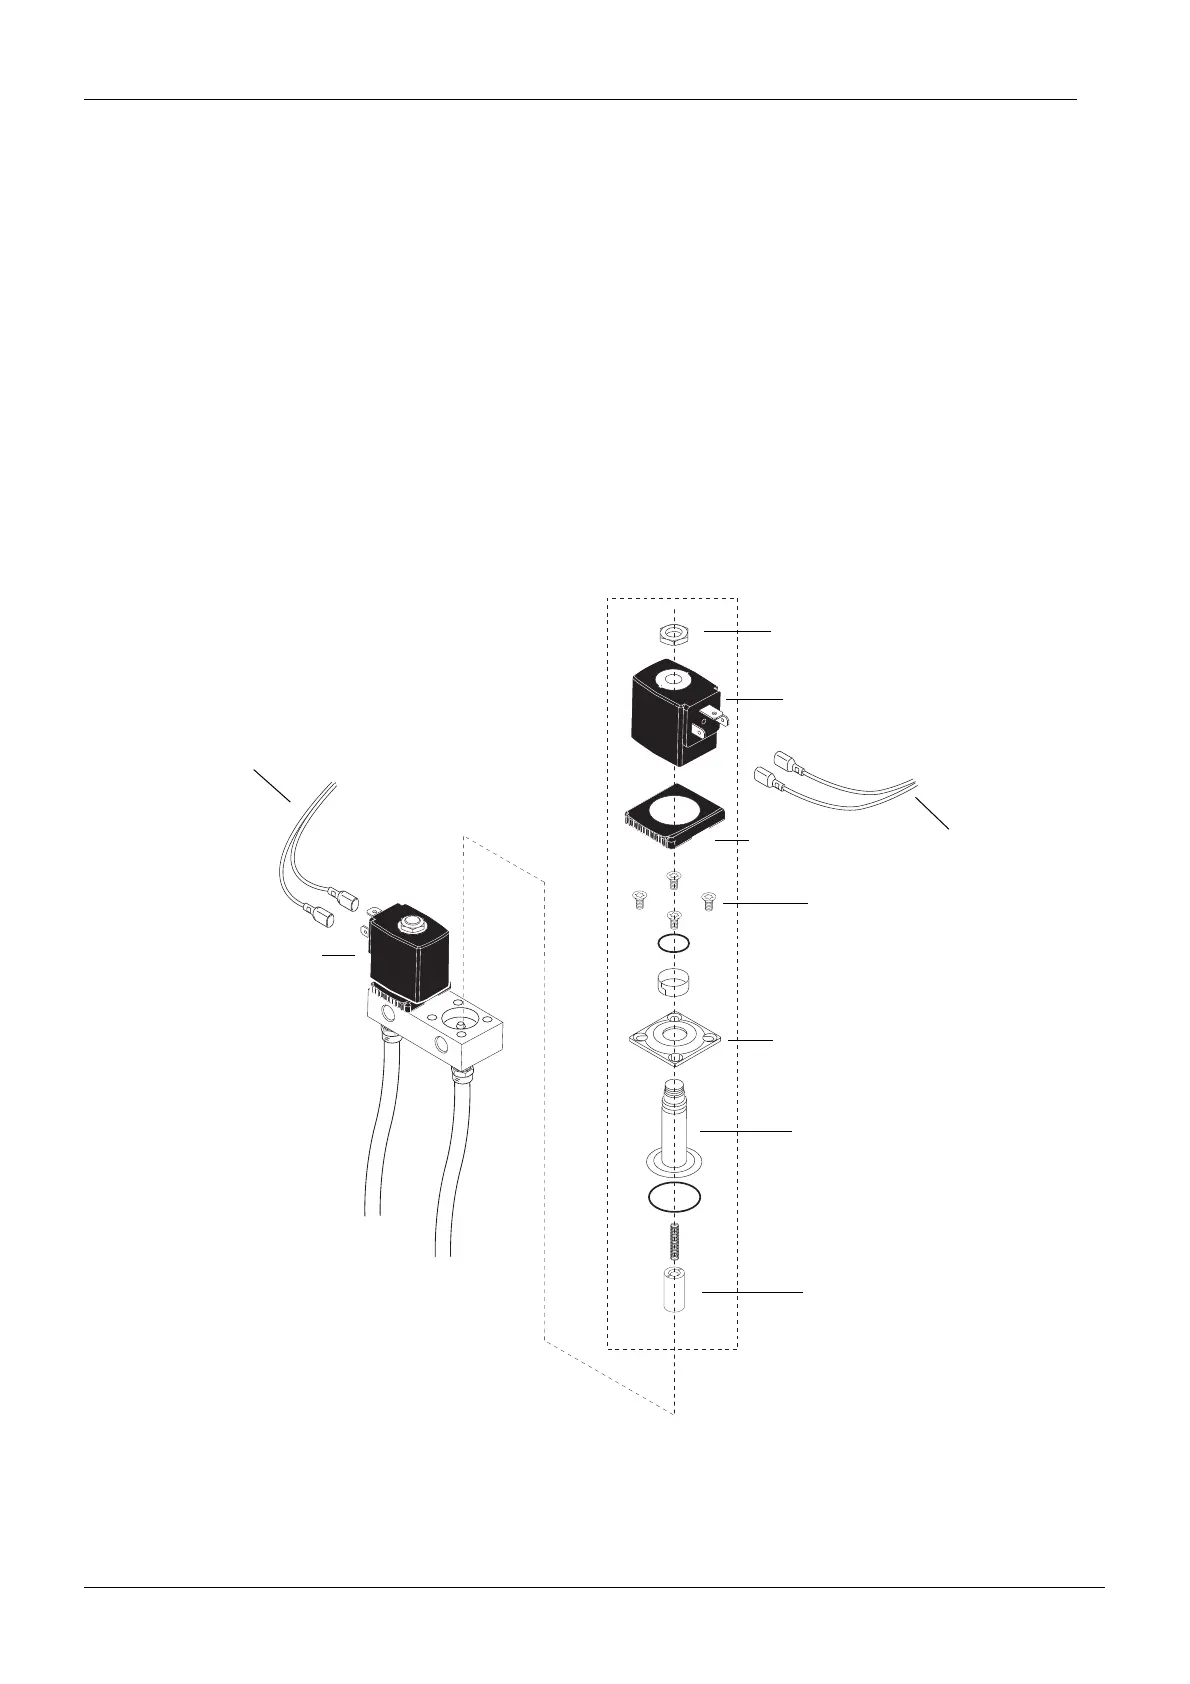
7.6 Replacing water or air main valve assembly
CAUTION Ensure that the water and air supply lines are turned off.
a) Decompress the water and air pressures as described in section 7.1 “Decompressing water
and air pressures” on page G-36.
b) Disconnect the control cable from the main valve you are working on.
c) Detach the locking nut from the main valve. Remove the old main valve. Detach the valve
bottom plate.
d) Remove the valve support and its attachment plate by unscrewing the four screws. Remove
the O-ring, spring and core.
e) Install the new main valve assembly in reverse order.
f) Check that the valve functions correctly.
Bmainvalves1202.eps
Air main valve
Water main valve
Valve cable
(blue leads)
Valve cable
(green leads)
Locking nut
Core
Valve support
Screws
Air main valve assembly
Valve bottom plate
Support attachment plate