Chapter H - FOOT CONTROL
H-14 Planmeca Compact i
ADJUSTMENTS
Technical Manual
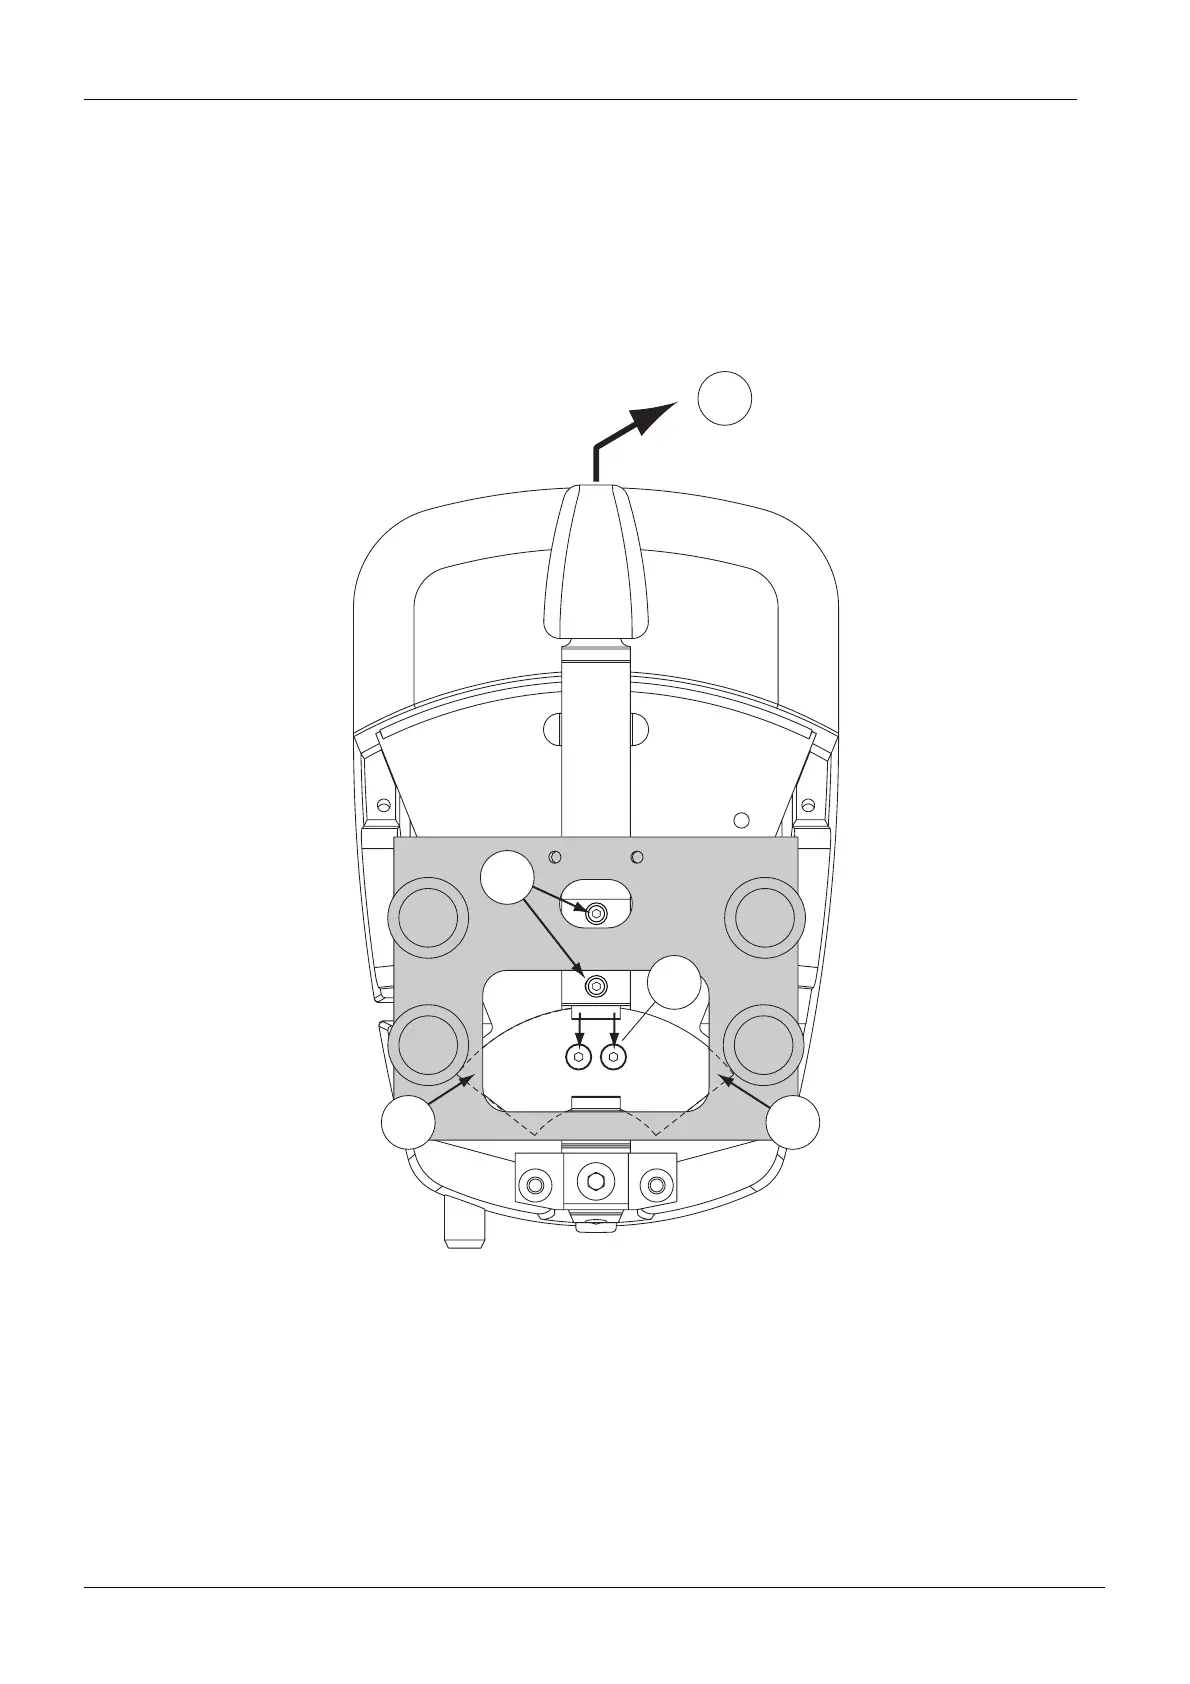
l) Make sure that the sector plate touches the calibration tool (dashed lines on the figure below,
1).
m) Make sure that the screws of the sector plate are in the middle of the sector plate screw
holes.
n) Apply a drop of Locktite 242 sealer to the sector plate attachment screws. Tighten the screws
equally (2) and simultaneously lift the pedal slightly up so that the sector plate touches firmly
the calibration tool (3).
o) Tighten the pedal centering plate screws (4).
p) Adjust the angle of the pedal by tightening/loosening the angle adjusting screw (1). The front
end of the pedal should move approx. 4 mm vertically (up/down) for convenient use of the
Fcntrl7.eps
3
1
1
2
4