4.11
ELECTRONIC FUEL INJECTION
4
9924096 - 2013 RANGER RZR XP 900 / RZR XP 4 900 Service Manual
© Copyright 2012 Polaris Sales Inc.
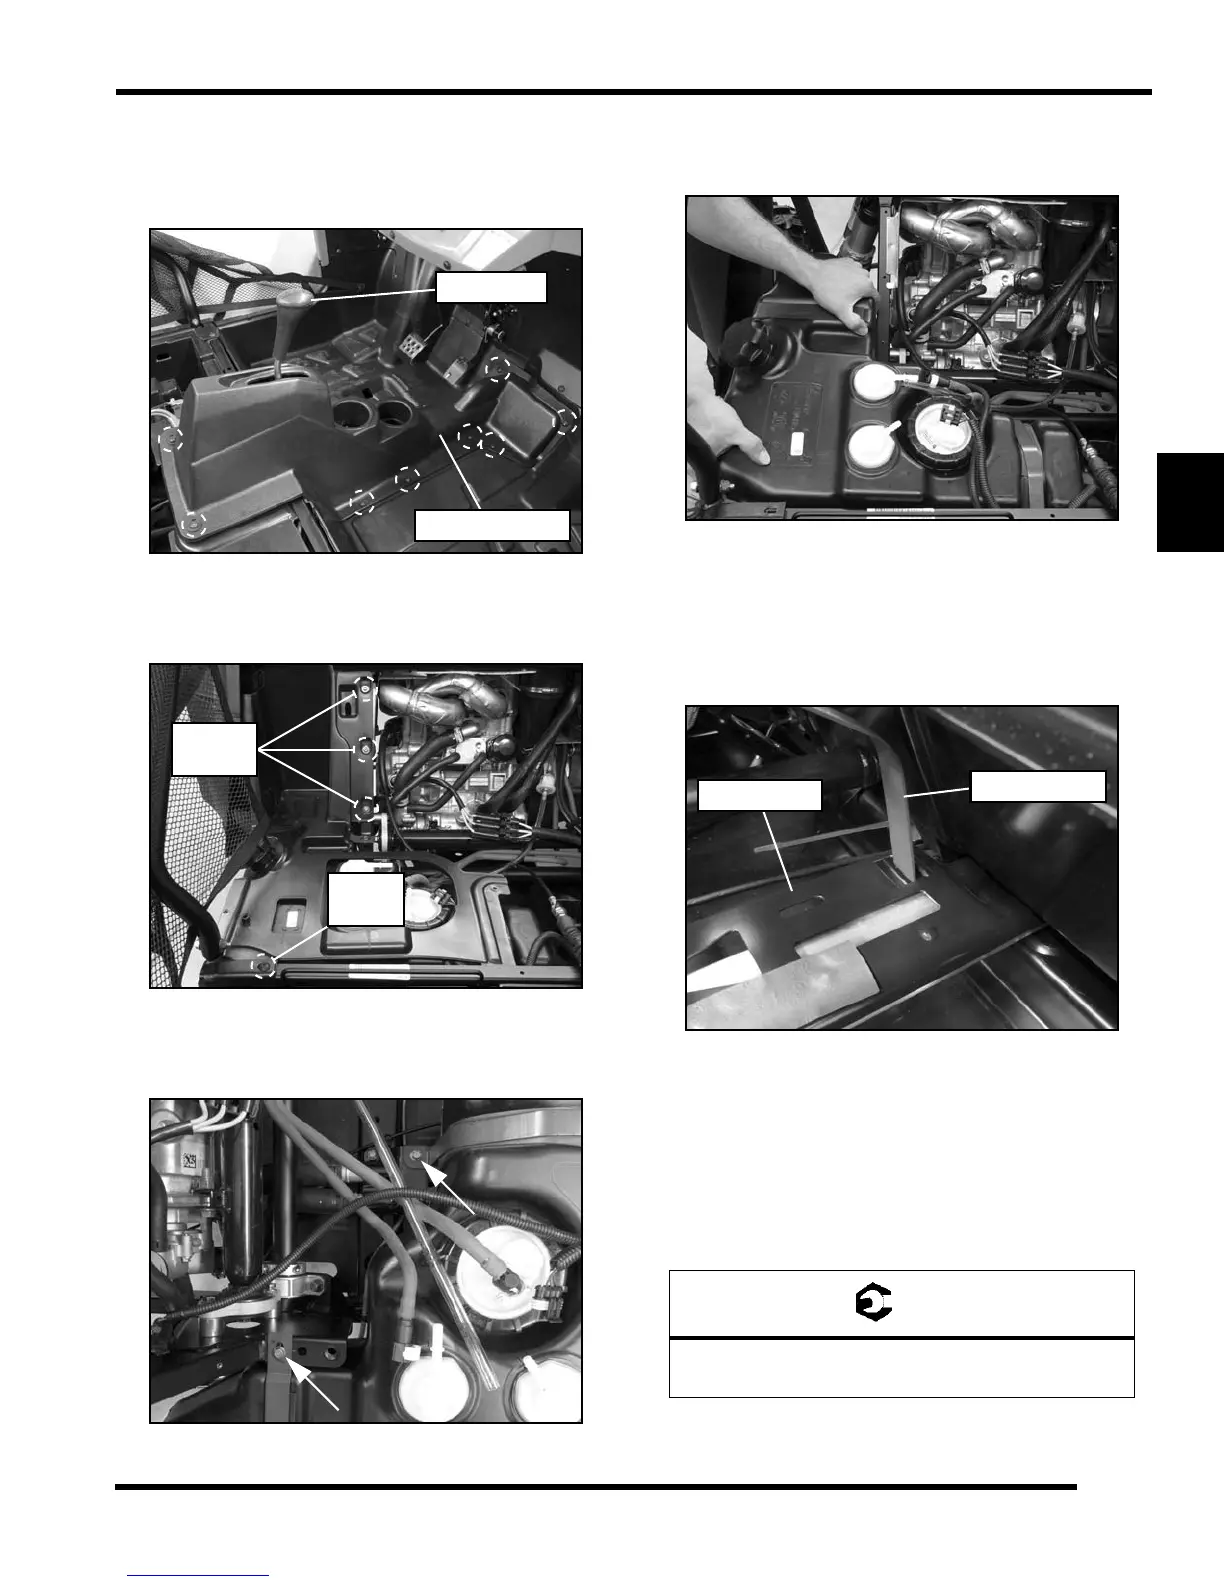
9. Remove the shift knob using a flat blade screwdriver
and T25 Torx driver. Remove the screws retaining the
center console using a T27 and T30 Torx driver.
Remove the console from the vehicle.
10. Remove the Torx screws retaining the right rear
fender well using a T25 and T27 Torx driver. Remove
the fender well from the vehicle.
11. Remove the (2) tank bracket fasteners that retain the
fuel tank in the chassis. Swing the tank brackets clear
of the fuel tank for removal.
12. Lift the rear of the fuel tank up first.
13. Carefully pull the fuel tank out of the vehicle.
Fuel Tank Installation (RZR XP)
1. Carefully reinstall the fuel tank assembly. Install the
inner tank bracket with the fuel tank to ensure the
bracket is inserted properly into the lower fuel tank
mount as shown.
2. Reinstall the (2) fuel tank brackets and fasteners.
3. Reinstall right rear fender well. Secure with screws.
4. Reinstall center console, shift knob and screws.
5. Reinstall rear seat base assembly. Secure with bolts.
6. Reinstall seat belt mechanism. Torque bolt to
specification.
7. Reinstall right-hand rocker panel and all previously
removed fasteners.
Seat Belt Mechanism Bolt:
40 ft-lbs (54 Nm)

 Loading...