5.44
BODY / STEERING / SUSPENSION
9924096 - 2013 RANGER RZR XP 900 / RZR XP 4 900 Service Manual
© Copyright 2012 Polaris Sales Inc.
9. Rotate bearing by hand and check for smooth
rotation. Visually inspect bearing for moisture, dirt, or
corrosion. Replace bearing if moisture, dirt, corrosion,
or roughness is evident (see Chapter 7).
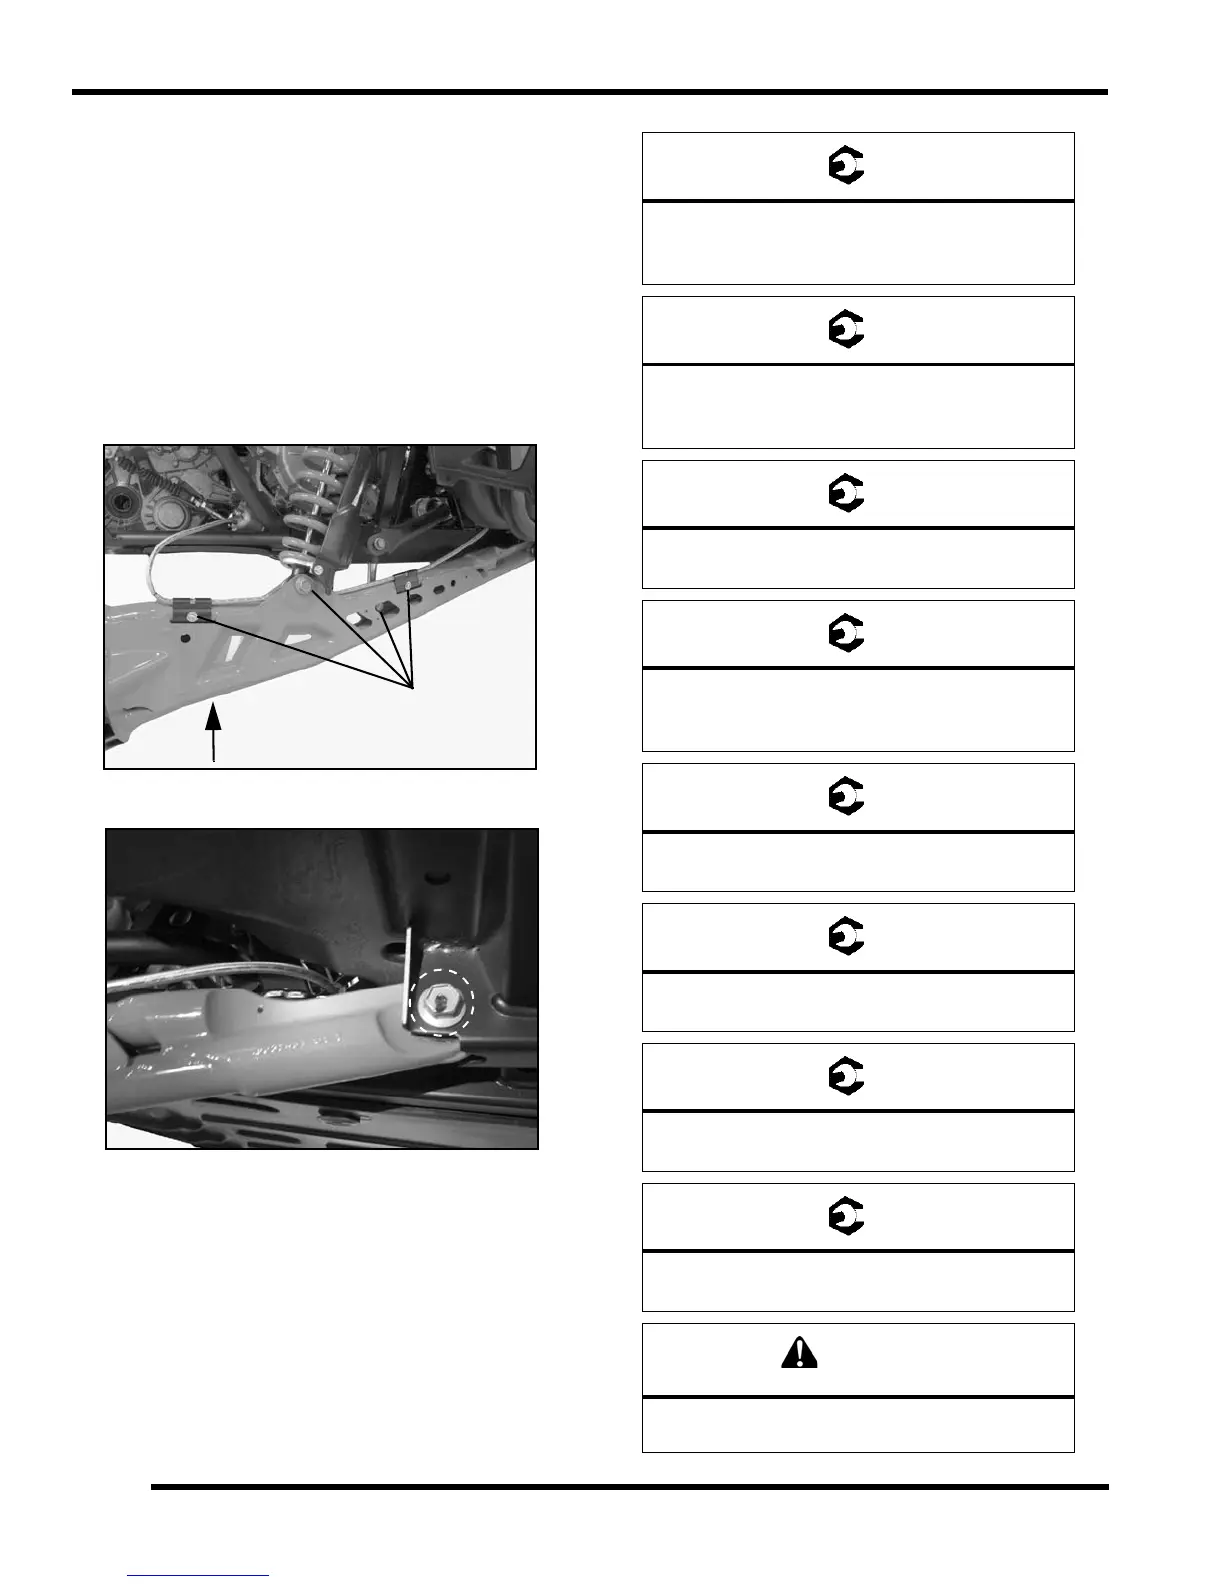
10. Remove the (2) fasteners that secure the brake line
retainers to the trailing arm.
11. Remove the lower stabilizer bar linkage fastener.
Discard the nut.
12. Support trailing arm with suitable jack stand or
support.
13. Remove the lower shock bolt. Discard the nut.
14. Remove the front trailing arm bolt. Discard the nut.
15. Remove trailing arm from vehicle. Visually inspect
trailing arm, bushings, o-rings and spherical bearing
for wear. If bearing requires replacement, refer to
“Trailing Arm Spherical Bearing Replacement”.
16. Replace trailing arm if physically damaged.
17. Reverse this procedure to reinstall rear trailing arm.
NOTE: Use new fastener nuts upon installation of
the rear trailing arm and bearing carrier.
18. Torque all fasteners to specification.
Remove
Support Trailing Arm
Trailing Arm to Main Frame Bolt:
(Trailing arm spherical bearing bolt)
70 ft-lbs (95 Nm)
Rear Shock Mounting Bolts:
Upper: 50 ft-lbs (67.7 Nm)
Lower: 70 ft-lbs (95 Nm)
Rear Stabilizer Bar Linkage:
31-34 ft-lbs (42-46 Nm)
Radius Rod Mounting Bolts:
Inner: 40 ft-lbs (54 Nm)
Outer: 45 ft-lbs (61 Nm)
Bearing Carrier to Trailing Arm Bolts:
40 ft-lbs (54 Nm)
Rear Brake Caliper Mounting Bolts:
40 ft-lbs (54 Nm)
Rear Wheel Hub Castle Nut:
80 ft-lbs (108 Nm)
Wheel Nuts:
30 ft-lbs (41 Nm) + 90° (1/4 turn)
Upon rear trailing arm installation, test vehicle at
low speeds before putting into service.
 Loading...