6.20
CLUTCHING (PVT)
9924096 - 2013 RANGER RZR XP 900 / RZR XP 4 900 Service Manual
© Copyright 2012 Polaris Sales Inc.
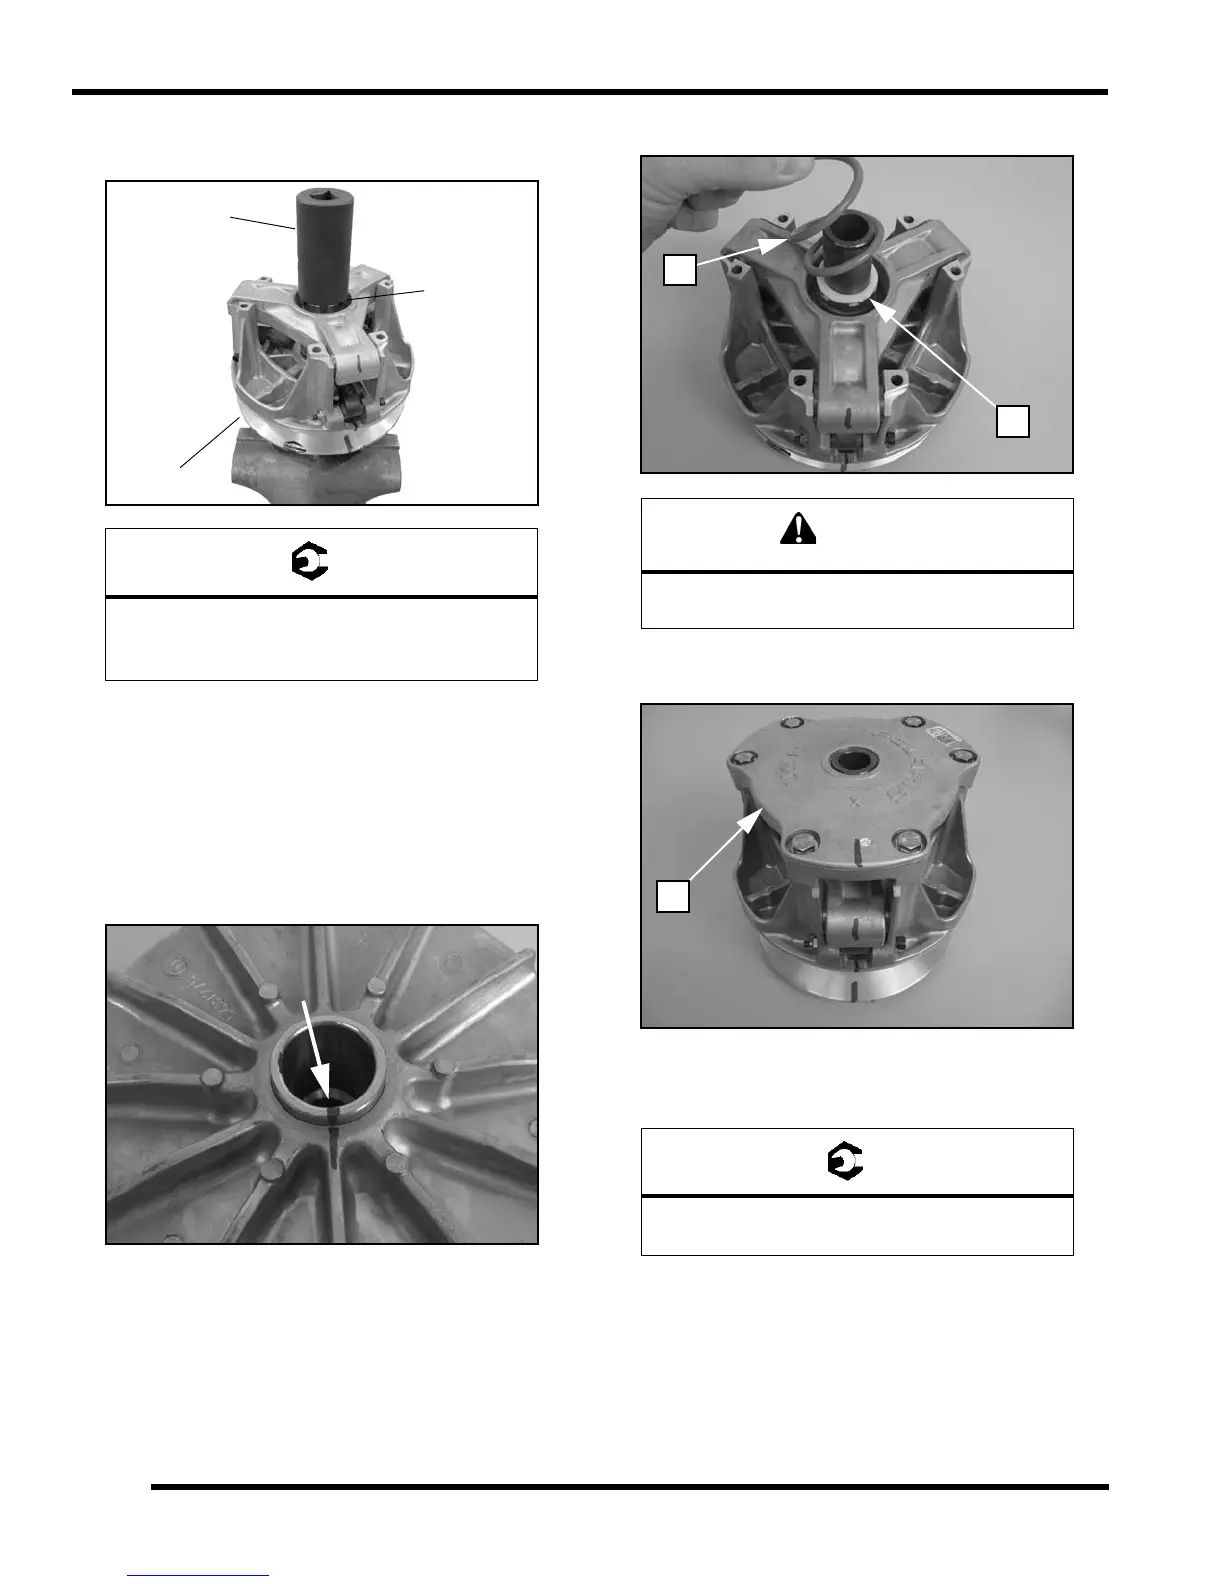
8. Tighten the spider jam nut using Clutch Spider Nut
Socket (PU-50578). Torque jam nut to specification.
9. After the spider and jam nut have been torqued,
remove the clutch assembly from the holding fixture
and inspect the alignment marks made during
disassembly.
IMPORTANT: If the marks illustrated below are not in
alignment upon assembly, the clutch will not be in
balance and the drive clutch assembly must be
replaced.
10. Install the limiter spacer (A) and the clutch spring (B).
11. Install the drive clutch cover (C). Be sure all alignment
marts are in alignment.
12. Install cover bolts and torque in a cross pattern evenly
to specification.
Spider Jam Nut:
250 ft-lbs (339 Nm)
Apply Loctite® 263™ to threads
DO NOT reassemble the drive clutch without the
limiter spacer. Belt life will be greatly reduced.
Drive Clutch Cover Bolts:
100 in-lbs (12 Nm)

 Loading...