SAM4s ER-900 Series Operator's & Programming Manual v.1.28 S-Mode Programming • 107
c. Using the handles of the selected image, resize the image. Keep the image in the
upper left corner of the screen.
d. Choose Attributes from the Image menu. The Attributes dialog box displays
again. Enter 384 in the Width field; enter 192 in the Height field; select Pixels
as the unit. Click OK to exit the dialog box.
e. Your image will be cropped to the 384 x 192 pixel size. If you cropped part of
the image you wish to keep, you can undo (Ctrl + Z) and try again. You may
have to experiment a bit to resize the image inside the 384 x 192 pixel limit.
5. After the image is sized, select Black and white in the Attributes dialog.
6. Save your image as type “Monochrome Bitmap (*.bmp,*.dib)” and confirm that the
size is 10k or less. If you resized your original image, you may wish to rename when
you save, so that you preserve a copy of the original image.
2. Use the PC Utility to Convert the Image
1. Install the ER-900 PC Utility on your PC.
2. At your PC, start the ER-900 PC Utility. (Select Start, Programs, SHC PC
UTILITY, ER-900 PC UTILITY.) The Store Setting dialog box displays.
3. If you are starting the ER-900 PC Utility for the first time, you must define a store
name, or if a store is already defined, you can select the store from the drop down
list. After the store is defined or selected, click Close. The PC Utility program
starts.
4. Move the .bmp logos you wish to use into the store directory
(i.e. C:\ER-900PC\storename.)
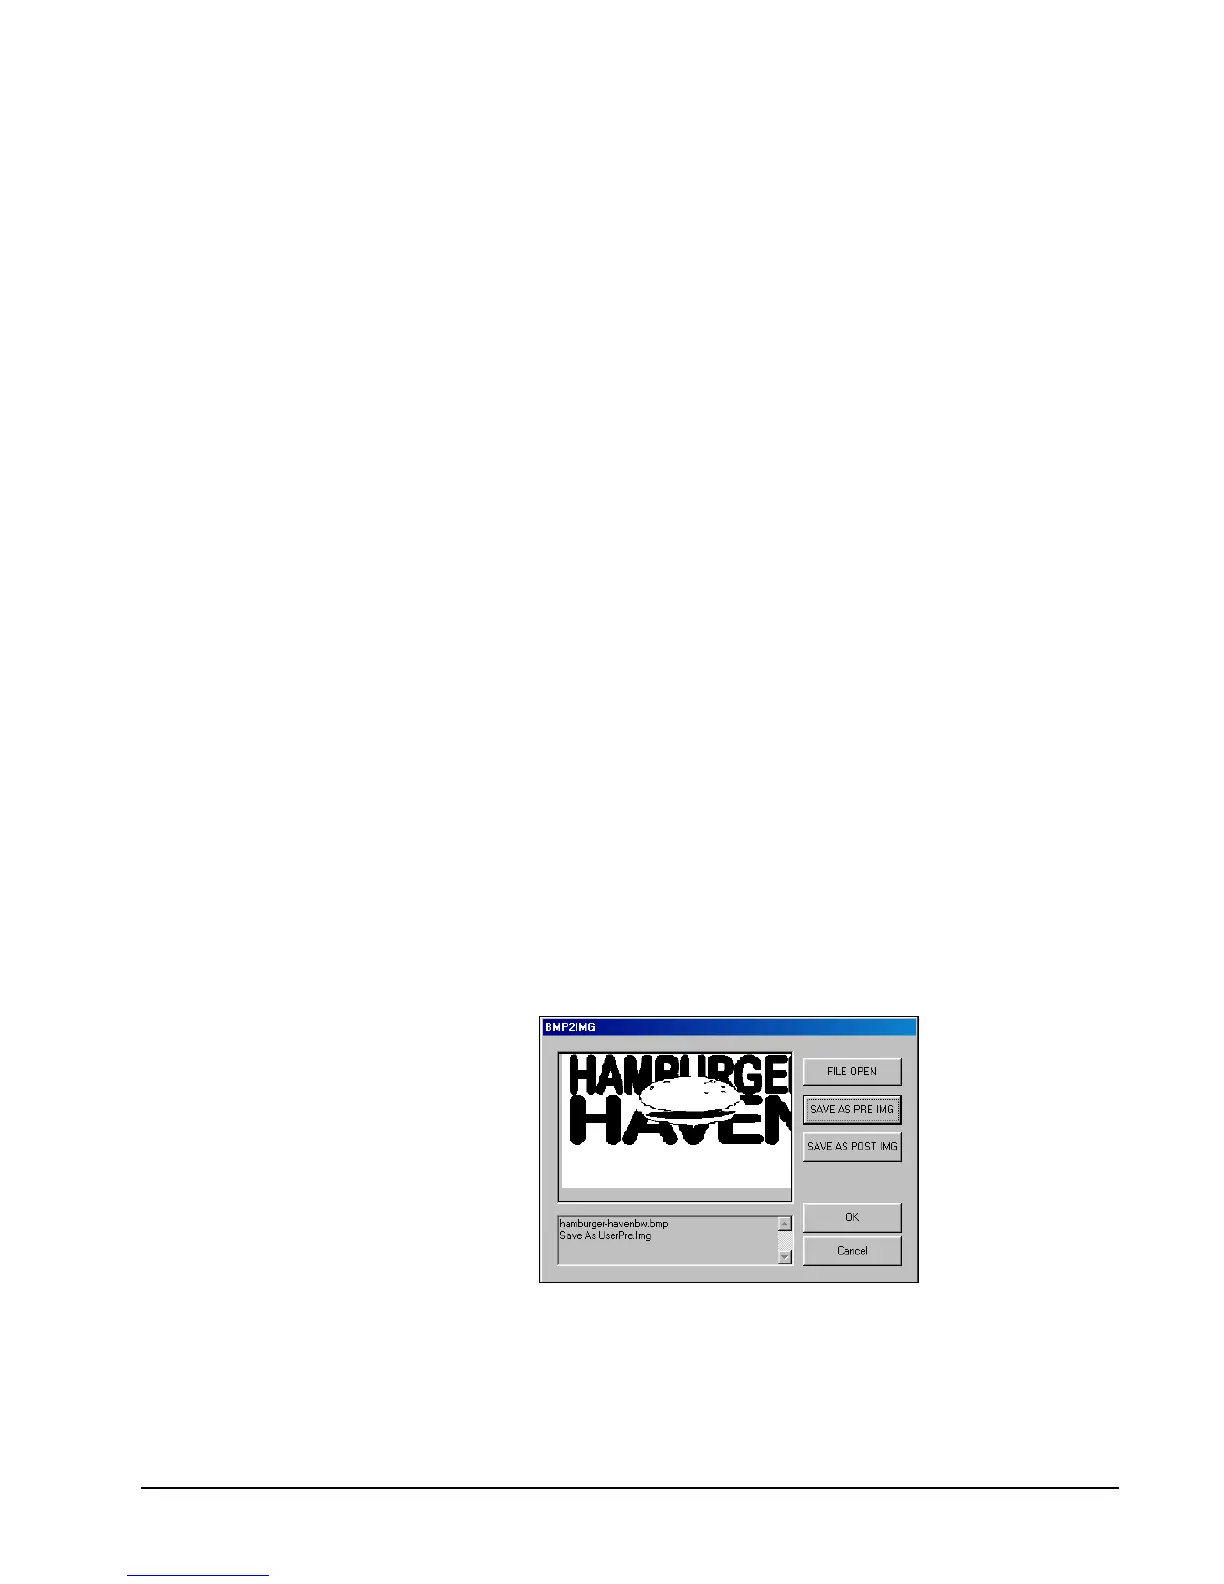
5. At the PC Utility, choose Convert Logo Image from the Utility menu. The Bmp
dialog box displays.
6. Click FILE OPEN. Select the bitmap image you wish to use from the Open
dialog and click the Open command button.
7. Click the SAVE AS PRE IMG or SAVE AS POST IMG button.
8. When the image is selected, click OK. Verify that the message “Save As
UserPre.Img” or “Save As UserPost.Img” displays. If the file is too large, and
cannot be loaded, the message “File Size Error” displays.