MRD 3187B - User Manual
Page 189 (245)
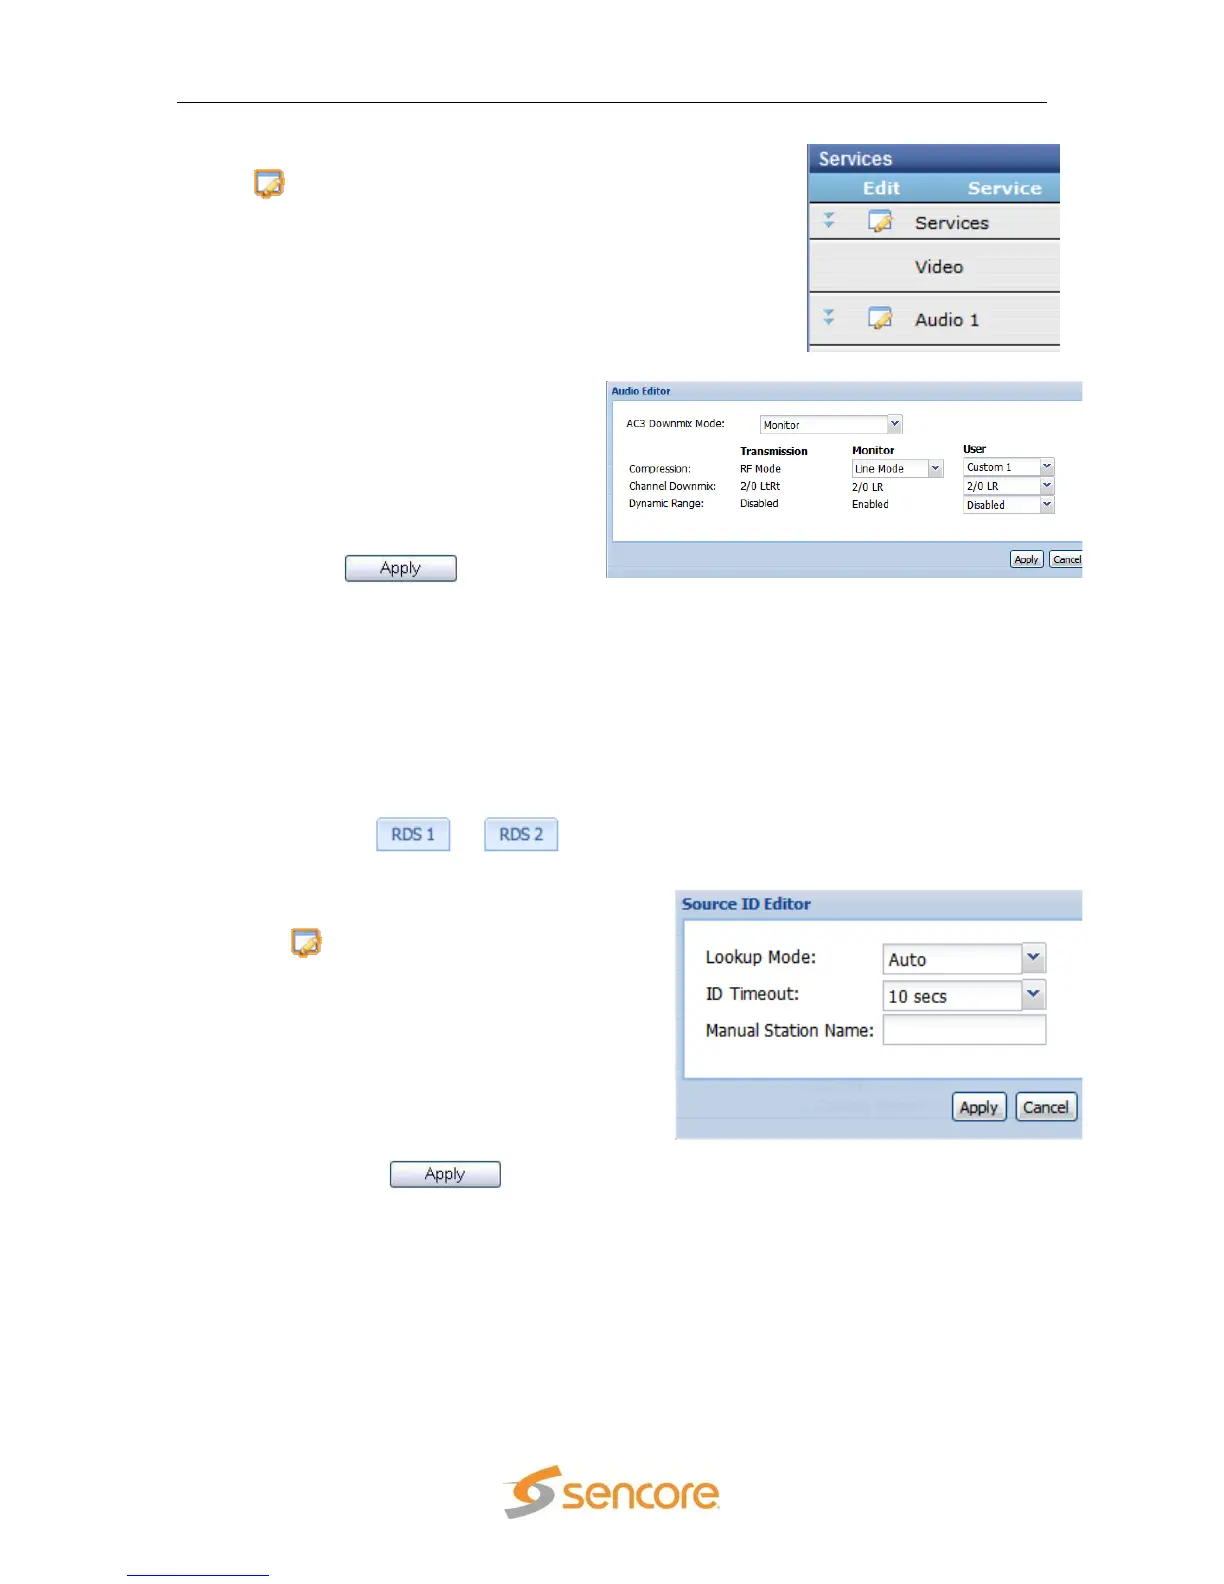
2. Under the “Services” heading, click on the
button next to the corresponding audio
to configure.
3. A new window should pop up in
the middle of the screen. Use the
drop down menu at the top to
choose the appropriate “AC3
Downmix Mode” .
4. Depending on the chosen Mode,
use the remaining drop down
menus to finish the setup.
5. Click the button to
save the settings.
Note: Use the previous steps to setup the other audio dowmixes as well.
Note: “Transmission” Mode does not allow any changes. “Monitor” Mode allows
changing the “Compression” value. “User” Mode allows changing
“Compression”, “Channel Downmix” and “Dynamic Range” values.
5.3.2.3 Source ID
To setup the Source ID, use the following steps:
1. Click on the or tab of
the corresponding RDS that needs to be
configured.
2. Under the “Services” heading, click on
the button next to the Source ID
option.
3. A new window will pop up in the middle
of the screen. Use the drop down menu
at the top to choose the “Lookup Mode.”
4. Then use the next drop down box to
choose the desired “ID Timeout” (in
seconds).
5. Enter a “Manual Station Name:” and
then click the button to save
the changes.
Note: If no source is found in the allotted time the “Manual Station Name:” is
displayed.
5.3.2.4 SCTE 35 to SCTE 104 Setup
To select the PIDs for SCTE 35, follow the steps below.