6.
From the Pins drop-down menu in line 3, select the pin pair you chose in Step 2. (Note
that you will need 4 pins if you selected a RS485 signal Type.)
7.
Click Submit.
8.
In the Actions panel, click Apply Changes.
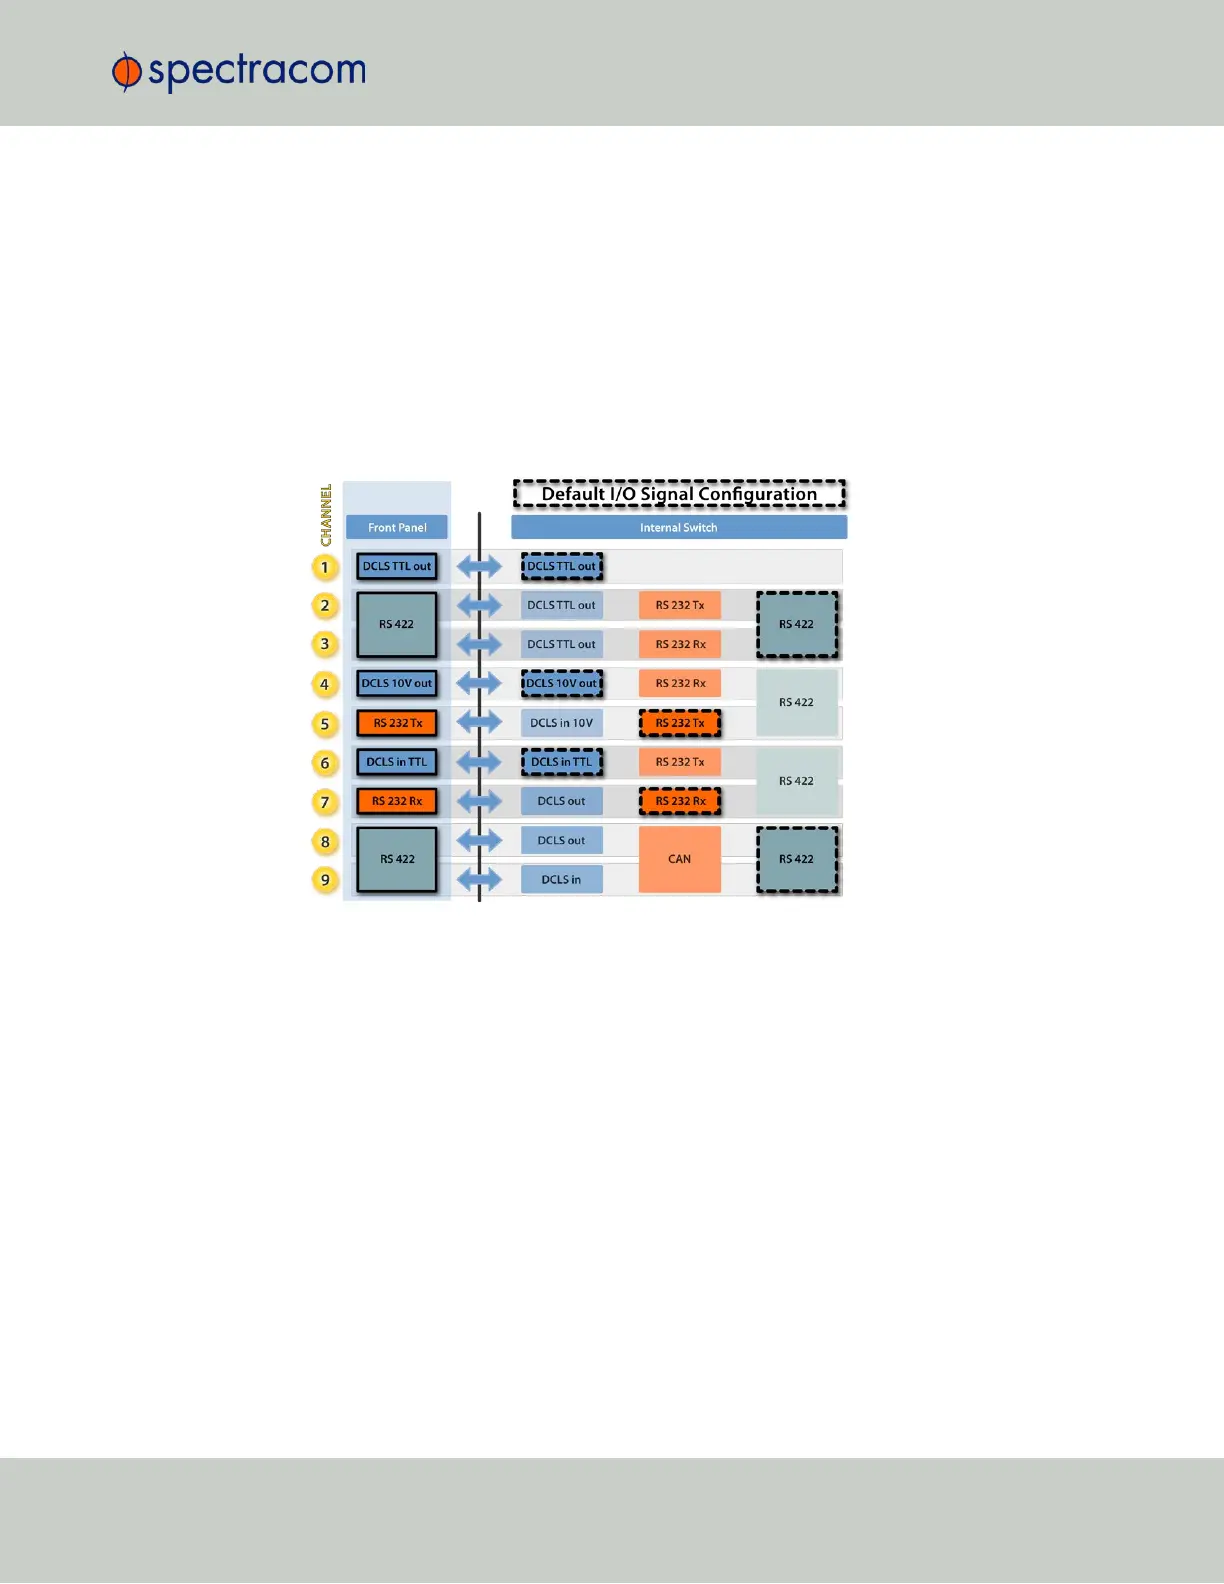
Restoring the Default I/O Configuration
VersaSync is shipped with a default I/O configuration that you can be customized. However, if
required you can restore the default configuration at any time after applying changes.
The following illustration shows the default I/O pin configuration:
Figure 2-4: Default I/O configuration
To restore the default I/O pin configuration:
A.
Navigate to the MANAGEMENT: NETWORK > Pin Layout screen.
B.
In the Actions panel on the left, click Restore Default Layout.
Reloading the Current I/O Configuration
To reload the currently used I/O configuration after adding pin layout changes, but before
clicking Apply Changes:
A.
Navigate to the MANAGEMENT: NETWORK > Pin Layout screen.
B.
In the Actions panel on the left, click Reload Layout.
2.6 Configuring Inputs/Outputs
CHAPTER 2 • VersaSync User Manual Rev. 6.0
39