Unloading Material Connecting Material Coil Box To Printer
Page 106
© Copyright 2020 Stratasys. All rights reserved.
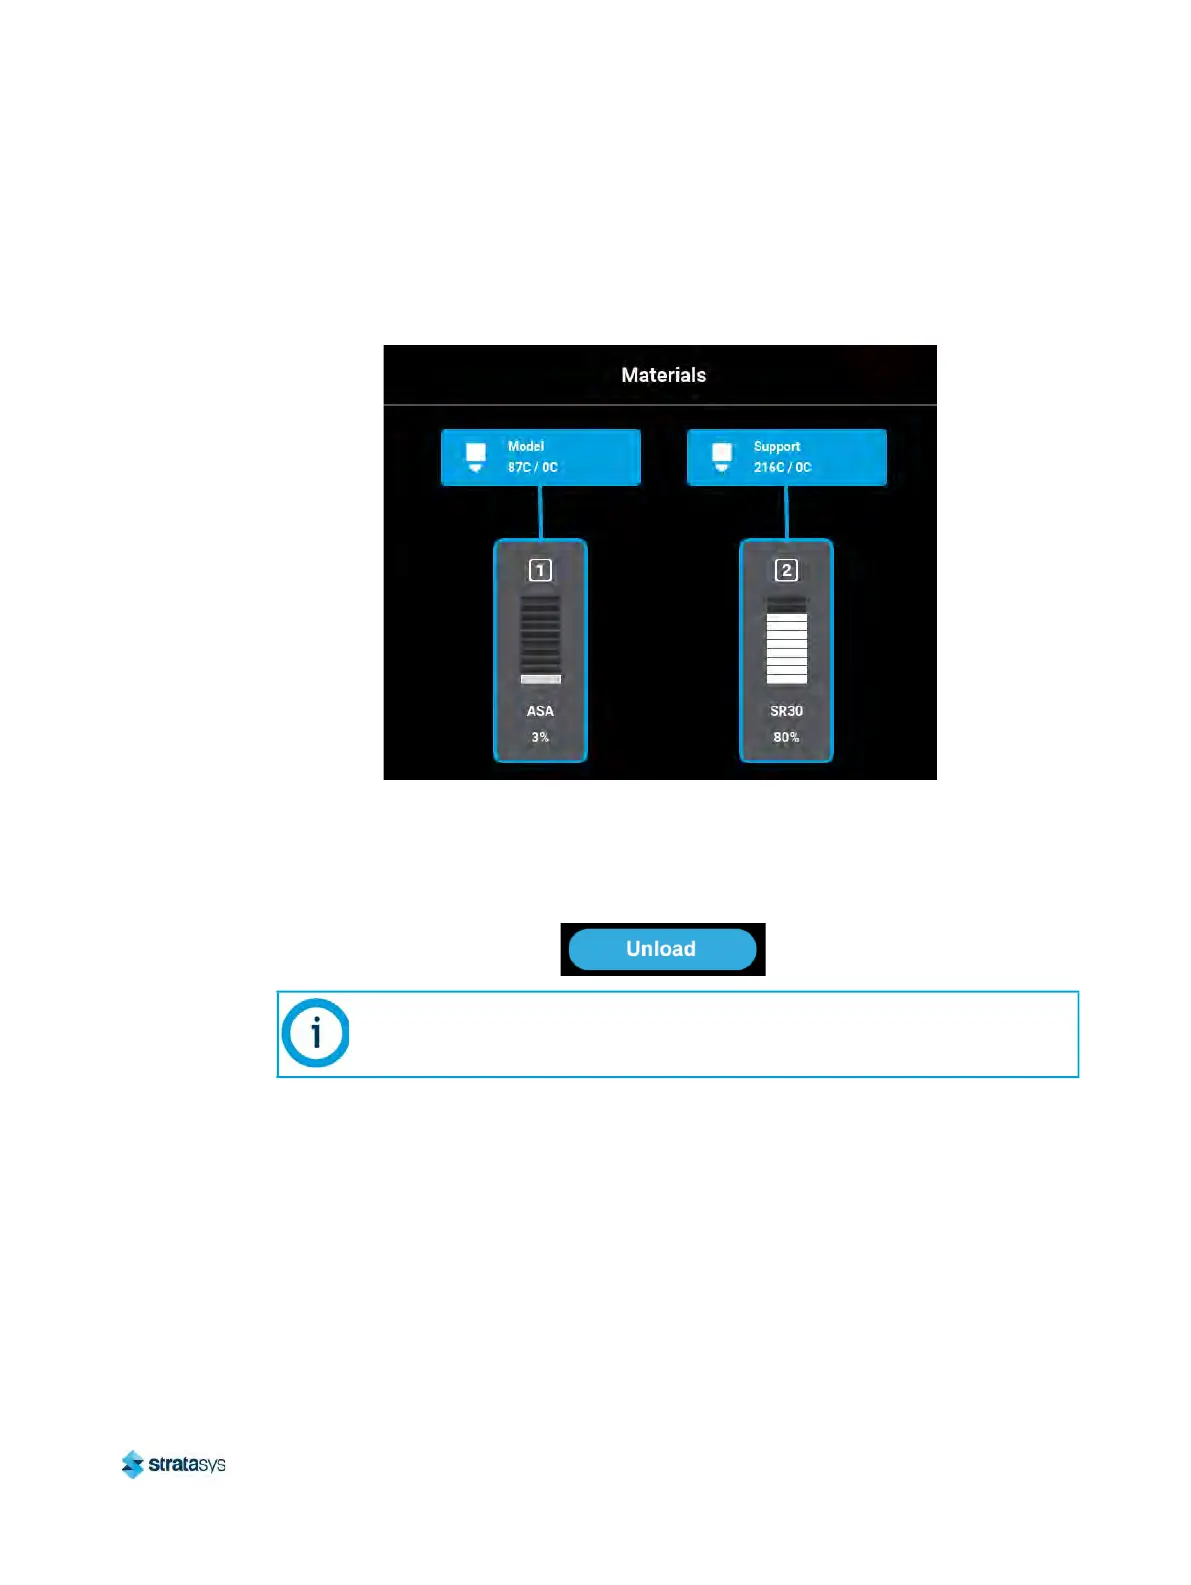
3. Observe the status information displayed for each of the Materials Status Icons. For a
loaded material, the pathway between the material’s Material Status Icon and
corresponding Head Status Icon will be solid blue, the Head Status Icon will be blue, and
the Material Status Icon will display a solid blue border.
Figure 12: Current Configuration - Unload Material
4. Open the Material Details page corresponding to the material you want to unload by
t
ouching its Material Status Icon on the screen.
5. Press the U
nload button within the Material Details page.
Figure 13: Unload Button
6. The F120 unload material wizard initializes and material begins to unload from the head.
T
he unload process will take several minutes; please be patient.
• The pathway displayed between the Material Status Icon and the corresponding Head
S
tatus Icon becomes highlighted to indicate unload progress (see
Figure 31 (page 67)).
• The Head Status Icon will refresh and become solid gray, indicating that material is no
l
onger loaded to the head.
7. When the material is unloaded from the head and the F120 material unload wizard has
c
ompleted its process. See Figure 15 (page 107).
• Remove the filament key from the material port.
Only one material can be unloaded at a time.
 Loading...


