52
S
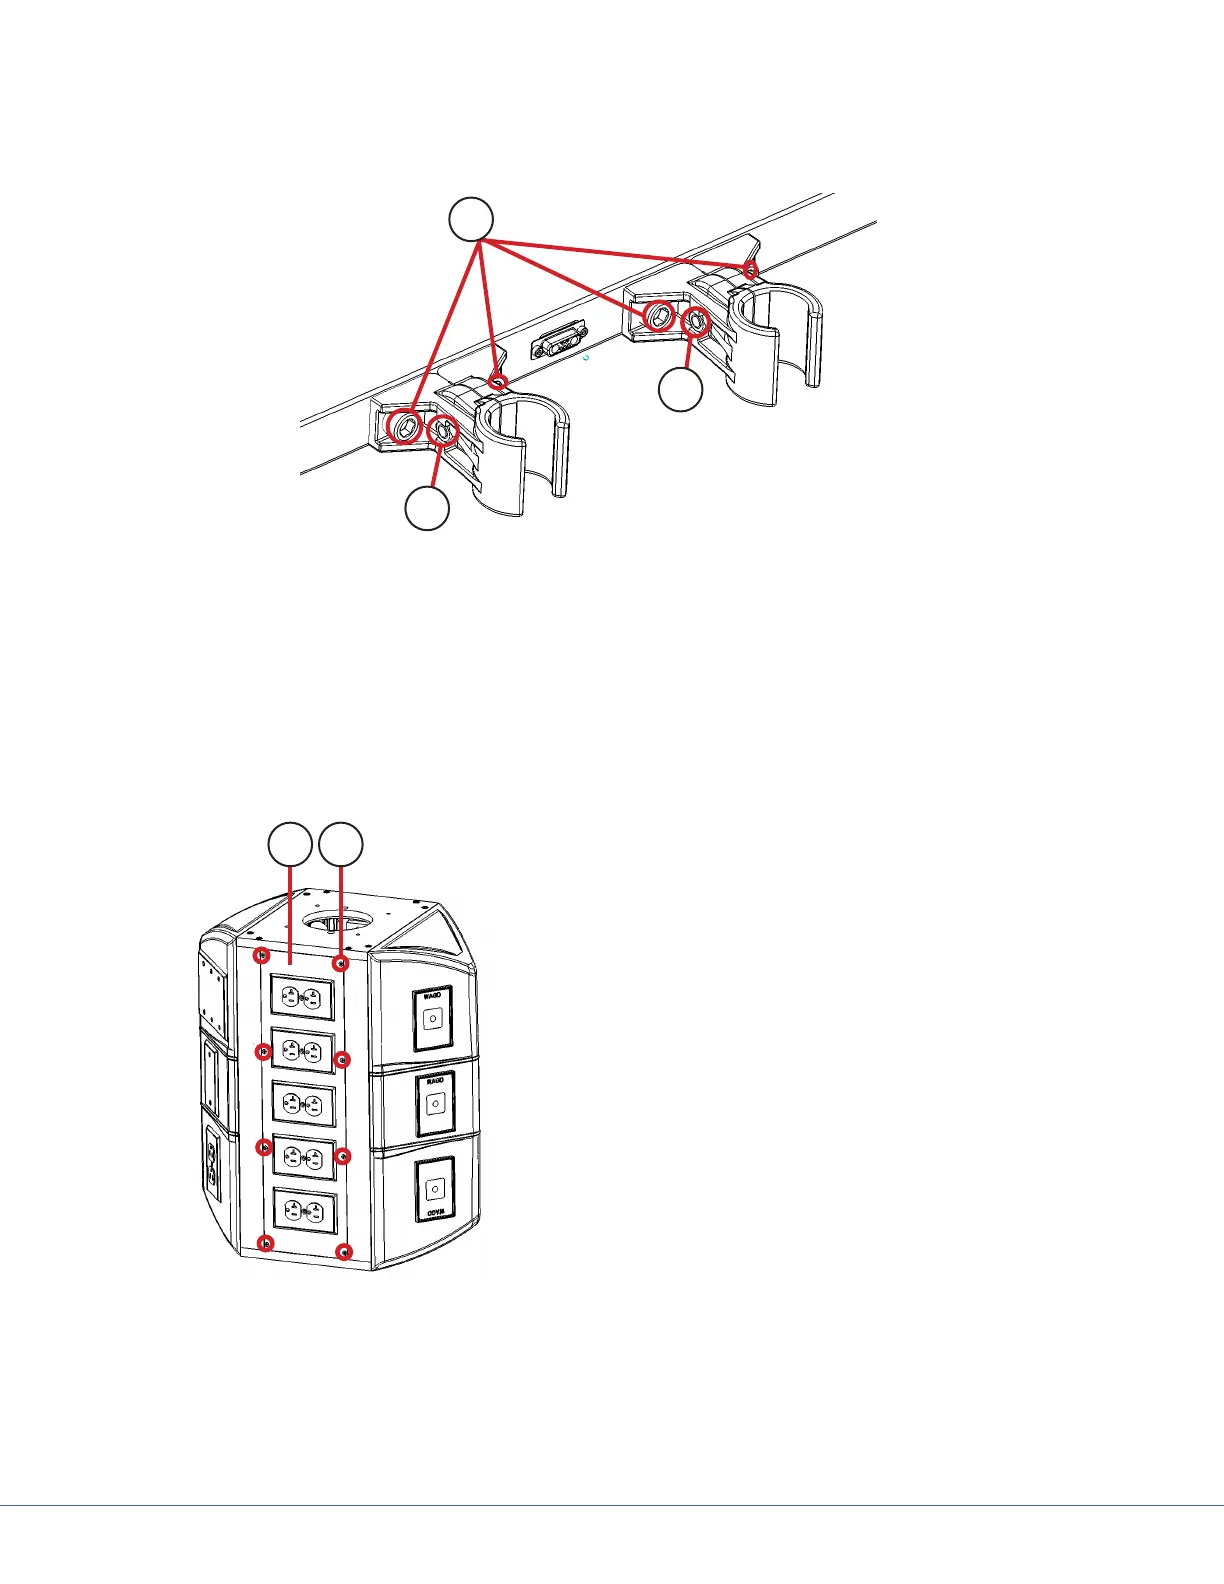
3. Loosen the mounting screws (Item 2).
4. Loosen the clamp screws (Item 1 in the following gure) as much as possible without disassem-
bly.
2
1
1
Screw and Nut Locations
5. Slide each clamp assembly apart and position the shelf on the MFRs of the FLEXiS System. e
clamps should be able to open enough to directly install the shelf to the desired location. e
shelf can also be attached by sliding the clamps onto the MFRs.
6. If the clamps cannot close properly, the shelf may not be level.
7. Fully tighten the clamp screws (Item 1).
8. Fully tighten the mounting screws (Item 2).
1 2
Location of Screws on Access Panel
9. If the shelf has a handle, connect the con-
trol cable from the FLEXiS System to the
connector on the back of the shelf.
a. Using a Phillips screw driver, open the
access panel (Item 1) on the front or
back of the FLEXiS System by removing
the eight Phillips screws (Item 2).