86
S
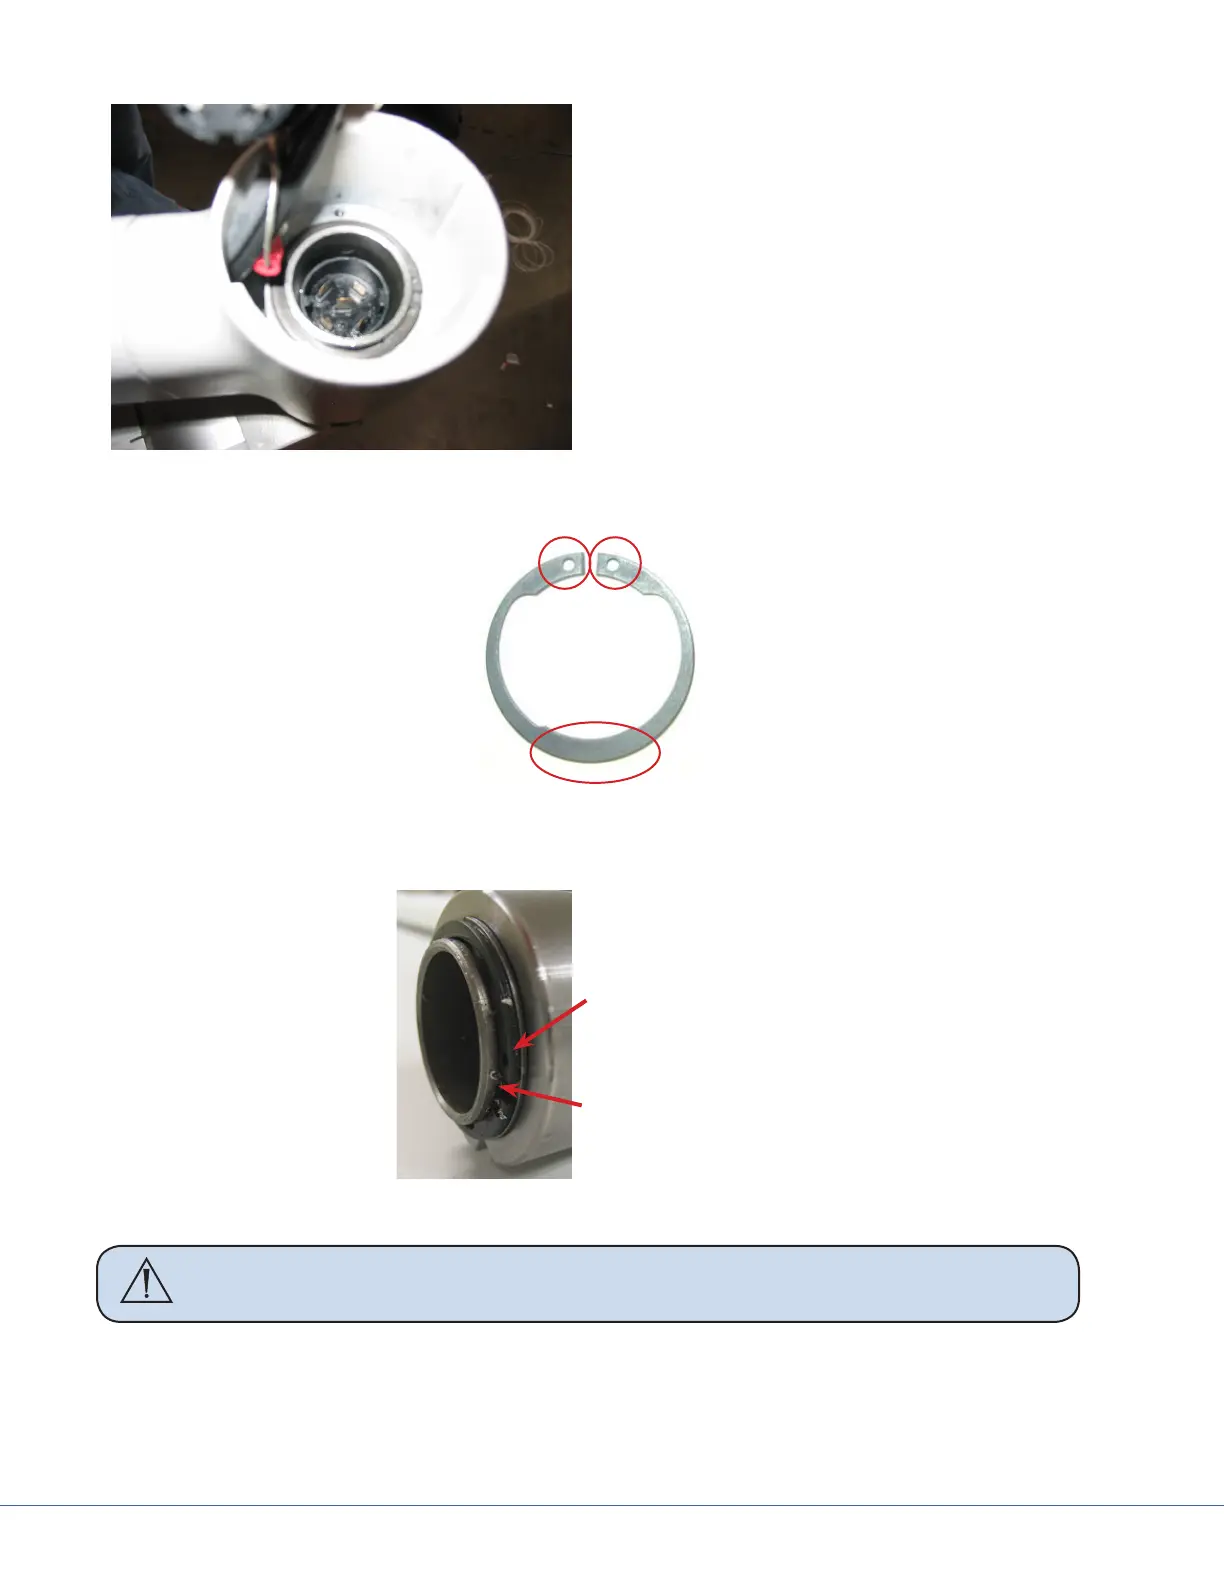
5. Insert washers into top of Suspension
Arm.
6. Raise Spring Arm into the bottom of the
suspension. Insert Spring Arm into Sus-
pension Arm and tighten brake screws to
hold.
7. Using the adjusted snap ring pliers secure
the C-Clip over the pair of washers, mak-
ing sure it ts securely in the groove at the
top of the Spring Arm.
8. Visually inspect to verify that all three sides of the retaining ring are in contact with the inner
channel.
Retaining Right Contact Points
9. Ensure the retaining ring is securely seated in its groove as shown in the next gure.
Retaining Ring
Seated in Groove
Groove in Spring Arm
Retaining Ring Properly Seated in Groove of Spring Arm
WARNING e C-Clip must be properly seated or the Spring Arm and light could fall.
10. Replace top cover and ensure end cap is screwed down completely, check for proper keying of
electrical connection (align big and little keys with slots).
11. Repeat as necessary.