RemovingtheFuelTank(continued)
g221627
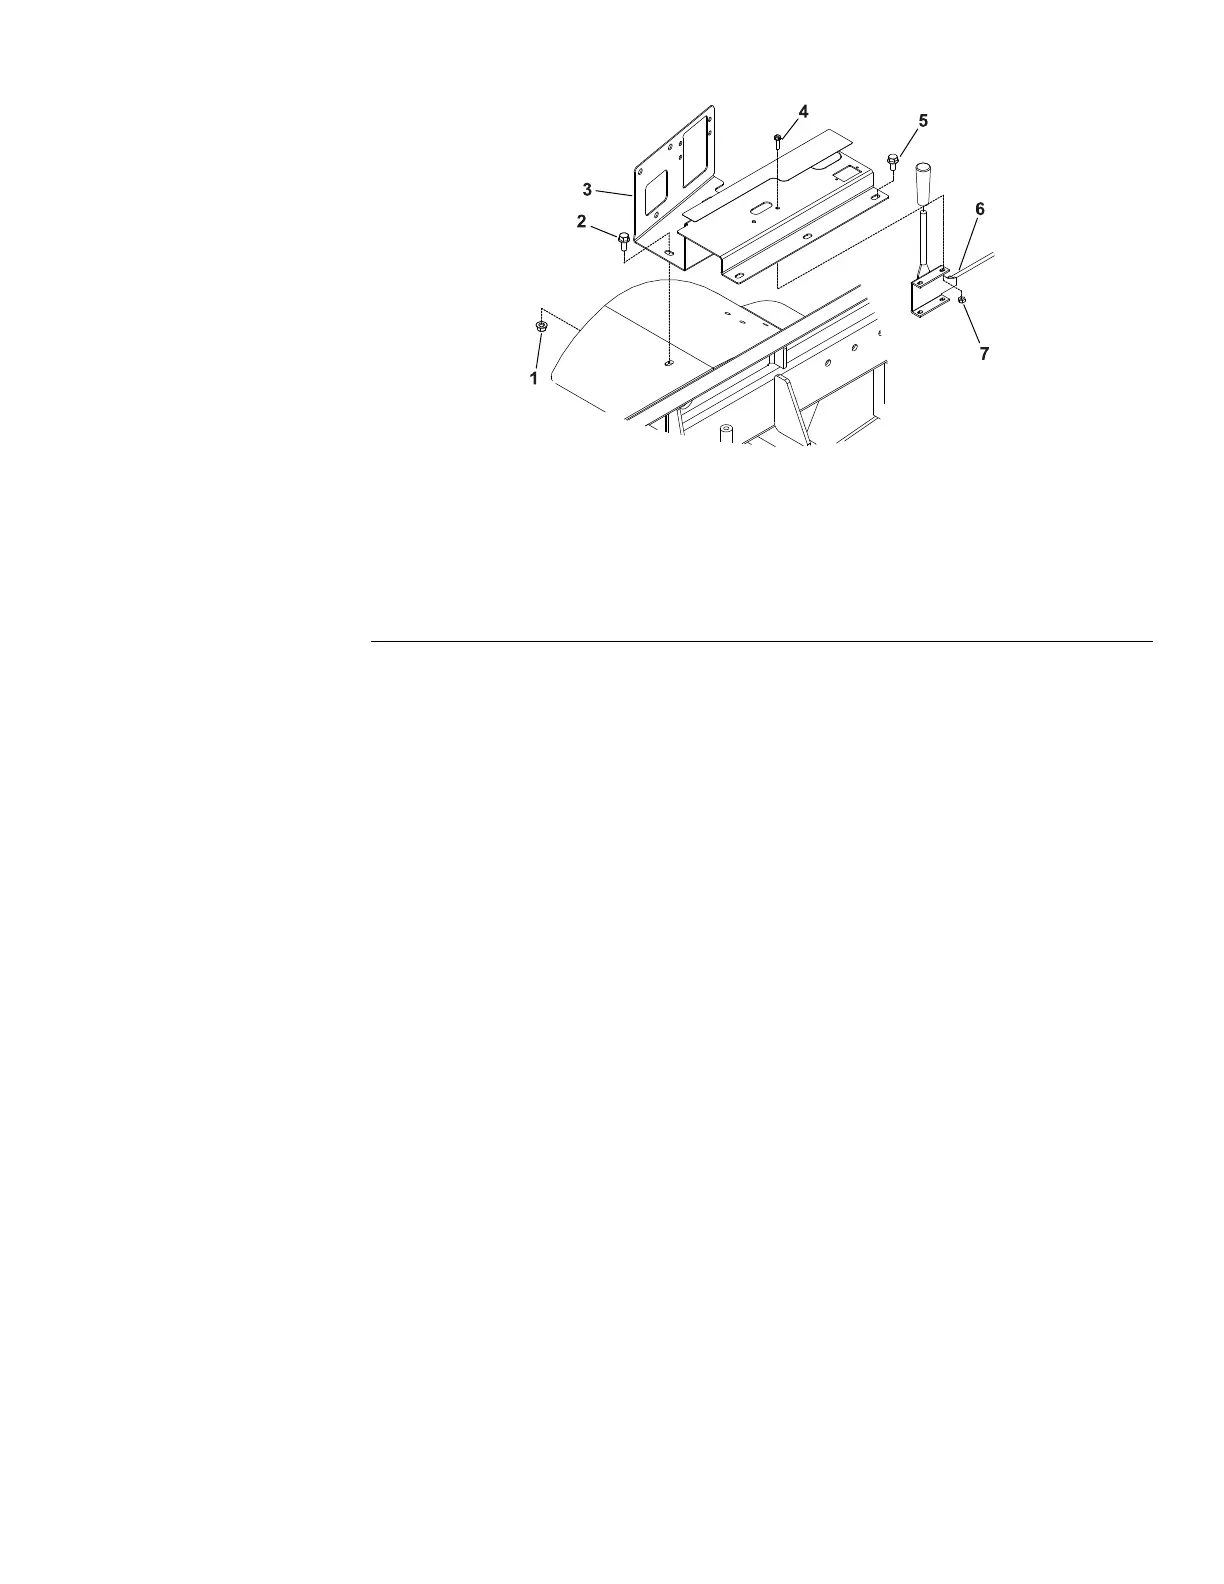
Figure27
1.Flangenut
4.Washer-headscrew(2
each)
7.Locknut(2each)
2.Flange-headscrew
5.Flange-headscrew(3
each)
3.Console
6.Throttlecontrol
9.Removetheange-headscrewsandangenutthatsecurethelowercontrol
paneltothemachine(Figure27).
10.Removethelocknut(item25inFigure26)fromtheleftfender.
11.Useafueltransferpumptoremovethefuelfromthefueltankandinto
asuitablecontainer.
12.Loosenthehoseclampsandcarefullydisconnectthefuelhosesfromthe
standpipeandelbowttings(items30and29inFigure26)onthetopof
thefueltank.
Note:Beforeremovingthefuelhosesfromthetankttings,labelthehoses
forassemblypurposes.
13.Coverorplugthefuelhosesorttingopeningstopreventcontamination
fromenteringthefuelsystem.
14.RemovethefueltankasshowninFigure26.
InstallingtheFuelTank
1.Installthefueltanktotheframe(Figure26).
2.Connectthefuelhosestothestandpipeandelbowttings(items30and
29inFigure26)onthetopofthefueltank.Securethefuelhoseswiththe
hoseclamps.
3.Securethelowercontrolpaneltothemachinewiththeange-headscrews
andangenuts(Figure27).
4.Securethetanktotheleftfenderwithalocknut(item25inFigure26).
5.Positionthecontrolpaneltothefueltank,connectthewireharnesstothe
panelcomponents,andsecurethepaneltothemachinewiththe4thumb
screws.
6.Installtheseatplatetothemachine.
7.Installtheseatsuspensionandseattothemachine;refertoOperatorSeat
(page7–19).
Groundsmaster
®
3280-D/3320
Page4–17
DieselEngine:ServiceandRepairs
05138SLRevB
 Loading...


