SHB WL34 * 2.0 4-19
Travel drive 4
Cardan shaft
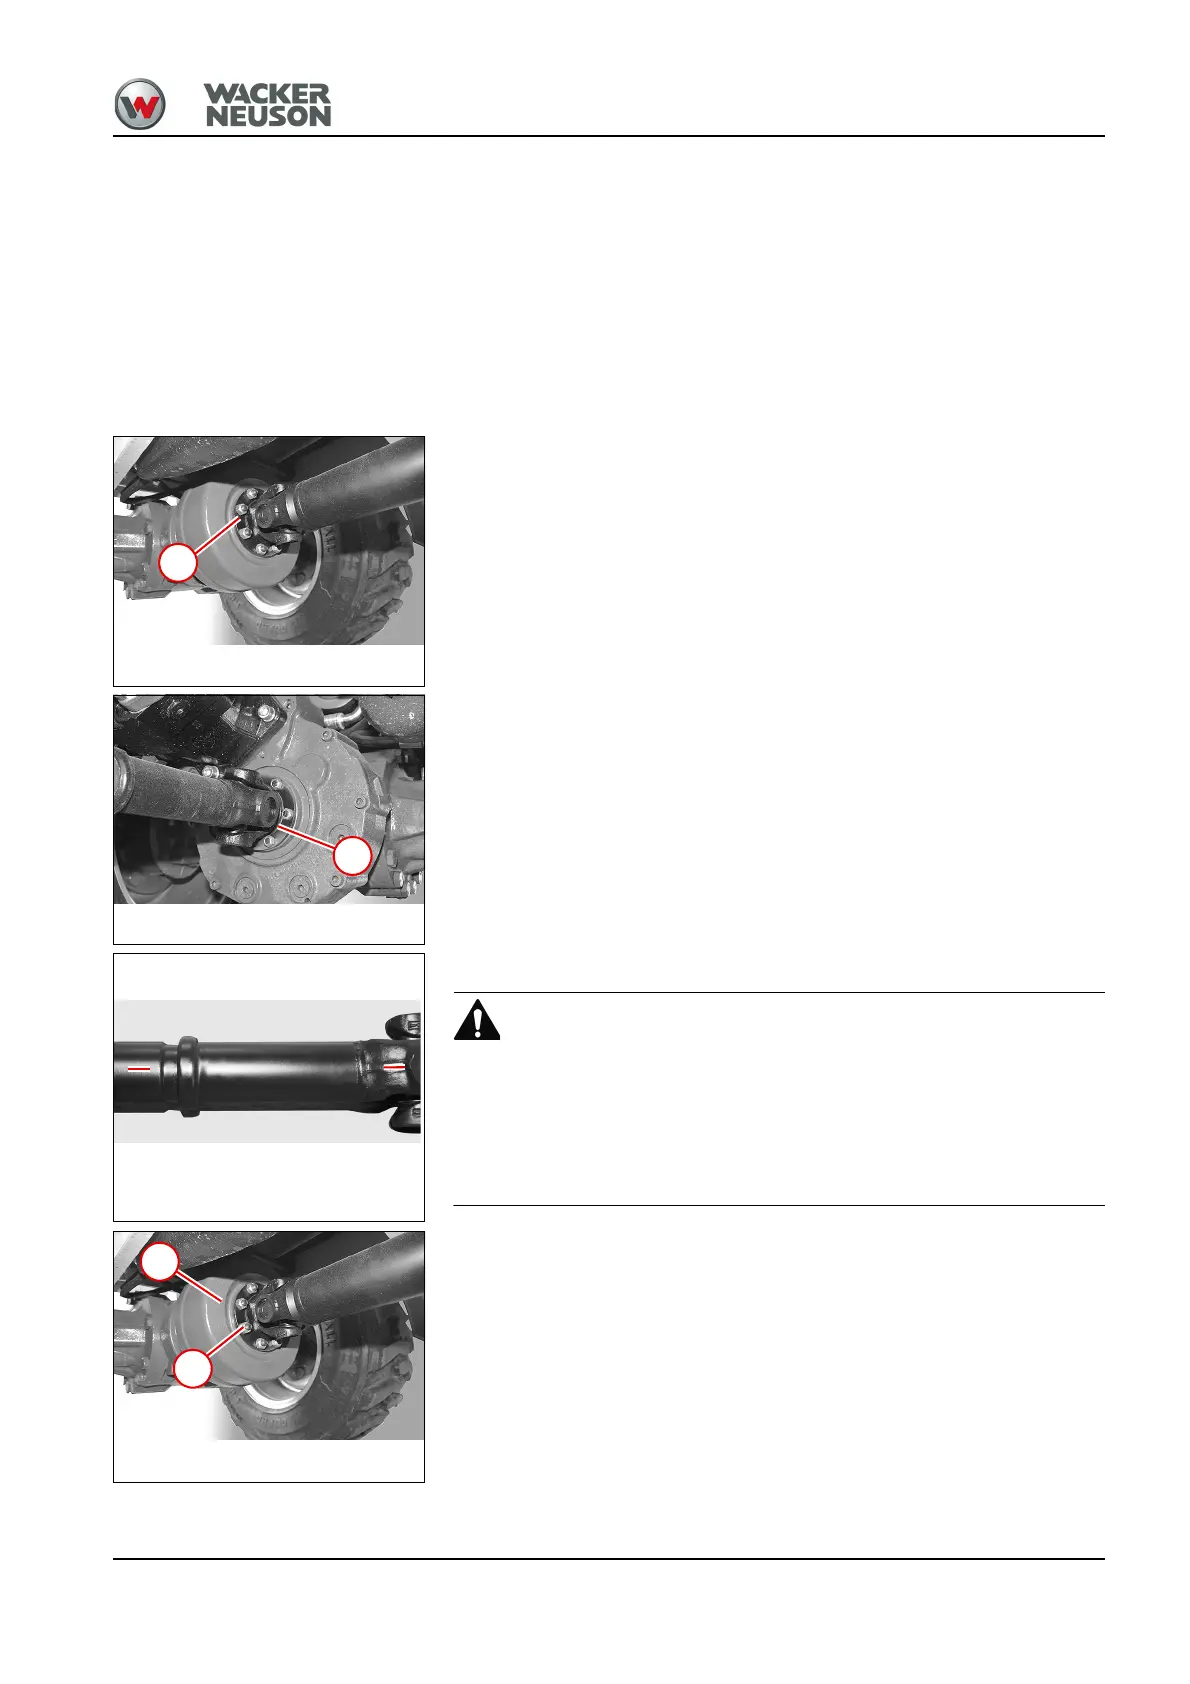
4.6 Removing/installing the cardan shaft
Preparations
1. Park the machine on firm, level and dry ground.
2. Apply the parking brake.
3. Lower the loader unit to the ground.
4. Stop the engine.
5. Block the oscillating articulation (see Operator’s Manual).
Disassemble
1. Remove all nuts (SW13) at the rear axle joint 1.
2. Remove the cardan shaft from the front axle by sliding it backward.
3. Remove all nuts (SW 13) at the rear axle joint 2.
4. Remove the cardan shaft from the rear axle by sliding it forward.
Install
Injury hazard due to incorrect installation of the cardan shaft!
The cardan shaft joints can be damaged if they are not properly aligned.
Persons standing in immediate proximity can be severely injured. The
machine can be damaged.
► Align the cardan shaft on the mark.
1. Clean the contact area and the stud bolts on the front axle 3.
2. Apply locking compound to stud bolts.
3. Slide the cardan shaft onto the stud bolts on the front axle.
4. Screw nuts 4 onto the stud bolts and tighten them.
Travel drive
Cardan shaft