Connect tubing and attachments
July 29, 2013, 715003794 Rev. B 59
To install the solvent lines:
1. Uncoil the solvent lines stored in front of the separations module, near
the syringe compartment.
2. Remove the filter from each solvent line and insert the free end of each
solvent line through a reservoir cap (startup kit).
3. Reinstall a filter on the end of each solvent line.
4. Install each reservoir cap on the appropriate reservoir.
Requirement: Make sure the solvent line extends to the bottom of the
reservoir.
Install the degasser vent tubing
Besides removing dissolved gases from the solvents, the degasser draws off
solvent vapors, which can condense to form droplets in the exhaust system.
The degasser exhausts these gases and droplets, if any, through a vent line.
To install the degasser vent tubing, place the free end of the tubing (the clear,
1/8 × 1/4” tubing that exits the rear of the instrument) in a waste container
located in a properly functioning fume hood.
Requirement: When your installation requires exhausting the degasser vent
line at a vertical height higher than that of the vent line exiting the rear of the
separations module, route the first 30.5 cm (1 ft) of vent line at the instrument
bench height before extending it upward to the fume hood. This requirement
will help to minimize the risk of condensation bleeding back to the vacuum
pump. Additionally, if your HPLC application involves the use of volatile
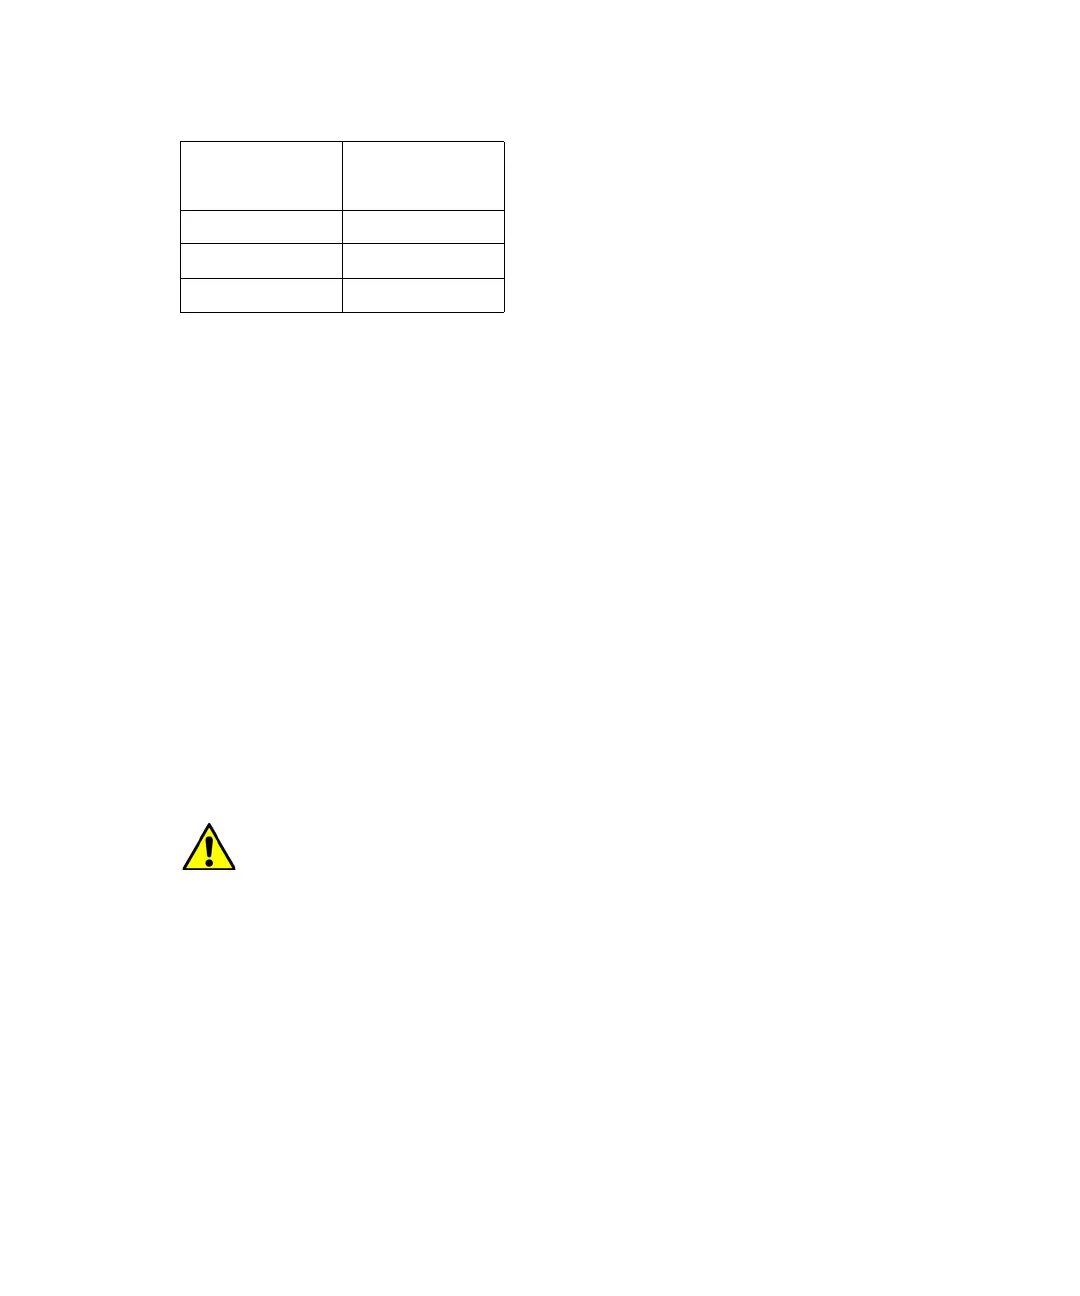
BBlue
CRed
DGreen
Caution: To avoid exposure to solvent vapors, connect the degasser
exhaust tube to a suitable fume hood. Consult local building and health
codes for specific requirements regarding the venting of solvent vapors.
Solvent supply tubing identification: (Continued)
Solvent line
label
Solvent line
color