February 2013
4-134
ColorQube® 9303 Family
REP 12.8-171, REP 12.10-171
Repairs/Adjustments
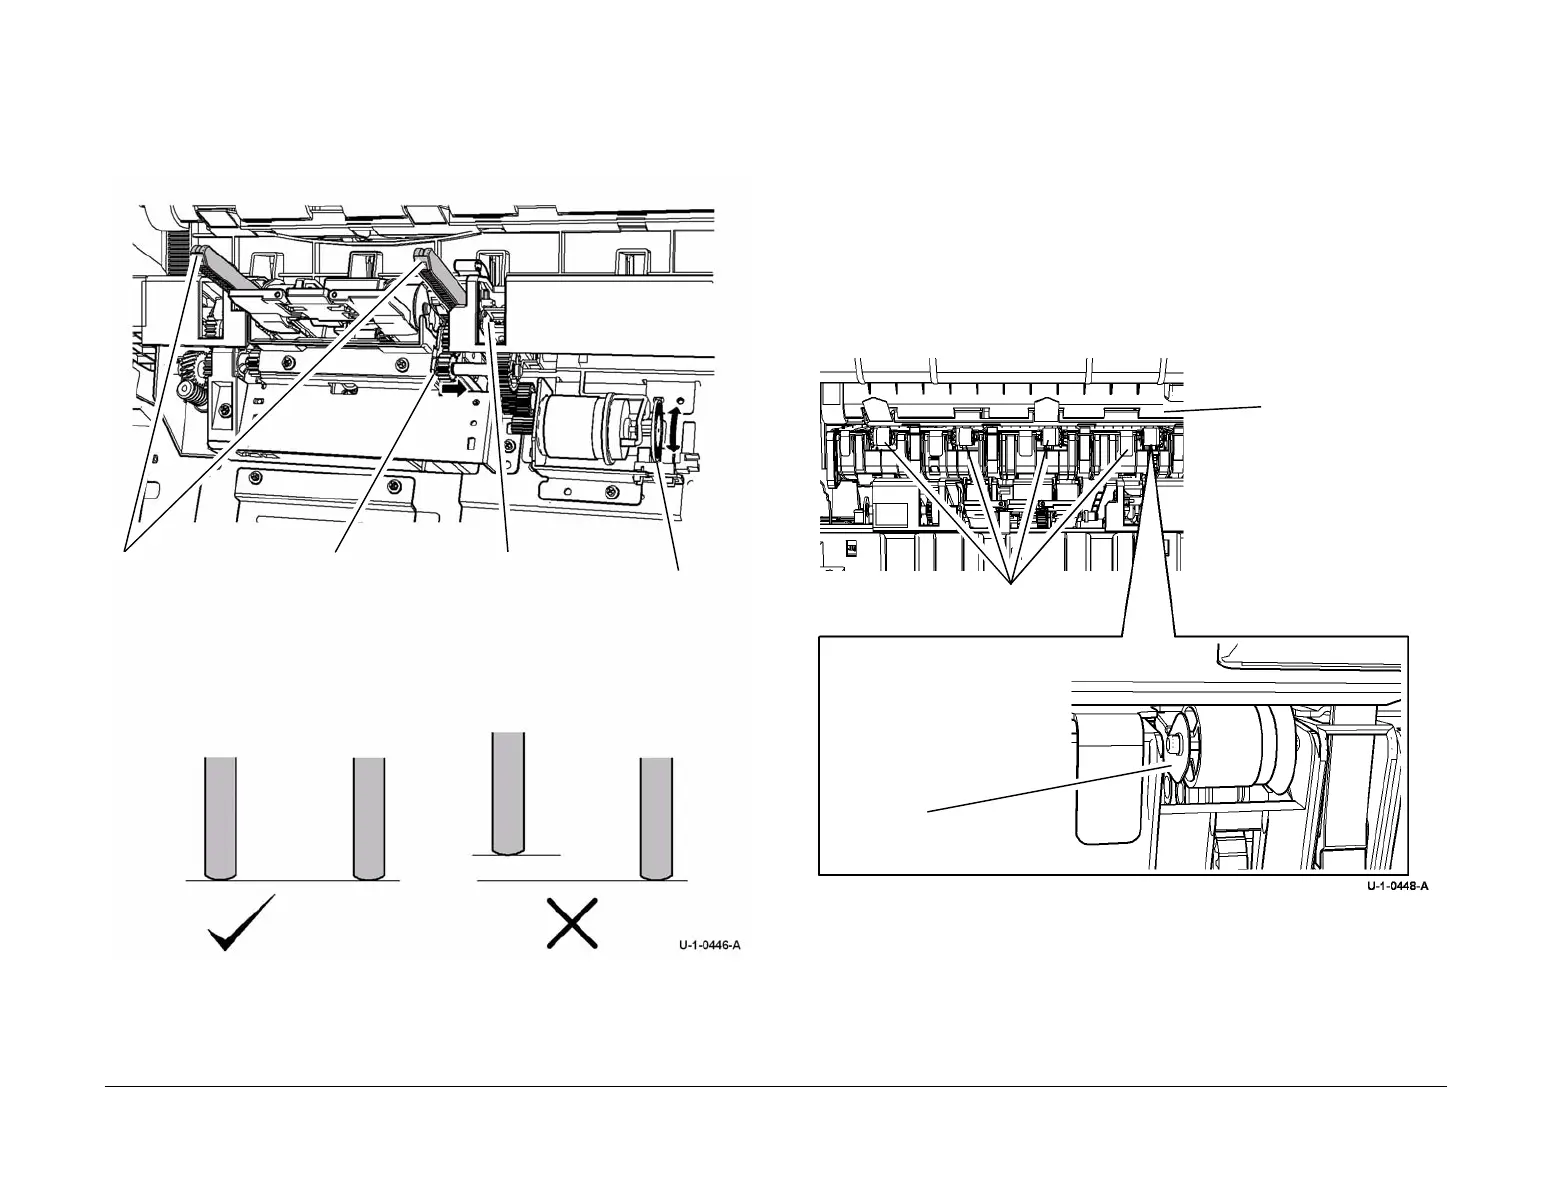
NOTE: Set the front and rear support fingers so that their ends are aligned when extended.
See Figure 2.
With the pressing plate installed, set the front and rear support finger alignment, Figure 2. If the
fingers are not aligned, the compiler output will be uneven and cause exit jams.
Figure 2 Support Finger End Alignment
REP 12.10-171 Stacker Idler Rolls
Parts List on PL 12.115.
Removal
WARNING
Take care during this procedure. Sharp edges may be present that can cause injury.
WARNING
Switch off the electricity to the machine. Refer to GP 14. Disconnect the power cord
from the customer supply while performing tasks that do not need electricity. Electricity
can cause death or injury. Moving parts can cause injury.
1. Lift the top tray
2. Figure 1. Raise the paper pusher and remove the four stacker idler rolls.
Figure 1 Paper pusher and idler rolls.
1
Remove the rear
pressing plate finger.
3
Rotate the encoder wheel
until the finger ends align.
2
Remove the clip and
disengage the gear.
Encoder
Wheel
CORRECT
INCORRECT
4
Re-engage the gear
and refit the circlip.
5
Replace the rear
pressing plate finger.
1
Raise the paper
pusher.
Idler rolls
2
Ease spring brackets
outwards.
3
Remove the
roll.
 Loading...


