February 2013
4-311
ColorQube® 9303 Family
REP 83.2, REP 83.3
Repairs/Adjustments
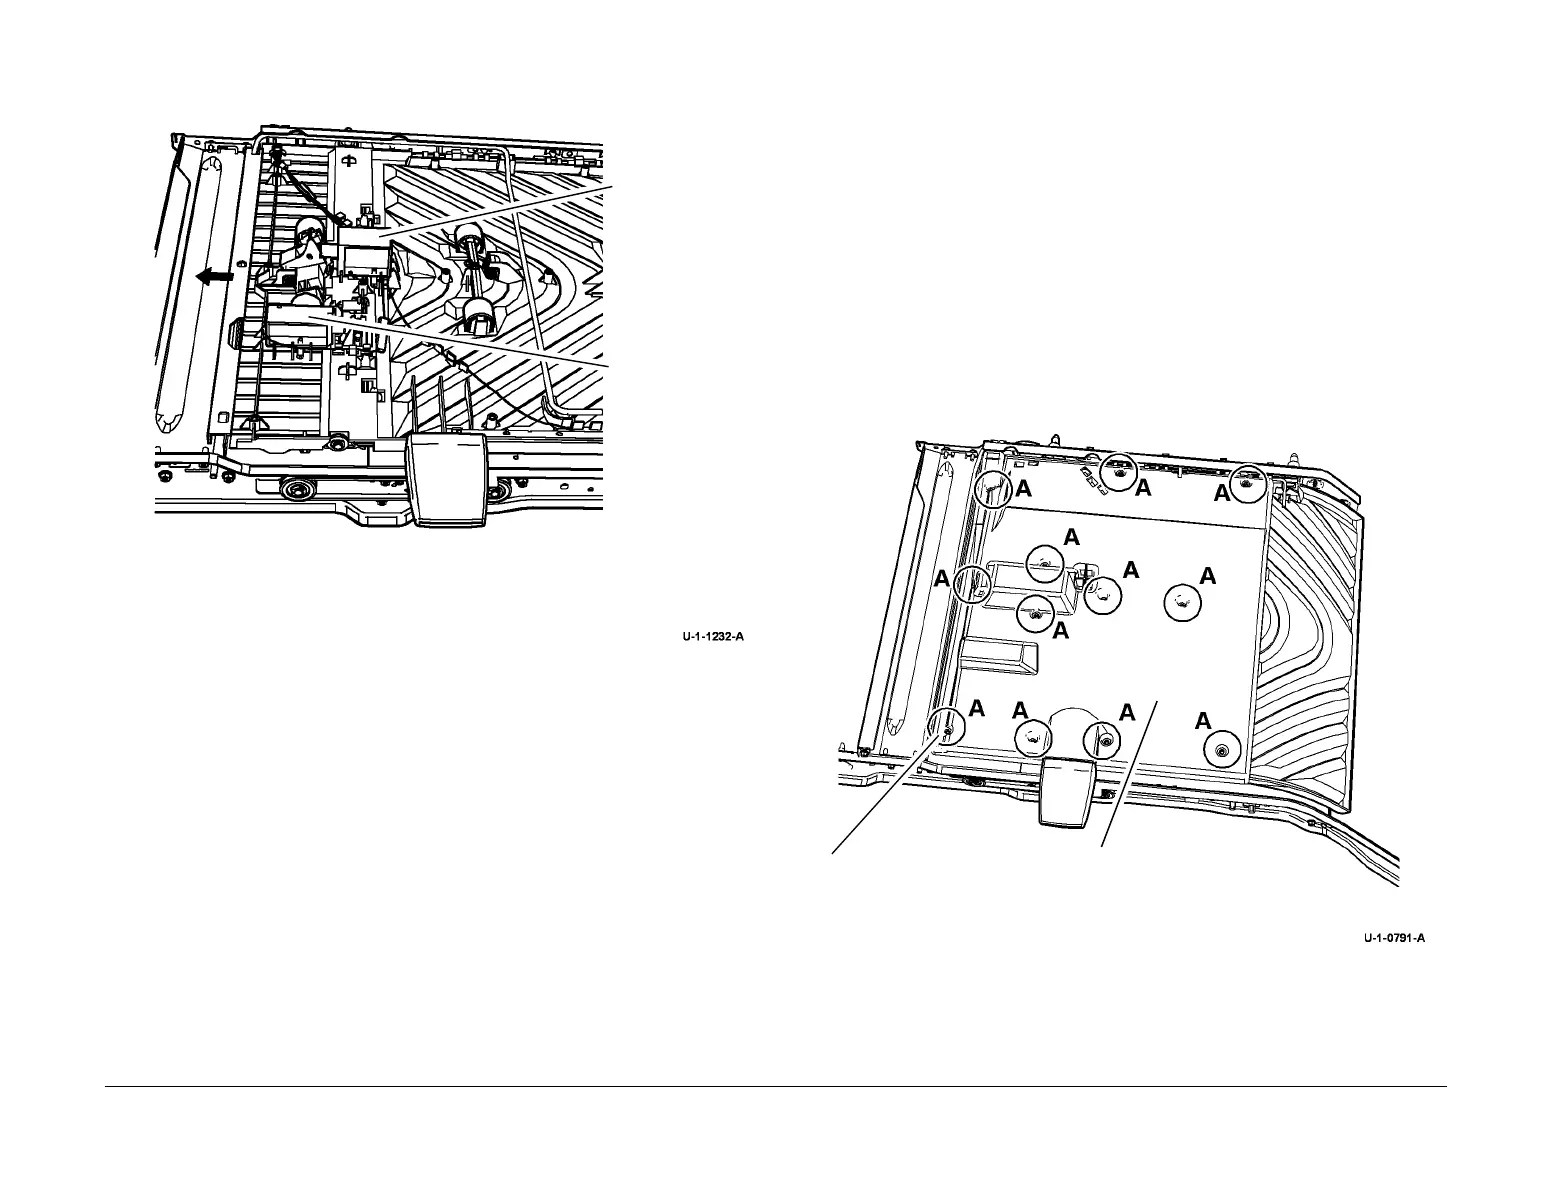
4. Remove the nip C solenoid and HPP diverter solenoid, Figure 3.
Figure 3 Solenoid removal
Replacement
1. The replacement is the reverse of the removal procedure.
2. When replacing the top cover, place the assembly on a flat surface i.e. a desk with the
curled portion hanging off the desk.
3. Hold the top cover down in the correct position the entire time the screws are being
installed.
4. Install and tighten down the screws in each corner first, then install and tighten the
remaining screws.
5. Perform dC625 Registration / Preheat Calibration.
REP 83.3 Duplex Sensor (17)
Parts List on PL 82.15
Removal
WARNING
Switch off the electricity to the machine. Refer to GP 14. Disconnect the power cord
from the customer supply while performing tasks that do not need electricity. Electricity
can cause death or injury. Moving parts can cause injury.
WARNING
Take care during this procedure. Sharp edges may be present that can cause injury.
WARNING
Take care during this procedure. Motors will become hot during normal operation.
1. Remove the horizontal paper path, REP 83.1.
2. Prepare to remove the duplex sensor (17), Figure 1,
Figure 1 Preparation
1
Nip C solenoid
2
HPP diverter sole
noid
1
Remove screws marked A.
2
Remove the cover.

 Loading...


